
This week, I was able to move upstairs and begin the To-Do's up there. By the time the end of the weekend came, I had walls in, trim on, lighting fixtures installed and all of the wiring nearly completed!

I began with the stairwell wall that separates the bedroom. Early on in my dry fits I had decided that I did not want a door here. It seemed like it would just make the stairwell feel crowded. Instead, I cut the wall back to create an open hallway from the stairwell to the bedroom.


I did not want a lot of dead space, either. It's always hard to know what to do with it, nothing ever fits because it's so cramped and it just leaves me wanting. So, where the back of the stairwell and the angled roof met, I made a knee wall that would bring the wall forward.


A fringe benefit to the knee wall was that it would give the viewer the notion that there was an attic crawl space there. Storage is at a premium, even in dollhouses, so I ran with the idea. I created a faux access door and while it actually serves no purpose, it is fun to imagine that it does.


For the actual stairwell, I wanted it to have an open sky ceiling and the sensation of walking up through a garden. This would give the tight space a much roomier impression. To add to the garden feeling, I decided to make picket fence wainscoting. I made the fence posts 3-1/2" tall, then alternating pickets at 3-1/4" and 3". I rounded off the corners of the 1/16" x 1/4" pickets to embrace the traditional picket look.
I finished this section of wall before I installed it, as reaching in to the stairwell was a tight squeeze! There are more photos below of the finished picket fence with it's cross braces added.

Also, before I could install the stairwell wall, I remembered that I needed to tidy up the wiring. This looks dangerous!


On a side note, Betsy suggested the name Roxanne for the lovely lady in leopard (far left). I think it fits perfectly for her personality! I have also begun to imagine a home for her. Perhaps she will be the perfect candidate for the Glencroft Treehouse? But I know Rose (far right), the fun loving owner of Rosie Lee Cottage (a.k.a. the Storybook Cottage), would appreciate her bedroom and living room being finished before starting on another new project. It's so close to being done, after all!

With the wall installed, I could hang the stairwell's pendant light and center it in the space. It matches the island lights on the first floor.
 |
| Notice all the pickets and cross braces have been added. |
I also installed the edge trim on the end of the wall.


It's always a good idea to check how the occupants will fit in the stairwell, and to see if there is any chance of them hitting their heads on the light fixtures. Though it looks at this camera angle like the fixture is right above Rose's head, it is actually about 2 inches behind her. It passes with flying colors!

In this photo, you can see that the quarter round trim has been installed and blends in with the sky. I am so happy that I was able to mix a paint color that matches the wallpaper so well!
The narrow side strip that borders the left side and back of the stairwell will be the perfect place to add pots of flowers and plants. We'll pretend the fourth wall has loads of windows for plenty of sunlight to pour in.


Later, I was able to install the wall separating the bedroom from the bathroom. There was quite a bit of sanding involved to get it to fit! With the final wall in place it was time to do the rest of the trim work. Those angles on the dormer trim were a challenge, but I really love the warmth of the light oak stain with the cheerful wallpaper.


Here is a peek into the bathroom.

I have often reduced or eliminated the tall thresholds on dollhouse doors, but because I did not know which flooring I would go with in this house, or how thick it would be, I decided to live with them If need be, after the floor is installed, I can add quarter round to the front of each threshold to ease the transition.
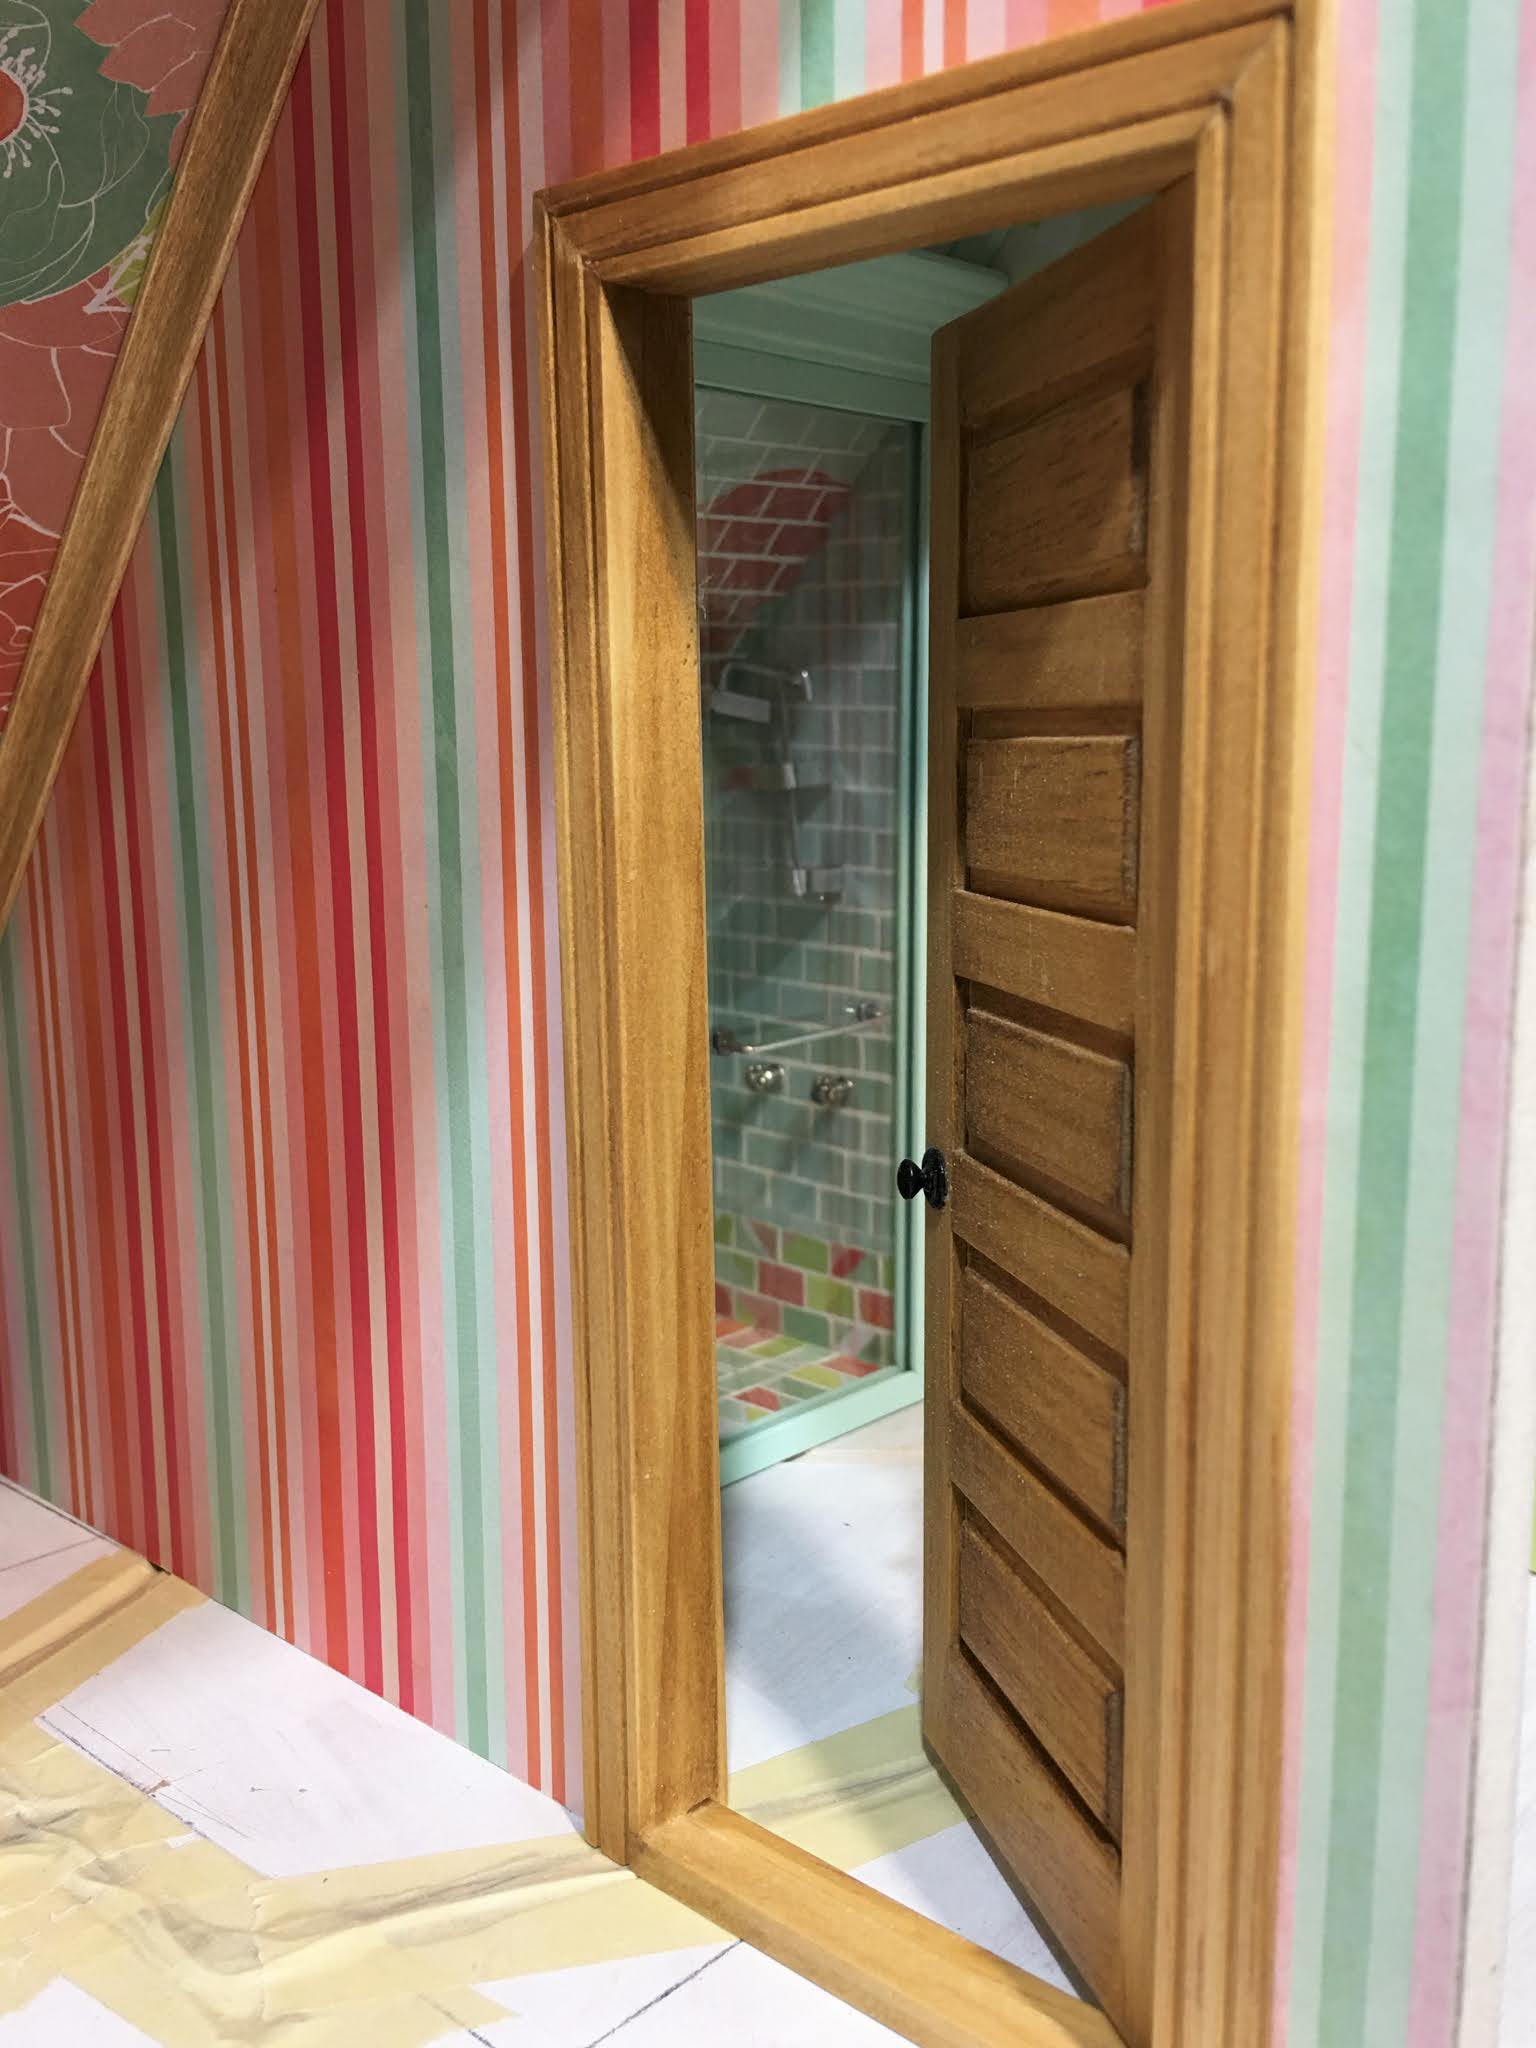

The toilet will abut the shower, then the vanity will sit under the sconces. I will have to come up with a nice mirror for Kairi, and install some towel bars and hooks. Form AND Function, I always say!

Hopefully, with the LED "can" light in the ceiling and the two sconces, she'll have plenty of light to see with. The sconces in this room are sold as Heidi Ott and match the bedroom's fixture with their tropical leaf design. A perfect style to have in a home by the beach!


And I had just taken a moment to congratulate myself on all my accomplishments for the week when I remembered that there was still trim work to be done on the first floor! Yikes! Luckily, it wasn't anything complicated. Just some stained crown molding for the great room...


And some painted quarter round for the powder room...

And then, after feeling good about the progress, my thoughts turned to how to conceal the wiring and make it seamlessly function. We'll save that for next week's post, and I may even try to design and print some utility boxes with the 3D printer. So much fun yet to enjoy!
I hope you're enjoying this project with me, and finding inspiration and motivation toward your own mini dreams! Have a lovely weekend, everyone!
xo xo,
Jodi
P.S. - If you are making minis and sharing your creativity with the community, then you are a worker of light. If you are letting folks know you see and appreciate them, you are just as essential. I thank you all from the bottom of my heart! In many significant and innumerable ways, you are making the world a better and more hopeful place. Let those lights shine!💗
That's fine! I like your lamps
ReplyDeleteThanks Britt!
DeleteThank you so much for sharing your miniature journey. It's been a treat to follow your progress. Soooo much knowledge shared and eye candy.
ReplyDeleteThanks SJ! I'm so glad you're coming along!
DeleteThis is so much fun to watch one inspiration follow another. I love the little surprises like the wallpaper trimmed around the flowers in the stairwell and then the picket fence to contain them. The little door to access “attic space” is so cute. And then the main topic of this entry is light, which perfectly allows the visitors to see all the extra detail trim you have so carefully added. I totally agree with your p.s. about the light that bloggers and blog viewers add.
ReplyDeleteThanks Sherrill! It is so much fun to let the creativity free with this project, but even better to share and to hope it lights the followers on fire, too! The positivity and the process are so good for all of our souls!
DeleteWhy do I hear Debbie Boone going through my head right now? It must be because you truly do light up our lives, Jodi. This project keeps me smiling all day. It is such a joyful project and your ideas are all so original and beautiful. Thank you so much for sharing this joy with us all. Big hugs! - Marilyn D.
ReplyDeleteHa Ha! Thanks Marilyn! I remember that song! I was at just the right age as a little girl to sing into my hair brush and belt it out! :O)
DeleteThis has been such a treat to work on and I am glad you are enjoying it, too!
That access door, what a brilliant idea. I love the colours of the wallpaper, and the picket fence does give a lovely feeling of being in a garden. And as for the bathroom, yes, I would have a smile on my face walking in there. Kairi must be so excited watching the progress of her new home :-)
ReplyDeleteThanks Polly! I don't know if I'd ever be brave enough to do something like this in my real life house, but it sure is fun to go for it in this mini one! Glad you like the free creativity, too!
DeleteUna maravilla Jodi, tu casita está llena de color y una combinación de colores que la hace única ,gracias por compartirlo . Tu eres una persona trabajadora de la luz ,tus entradas son fantásticas. Feliz fin de semana, besos
ReplyDelete¡Gracias Rosa Maria! ¡Me alegra que te gusten los colores y que también te hagan feliz!
DeleteI'm always inspired to get to work after a session with you. Love the picket fence--who'd think to do that? And, I love my blogging community because everyone is so cheerful, positive, supportive, and happy. Anxious to see what you do with the floors. I do like the idea of not making them permanent. Neither are mine in the Bellingham.
ReplyDeleteThanks Ann! It makes me happy to think of you working on all of your amazing projects and taking a little of me along with you! Our community is singular, and for some, it's the only bright spot in an ever challenging world. I am so blessed to be a part of that and I know you feel the same!
DeleteThis would have to be the ultimate Happy House, Jodi! The picket fence stairwell is just a strike of genius and the knee wall and storage space is such a clever use of a useless space - even if it is just make believe.
ReplyDeleteThanks for sprinkling some sunshine and happiness into this rainy day.
Anna X
Thanks Anna! I feel that way, too! It's so much fun when we can turn our determents into attributes! I hope the sun will make an appearance soon and remind you that spring is just around the corner! 💗
DeleteDear Jodi, this is such a fun project and it is looking so Fantastic!!! I really love the stairwell "open sky" idea with the garden fence! Brilliant! (In my old house I painted a mural in the stairwell... making that "end wall" visually disappear by making it a long view over trees to a river valley in the distance... it worked!) And the trim and lighting you have added are the perfect complements in every case! I too, love the warm oak with the floral paper... it works so much better than trying to coordinate a single color in that room! (That "pretend" kneewall storage door needs a mini-mini "fairy door" tucked in next to it.... just to keep people guessing!) When you bring the ladies in to visit, I am astonished at how large the building really is! Somehow it's "profile" makes it seem smaller. As for flooring options.... some old New England building used a "splattered" painted style... multi colored "polka-dots" on a solid painted ground. (Just if you are wanting to add more painted color under foot but want to stay with wood.) I am sure you will surprise us with a fantastic choice... and I can't wait to see it! Keep up the Wonderful work! (And don't forget to let us know how the Birthday -kitchen reveal goes...!):):):)
ReplyDeleteThanks Betsy! I would have loved to have taken a tour of the old house, and to see the new one in person, too! The stairwell sounds dreamy! The things you imagine and then make real amaze and inspire me!
DeleteI love the fairy door idea and it is going to happen! Thank you!
The size really does throw me, too! I can't tell you how excited I am to keep measuring and subsequently believe that I can actually fit all the necessities in here! And yet still I doubt the space! The girls really help to ease my mind!
I love the spattered floor idea for the upstairs and will look up some examples! I have come up with a never before tried idea for the flooring in the great room, and I am so excited to see if it will work! Hopefully, I'll have something to share, soon!
Saturday is the day for Tasha's party and I am busting with excitement about finally giving her the kitchen! I think the first post for August will be all about it, and I'm crossing my fingers it goes well!!!
Siempre encuentras solución ante cualquier adversidad que se presente.
ReplyDeleteMe encanta como lo resuelves, para hacer que tus trabajos queden fantásticos !!!
¡Gracias Eloisa! Siempre es muy emocionante encontrar una solución a estos acertijos, ¡especialmente cuando puedes hacer que parezca intencionado!
DeleteArghh! I'm so late commenting!
ReplyDeleteBut I love how the lights look. They're so pretty and everything just works together so well.
Thanks Sheila! I seem to be so late to everything this summer, too! Is it me or is time speeding up??? I am glad you like the progress and I hope you find lots of mini time for yourself, too!
DeleteHi Jodi,
ReplyDeleteThe fence with the open sky and flowers for the landing is a great design idea! I love it. The colourful wallpapers and bathroom are each lovely to see. The vibrant and bold colours make it such a fun project to follow.
Huibrecht
Thanks Huibrecht! It feels so great to be fulfilling another old dream! I know that you know how it feels! I am excited for you and your partner to get settled into the new place so you can begin working toward yours again soon!
Delete¡Fantástica iluminación!
ReplyDelete¡Gracias Isabel! ¡Siento que finalmente estoy entendiendo la mecánica de ellos y por eso mis exploraciones van más allá! ¡Es maravilloso!
DeleteI really like the picket fence at the staircase! Unusual but just right for this colourful house.
ReplyDeleteThanks Marijke! You can easily tell an artist lives here! There are no "shoulds", just followed whims! :O)
DeleteMy, I'm once more late this time to comment but luckily not too late to say from the bottom of my heart: Oh, what a wonderful post! ;O) And what a wonderful project... and so much amazing progress. You've been achieving so much in just a few days... makes me a bit jealous as miniatures have come to a halt for me at the moment. But no reason to worry about me, it's just because of the weather. We've had high temperatures meaning it was too hot inside and outdoors too risky... in our land between two oceans there's always wind. And inbetween of sweating we had to deal with hard rain... *sigh* Luckily not as terrible as in our catastrophe areas in the West but still... our street turned into a river in a wink of an eye several times and one day we even had two cellar rooms flooded. At some point I stopped counting the buckets I had to carry upstairs. :O(
ReplyDeleteBut the more I enjoy to see your happy and cheerful house develop - Kairi must be the happiest girl in town. I love how everything is coming together and as always it's fascinating to see the difference the trim makes *smile*. And with the lights on it's for sure a "WOW!!!!!!"
And as always there are additions which make your projects always so special and realistic. The attic door is a brilliant idea... one can never have too much storage space. But my favourite is the picket fence - what a brilliant idea! It looks beautiful. Btw I like Betsy's suggestion of a fairy door, this would be such a cute idea.
As always I'm looking forward to see more progress and new wonders from you. But this time I'm also anticipating to hear how Tasha reacted when seeing her dream kitchen. Btw - don't forget the tissue box! ;O)
Hugs
Birgit
Oh Birgit! The moment I heard about the flooding I ran to my computer and boy was I relieved when I saw that Wankendorf was far to the north, above the worst of the trouble! But I am shaken to hear that you did not escape the calamity! Oh I hope there isn't much damage to your home and property! I know first hand how disastrous floods can be. We were in the 100 year floods in central California where highways looked like raging rivers. Our home was up on a hill but Russ mom's was not. here basement flooded, and we were in a bucked brigade just removing mud for days and days to make paths to her home and property. It was horrendous! I hope you and mom have a lot of help and that the worst is over!
DeleteIt feels terrible to be talking about minis now, but I am happy that the post took you away from the troubles for a few moments anyway! I am sending prayers that life gets back on an even keel for you and that the worst you have to deal with is a little run away glue! Big hugs!!!
One more beautiful home, a young and cheerful one perfect for a young lady. I'm glad you plan more homes for her friends. It was lovely to follow your project, dear Jodi. Fantastic, out of the box work! Cheers!
ReplyDeleteHugs, Drora
Thanks so much, Drora! 💗
DeleteA lovely house. The lamps are beautiful and well arranged lamps.
ReplyDeleteThanks Faby! 💗
DeleteAh yes, that moment when the lights go on! Your house looks stunning.
ReplyDeleteThanks Megan! The thrill is never gone!
Delete