Search My Blog!

Use the Search box below to find keywords that you're looking for quickly and easily!

Search Feature

Thursday, August 5, 2021

Happy Birthday Natasha!

After nearly a year of planning and working in secret, last Saturday was finally the day for Natasha's 34th birthday party and the unveiling of her kitchen room box!  


When she arrived at the house she was greeted with this gigantic gift wrapped box. I was so happy to have found actual blue chevron wrapping paper! I made it a lift off gift box with the room box and two wrapped accessory boxes hidden beneath. She had to keep looking at it for hours until it was time to open gifts!


When I asked Tasha a few weeks ago what kind of birthday dinner she wanted, of course she said she wanted to cook! She loves to cook and to explore cuisines from all over the world. When her and Brent went to the Philippines after college graduation, she even tried Balut!

Luckily, what she wanted to cook together this time was a little less exotic, though very spicy! We made Sheet Pan Pork Chops with Tapenade from Matty Matheson's Homestyle Cookery cookbook. It was so delicious, and for the folks in the family that like things hot - scrumptious!

Sheet Pan Pork Chops and Veggies, Tapenade and bread for mouth cooling.

Lex, Ande, Tasha (chopping herbs) and Brent.

Last summer I found a neat charcuterie set for Tasha. I asked her to bring it so that we could set up hors d'oeuvres. Little did she know that soon, she would be opening a perfect 1/12th scale charcuterie board made by Erzsebet Bodzas of Hungarian Miniatures!


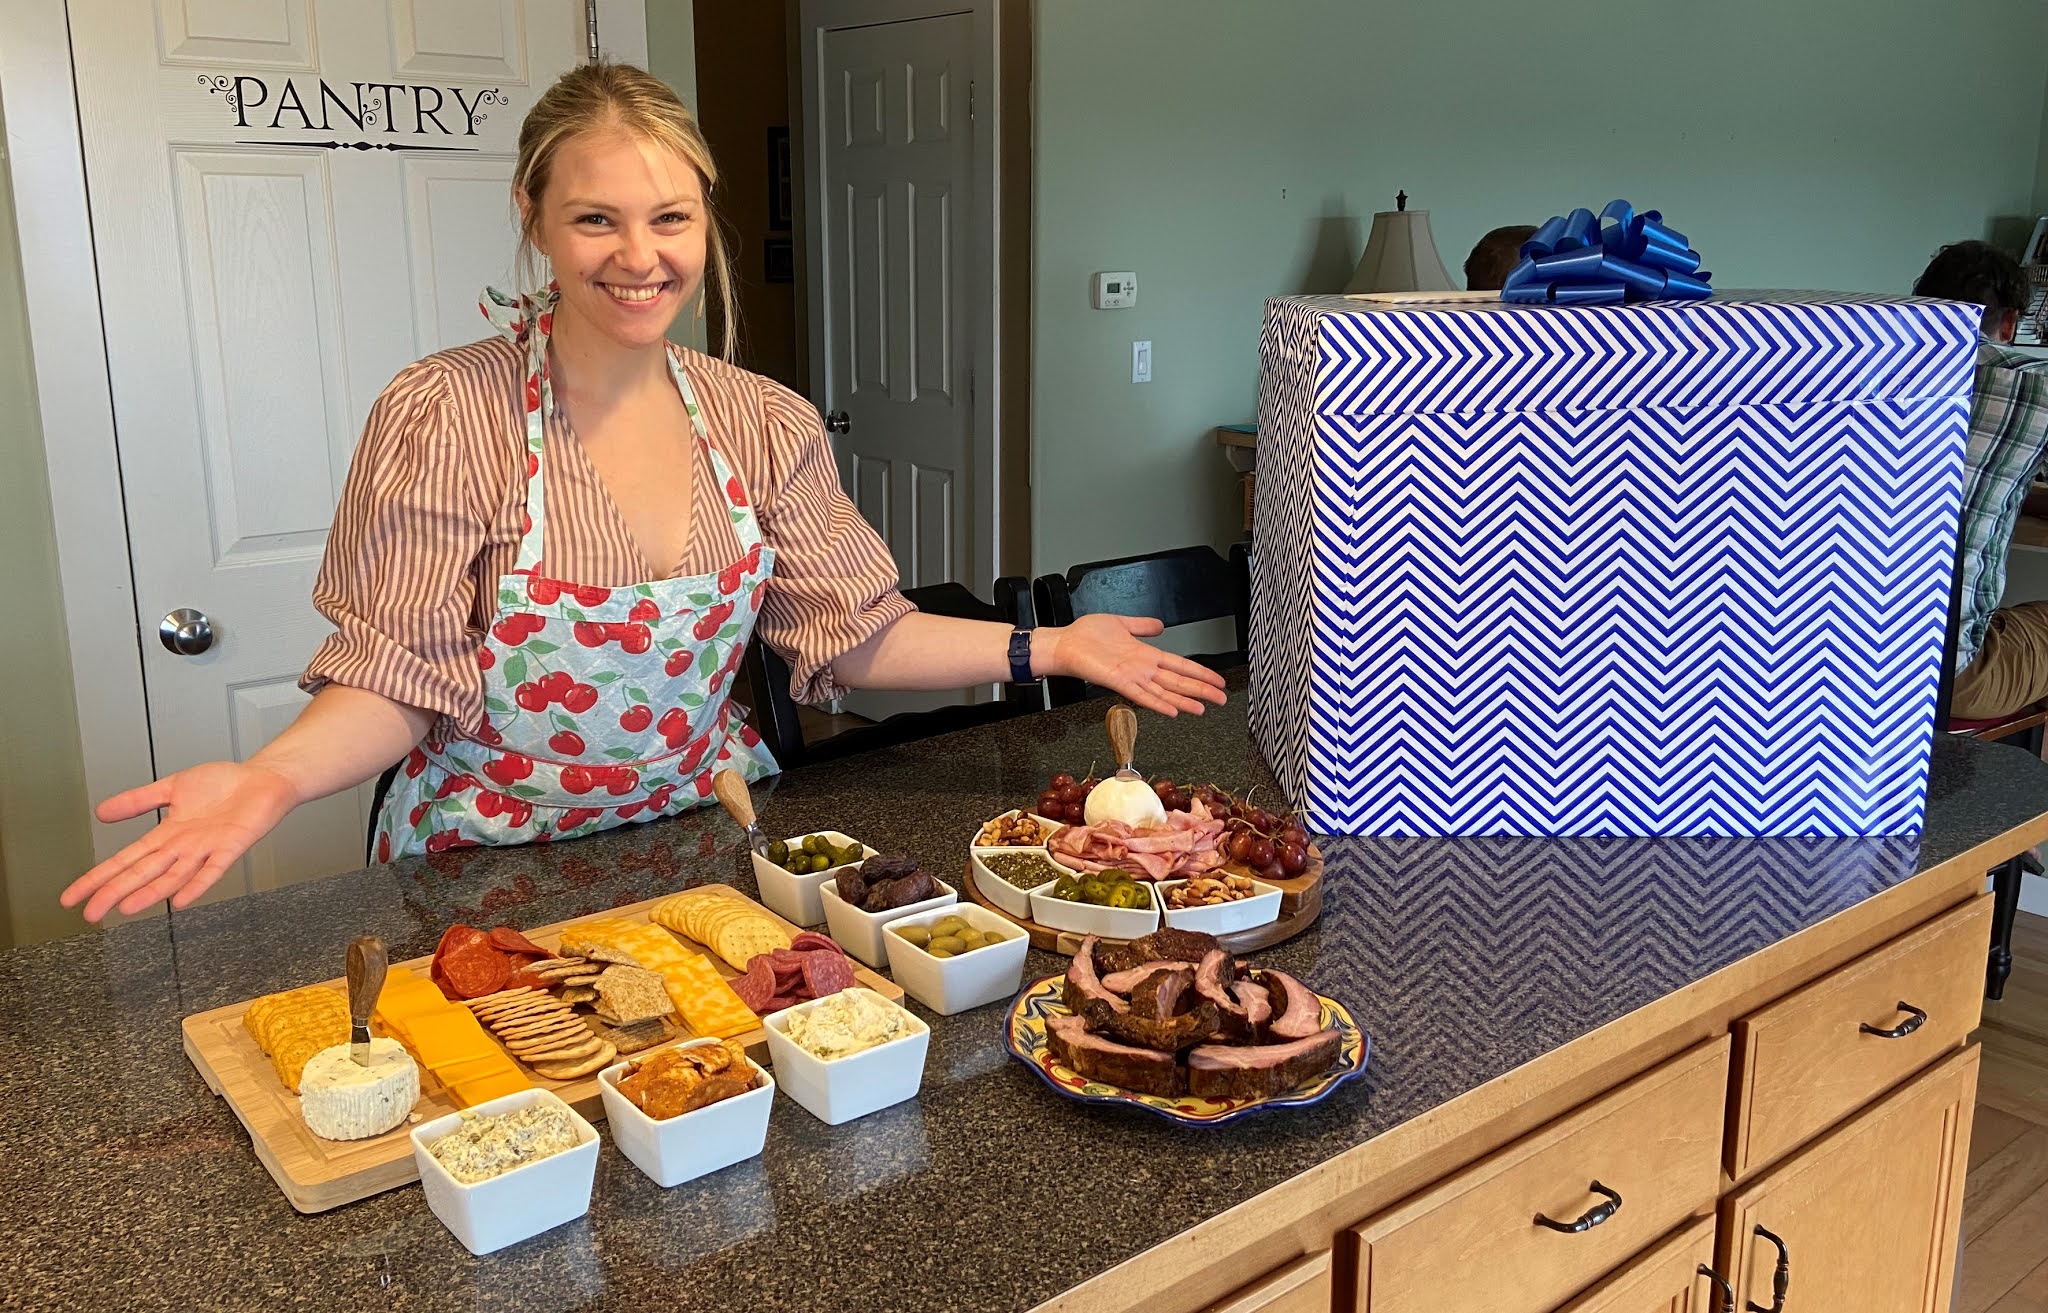
We were all having such a great time together, by the time we got around to opening gifts it was VERY LATE! I had only set up a replica bottle of Tasha and Brent's homemade wine, two real blown glass wine glasses and a corkscrew in the kitchen. I wanted Tasha to see the kitchen for the first time without my decorating influence, if possible. She opened the big box and the two smaller gift boxes containing everything a kitchen needs for a real good start. There were no tears, Birgit, just a lot of excitement and a good bit of overwhelm!!! With Brent having to be up early for work the next morning, we agreed to have her come back to play the next day. 


Looking through the sliding "Glass" front wall.

Before she arrived the next morning, I had set up the charcuterie and a couple other small things. I gave her a better tour and some ideas about how to arrange the items on the open shelves and in the opening door/drawers of the island. She was still a bit overwhelmed about where to begin!


I suppose to a new miniaturist, it really is a lot to take in! She was excited that I included the octopus cornices and the art work!

Tons of artisan vegetables and fun, mass produced accessories.

Artisan fruits. She loved the split avocado, fuzzy coconut, cut lime and the peeled oranges!

Bags packed full of kitchen essentials!

Remember Phyl the orchid? She loved him!

She was fascinated by the tiny herbs!

She loved the octopus accessories!

Extra aprons are a must have!

Cookbooks in a kitchen? YES!

3D printed paper towel holders in a variety of colors.

A few essentials and décor items to add a splash of color.

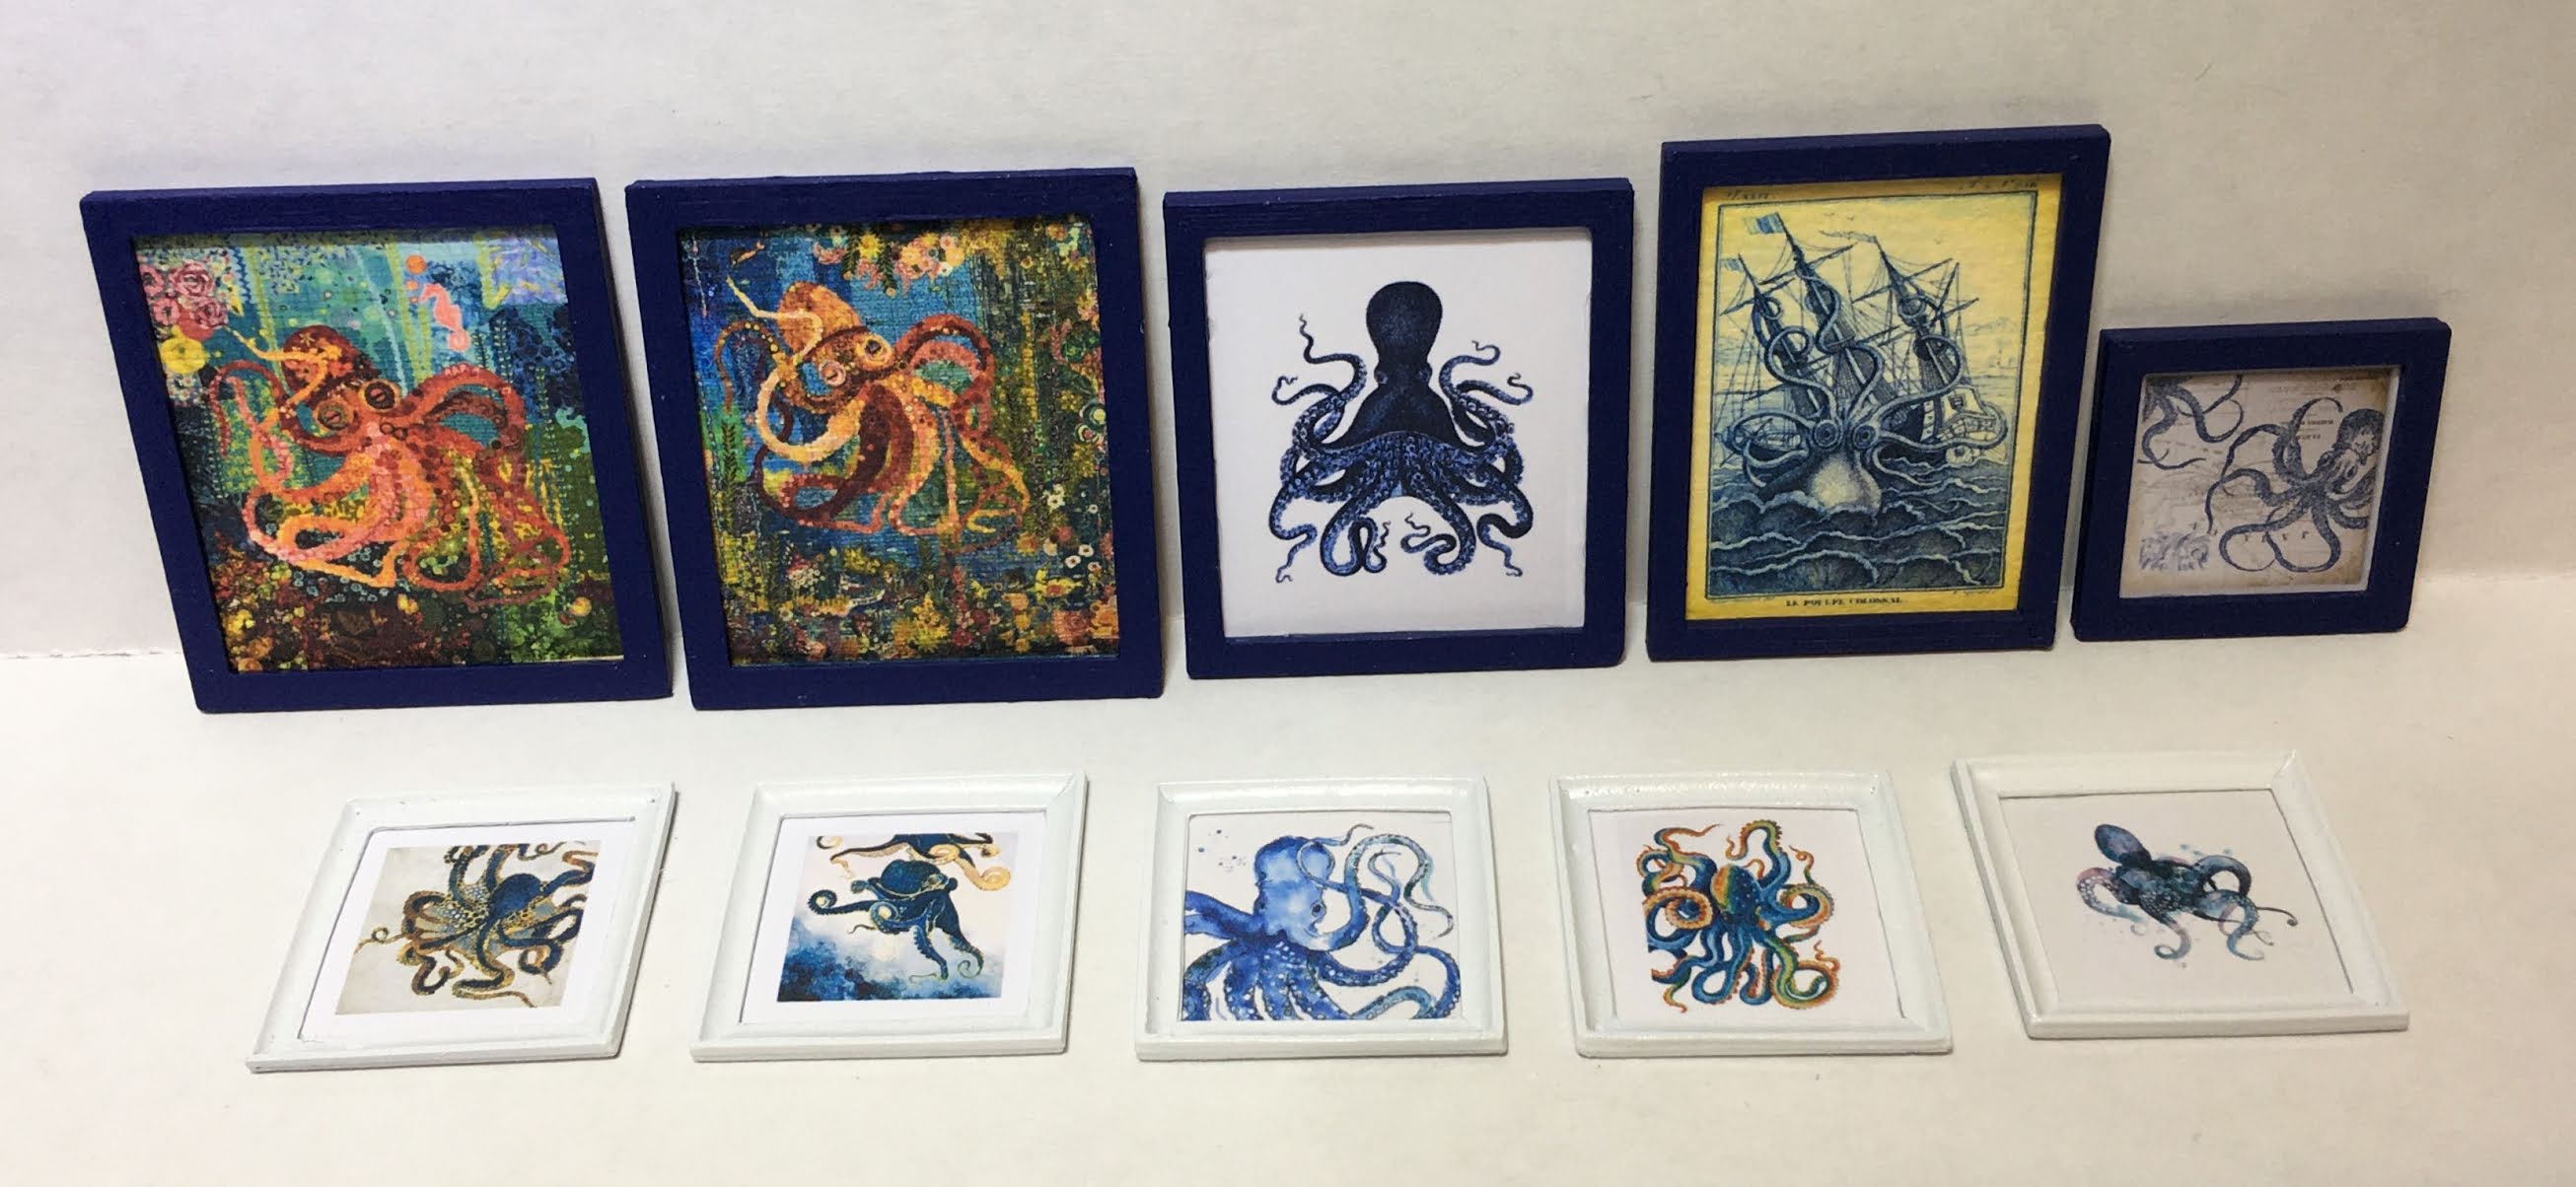
Framed octopus art in various sizes.


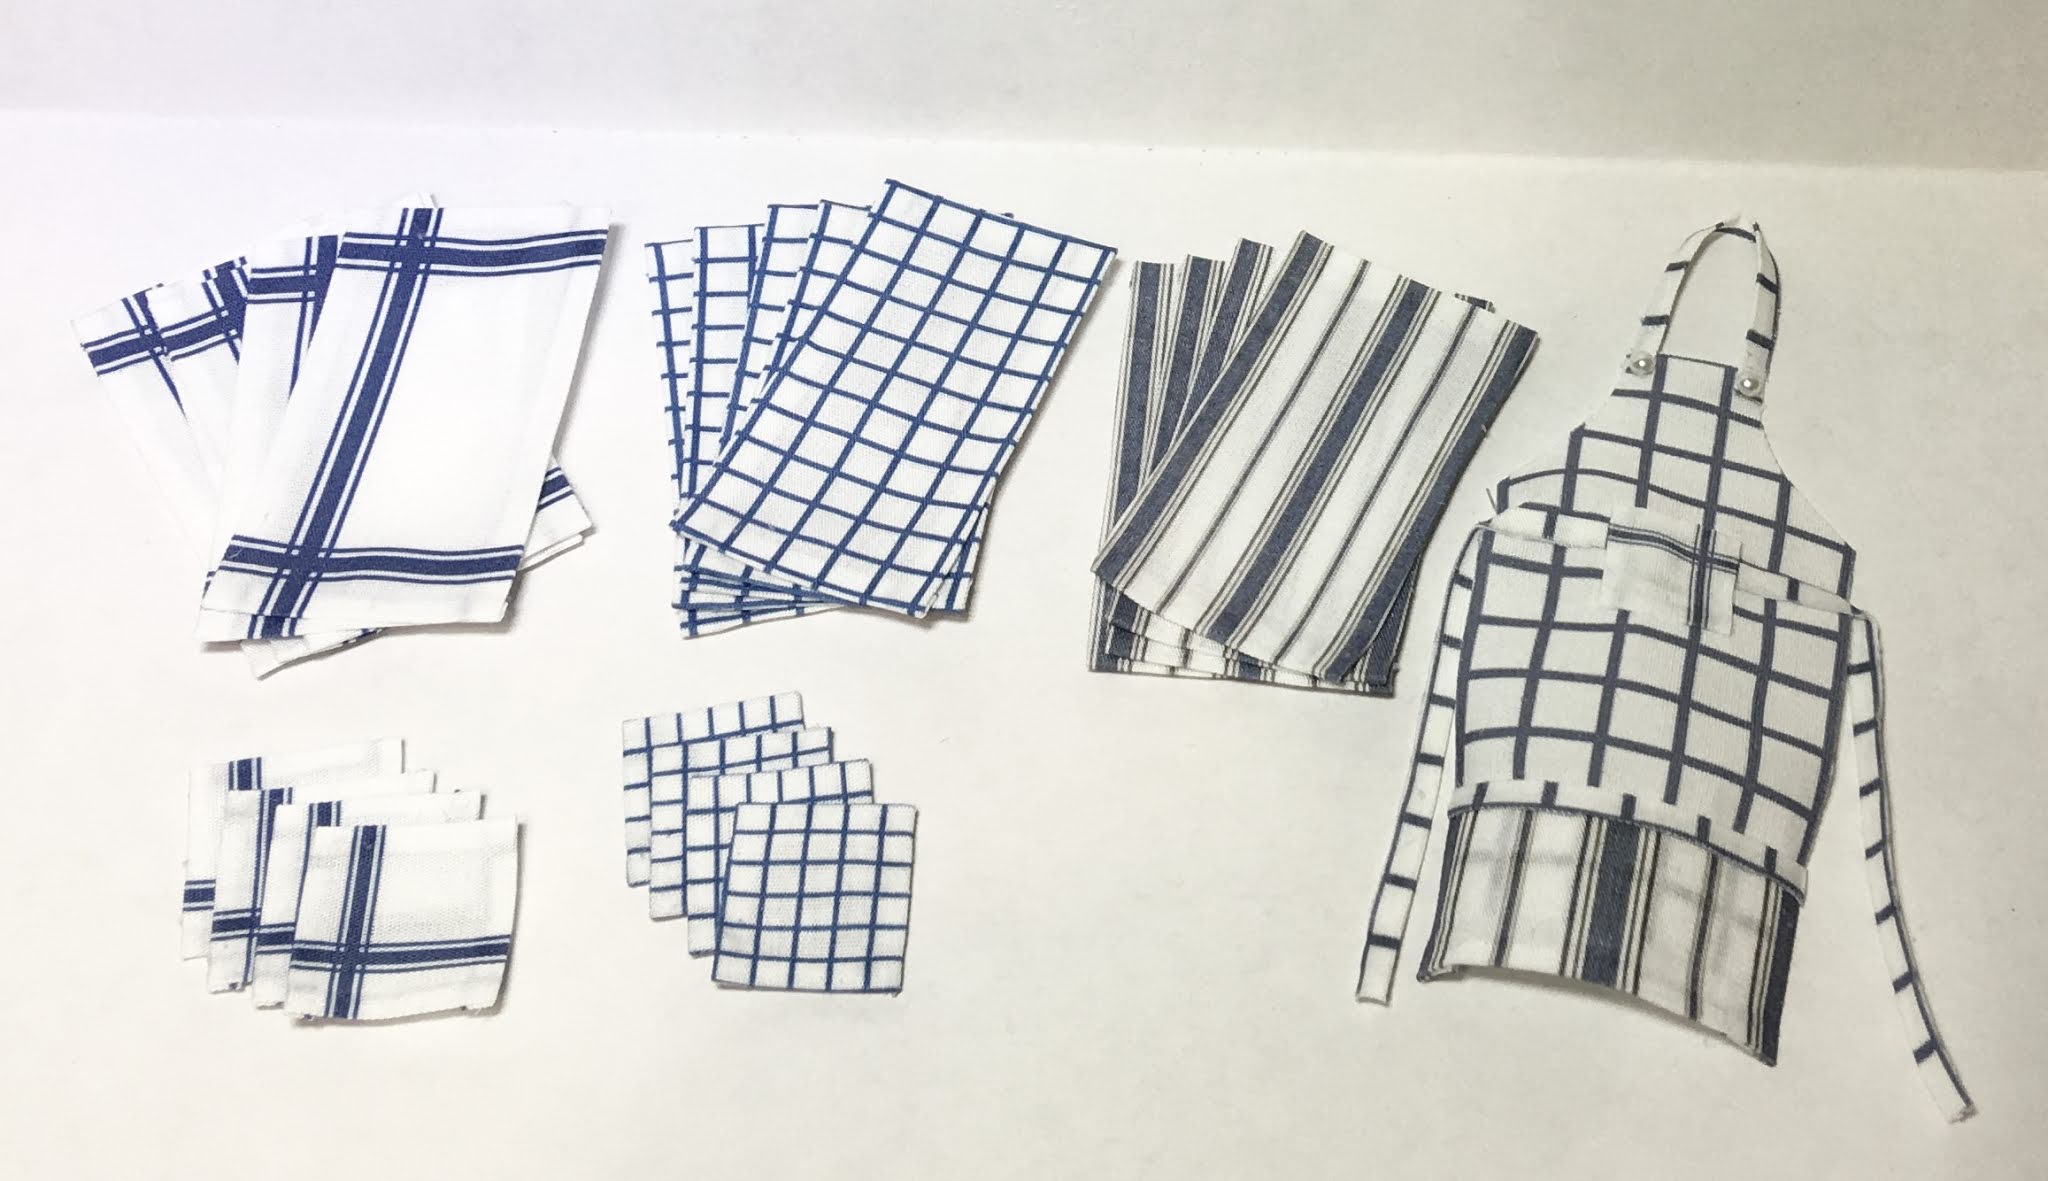
Tasha loved the vintage linen patterns.

I introduced her to Roxanne and showed her what it would feel like to be a 5-1/2" person in the kitchen. The visual was really helpful!


I shared the blog links so that she could go back and look at the building and planning process from the start. Since Tasha had to drive all the way home with it, we didn't want to get it all set up and risk breaking anything. That means I'll get to go to Tasha's house soon for a mini play date! I can show her how to use the Museum Wax. long tweezers and the tricks to placing tiny things. She's got a crazy travel schedule for work the next few weeks, but I'll post update photos with the kitchen all set up when we finally get together.

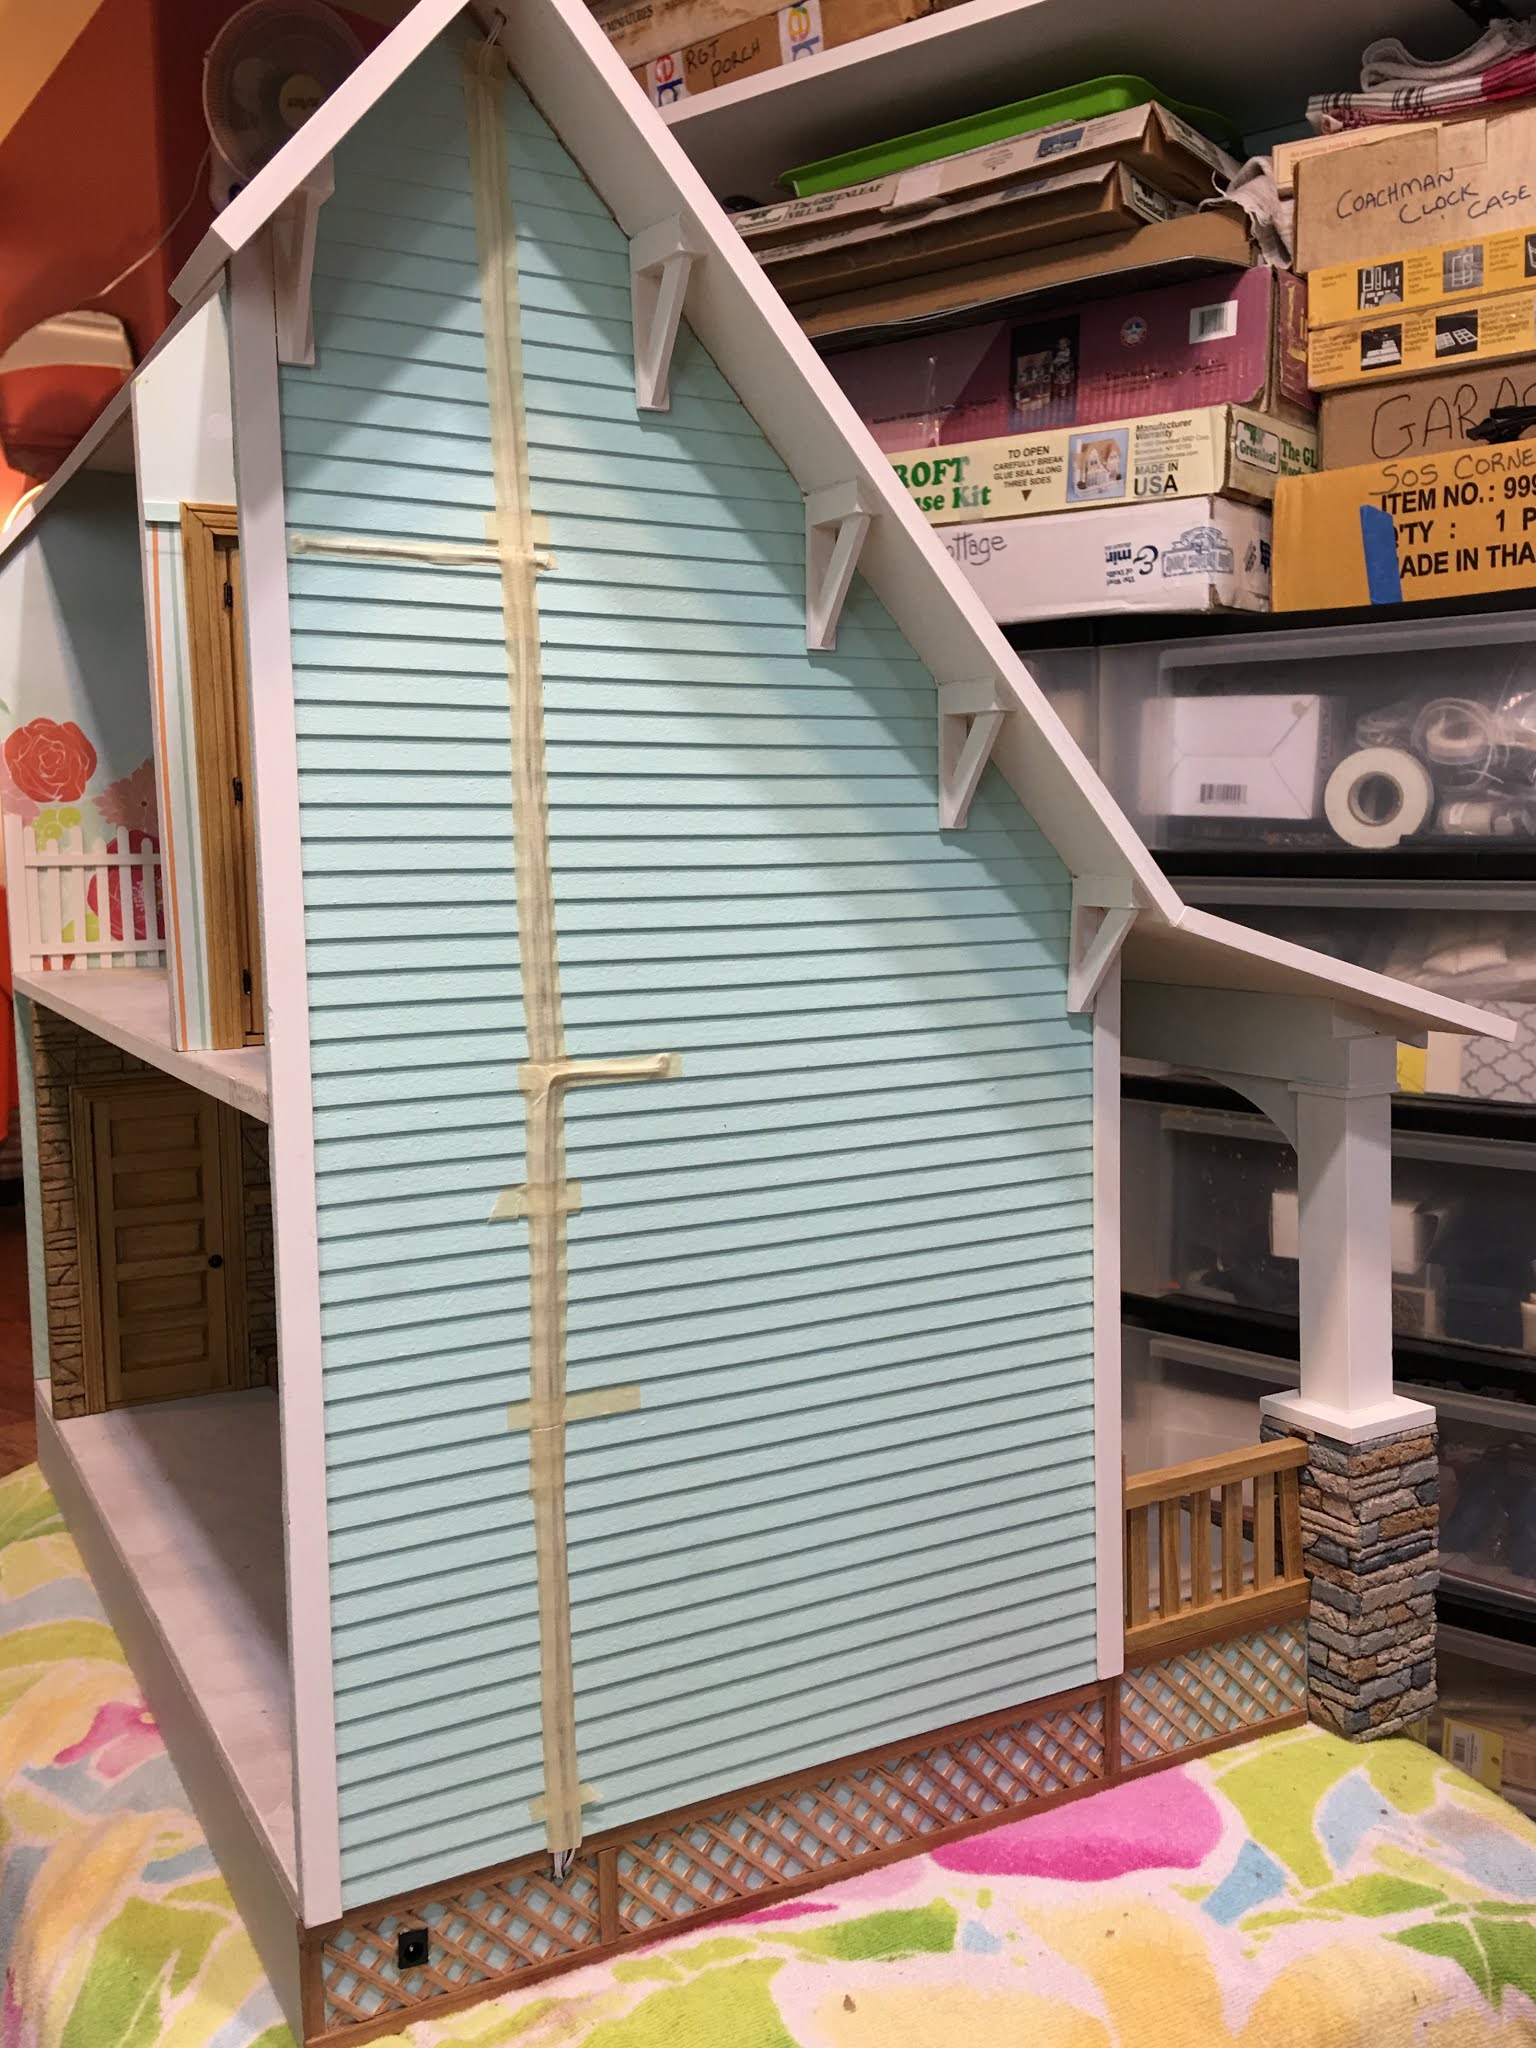
Here is a photo of Natasha's Kitchen in it's new home. It will be displayed in Tasha's home office where she can take stress breaks to play.


I can't believe my baby girl is 34 years old, and that making a dollhouse for her 23 years ago is what ignited this miniatures passion and incredible journey for me! I am so grateful to be able to share this with her once again!


And so grateful to share it all with you! Thank you all for coming along on this mini kitchen journey with me! 

xo xo,

Jodi

Thursday, July 29, 2021

Beachside Bungalow - The Good Ugly

We often pay special attention to the wallpaper, lighting fixtures and furnishings of our dollhouse plans, but by leaving the functionality as an afterthought, we might be missing a lot of fun details. For me, the best dollhouses do a great job of supporting the story: hiding stuff that interferes with the "real" illusion and including everyday mundane things that add to it. The kinds of everyday things that are common to real life houses are what I call The Good Ugly.


Wires can be Bad Ugly, and having lots of lighting means a lot of wiring to run, connect and conceal. So how to hide the wiring? In previous posts on this build I talked about some of the channels I created to conceal the wiring. Here's the rest of the story...

For all of the second floor fixtures and "can" lights, I directed them to exit through the roof. I chiseled out recesses for the LED wiring where they protruded too far above the roof surface. The thin wires are just secured with masking tape, which will then have the roof shingles installed over top.

The wiring runs for the porch lights and second floor ceiling fixtures.

All of the wires for the project run to the left side of the house (if you are looking from the front). The second story ceiling wires bundle together near the left roof apex, then make their way down through the roof and under the eave. The first floor ceiling lights exit the bathroom's left wall at the the floor, then join the second floor's bundle. They all run together to one entry point into the foundation and under the house. Here I have the wires bundled and secured with masking tape.


To conceal the wires, I'm using a long utility box which runs from the roof overhang to the foundation. I constructed the three sided box using  1" wide basswood for the front and 3/8" sides. This is glued to the wall over the wire bundle. I covered it in stucco just to add a bit of texture. Trying to match up the siding would have been a huge time investment with little return. Painted the house body color, it nicely blends in. Presumably, it houses some kind of ducting added at some point to modernize the function of the house. Dollhouse builders will know it's where the wiring is hidden and regular observers are not supposed to see anything out of the ordinary. 

I am leaving the option open to add some cabinet lighting in the kitchen. If I do, I will probably just house it in some type of additional "pipe" that looks in keeping with the utility side of the house.


The wires exit the utility box and feed into the crawl space where they connect to the transformer plug. The transformer plug sits into the foundation so that it is as unobtrusive as possible. Once I am sure I have run all the lights I want, I'll connect the last few wires together with heat shrink tube and secure them for the long haul. The wires are labeled in case I need to track down a problem at any point.

Underside of house/crawl space

Transformer plug


There are a lot of odd looking devices placed on the outside of real life homes. They are essential elements to address the issue of post construction improvements and modernization to our standard of living. We do our best to blend them into the facade and then ignore them. This gives the miniaturist plenty of justification to add odd appendages meant to disguise wiring. 

The utility side of a real life house.

It also provides the opportunity to add some Good Ugly to the project.  Once we hide all of the things we don't want seen, we can think about the not necessarily pretty things we want to add for the sake of realism. Gas and electric meters and a phone/DSL box are always a treat for the mini eyes! After looking at some example photos online, I designed and printed like models with Tinkercad and my 3D printer.


Electrical meter and phone box


Gas meter


Electric meter with cover door, telephone/DSL box, gas meter and roof vents.

 
Printed with black PLA

Sprayed with flat gray paint and then varnish

Tiny labels for the meters...


Once I added some paint and details, I affixed them to the utility side of the house. I think they turned out pretty good, though I wish I'd had a cabuchon instead of having to use Glossy Accents for the electric meter's "glass" bubble cover. I'll remember to order some before my next utility box project!


Glossy Accents applied over a printed label.


I'll add tufts of grass or weeds to the pipe bottoms with the landscape board.


Kairi is just ecstatic to have the services connected. For her, this is real! Just wait until she gets the first bill!


And I couldn't forget to add water access. With just a little green paint marker for the see through green tubing of the hose, and some faux galvanized gray paint on the brass metal spigot and nozzle, this mass produced hose set can look a little more real. I suspect Kairi will want lots of flowers and will need a way to water them.


Now this side of the Beachside Bungalow looks a little more like a real house and a little less like just a dollhouse. And that's Good Ugly!


I hope you have enjoyed this week's progress on the Beachside Bungalow! I'll have to put this project on hold for the week and move my attention to last minute details and touch ups for Natasha's Kitchen. Just a few more days until we celebrate her birthday! I suspect the unveiling will be the subject of my next post.

Until then, I hope all of you are finding time and motivation to make mini wonders of your own!

xo xo,

Jodi

P.S. After I shared the name Betsy had suggested for her, Roxanne was thrilled! She said that name makes her feel like herself. How lovely is that? In fact, she said the name has emboldened her to ask for what she really wanted. She explained that, in spite of how neat a "Glencroft Treehouse" sounded, she would feel much more at home in The Travel Trailer!!! Well, dear friends, that was an unexpected twist! But if it's a trailer the little lady wants, I shall be glad to give it to her! She was so relieved that I understood and assured me that there was no rush. You see, Kairi has invited her to stay in the Bungalow for as long as it takes to build the trailer!  I just love happy endings, and so we celebrated with a new outfit! Isn't she cute?!? She's really embracing the casual beach style!

Roxanne Before and After

And for those that didn't know, Kelly and Chelsea (Barbie Doll) dresses fit Heidi Ott and Zjakazumi Dolls great as tops. You can buy them on eBay from $3 single pieces to $13 for an outfit with accessories. The shoes fit, too. Roxanne's have been made into sandals with a quick Xacto reshaping. You can find pants for around $4.00. No need to shop for expensive couture doll clothing if you don't have the budget for it. If you do, Rock On! There are some amazing mini seamstresses out there!

Kelly shoes before turning them into sandals and bracelets for Roxanne.