Once the foundation was good to go, I was able to get the house pieces into dry fit. This way, I could begin to formulate ideas as to the layout and the things I want to include. The kit comes with a divider wall for the first floor, as well as two that can be used upstairs. This leaves the potential for 5 rooms.
 |
| Kit Box Interior Photo |
My original renderings for the project back in 2016 left the first floor open concept with the kitchen on the left side and separating the living room with a large island. That's about as far is I got back then in terms of layout, but I still like the open concept idea. This time around, though, I decided to flip the arrangement. The kitchen is on the right side, and will be the room you walk into upon entering the front door.
I wanted to create a stairwell with the first floor divider wall. And I wanted to create a more realistic stair opening in the second floor.
 |
| Looking at what will be the front of the house. |
 |
| Notes bringing the stairs forward about 3/4" and increasing the opening 2". |
Some Real Good Toys kits provide floor pieces with wood floors pre-scribed into the MDF. There is also a shiny paper product laminated over the surface to simulate wood grain. I don't particularly think the wood grain looks in scale, so I have opted, like many do with this kit, to use the scribed side as the first floor ceiling, This lends itself nicely to the ship deck/nautical feel.
I got a rough idea of the space that would be left for the kitchen and living room area if I enclosed the stairs this way, and if I could fit an opening for the return. It seemed like it could work.
I had the primer out so decided it was a good time to get all the pieces primed. Following the instructions here, I applied a light coat of primer and then sanded it back until it barely showed any longer.
I spray painted the ceiling piece with several coats of off white after adjusting the stairwell opening per my notes.
The grooves on kits are often overlooked in our rush to make progress. Surprisingly, even a tiny amount of dried paint and primer can have a profound effect on how the kit pieces fit together. Taking some time to sand them smooth and clean now can be very helpful in avoiding problems with tight joints or misalignments later on.
 |
| Before Sanding & Cleaning |
 |
| After Sanding & Cleaning |
Be sure to clean up the ends of the pieces going into the channels, too. Then pre-fit them all again before you get glue anywhere near them. Sliding the piece back and forth in the track also helps to flatten any fuzzy MDF and ensures a perfect fit at glue time.
Once the primer was finished it was time for a second dry fit. This is my opportunity to mark for wallpaper, plan my lighting, audition wall positions and all the things that are easiest to do before anything is permanent.
I made a mock up return to look at the space and see if I liked it. I did! And by taking this step I determined that I would have room for a powder room under the stairs. I have seen one or two Beachside Bungalows with a powder room under the stairs and I love the idea. But because the kit stairs are only 2-1/4" wide, it leaves the power room looking way too dysfunctional and unrealistic, in my humble opinion. I had an idea about how to improve the realism and function, while still using the kit's stairs. But first...
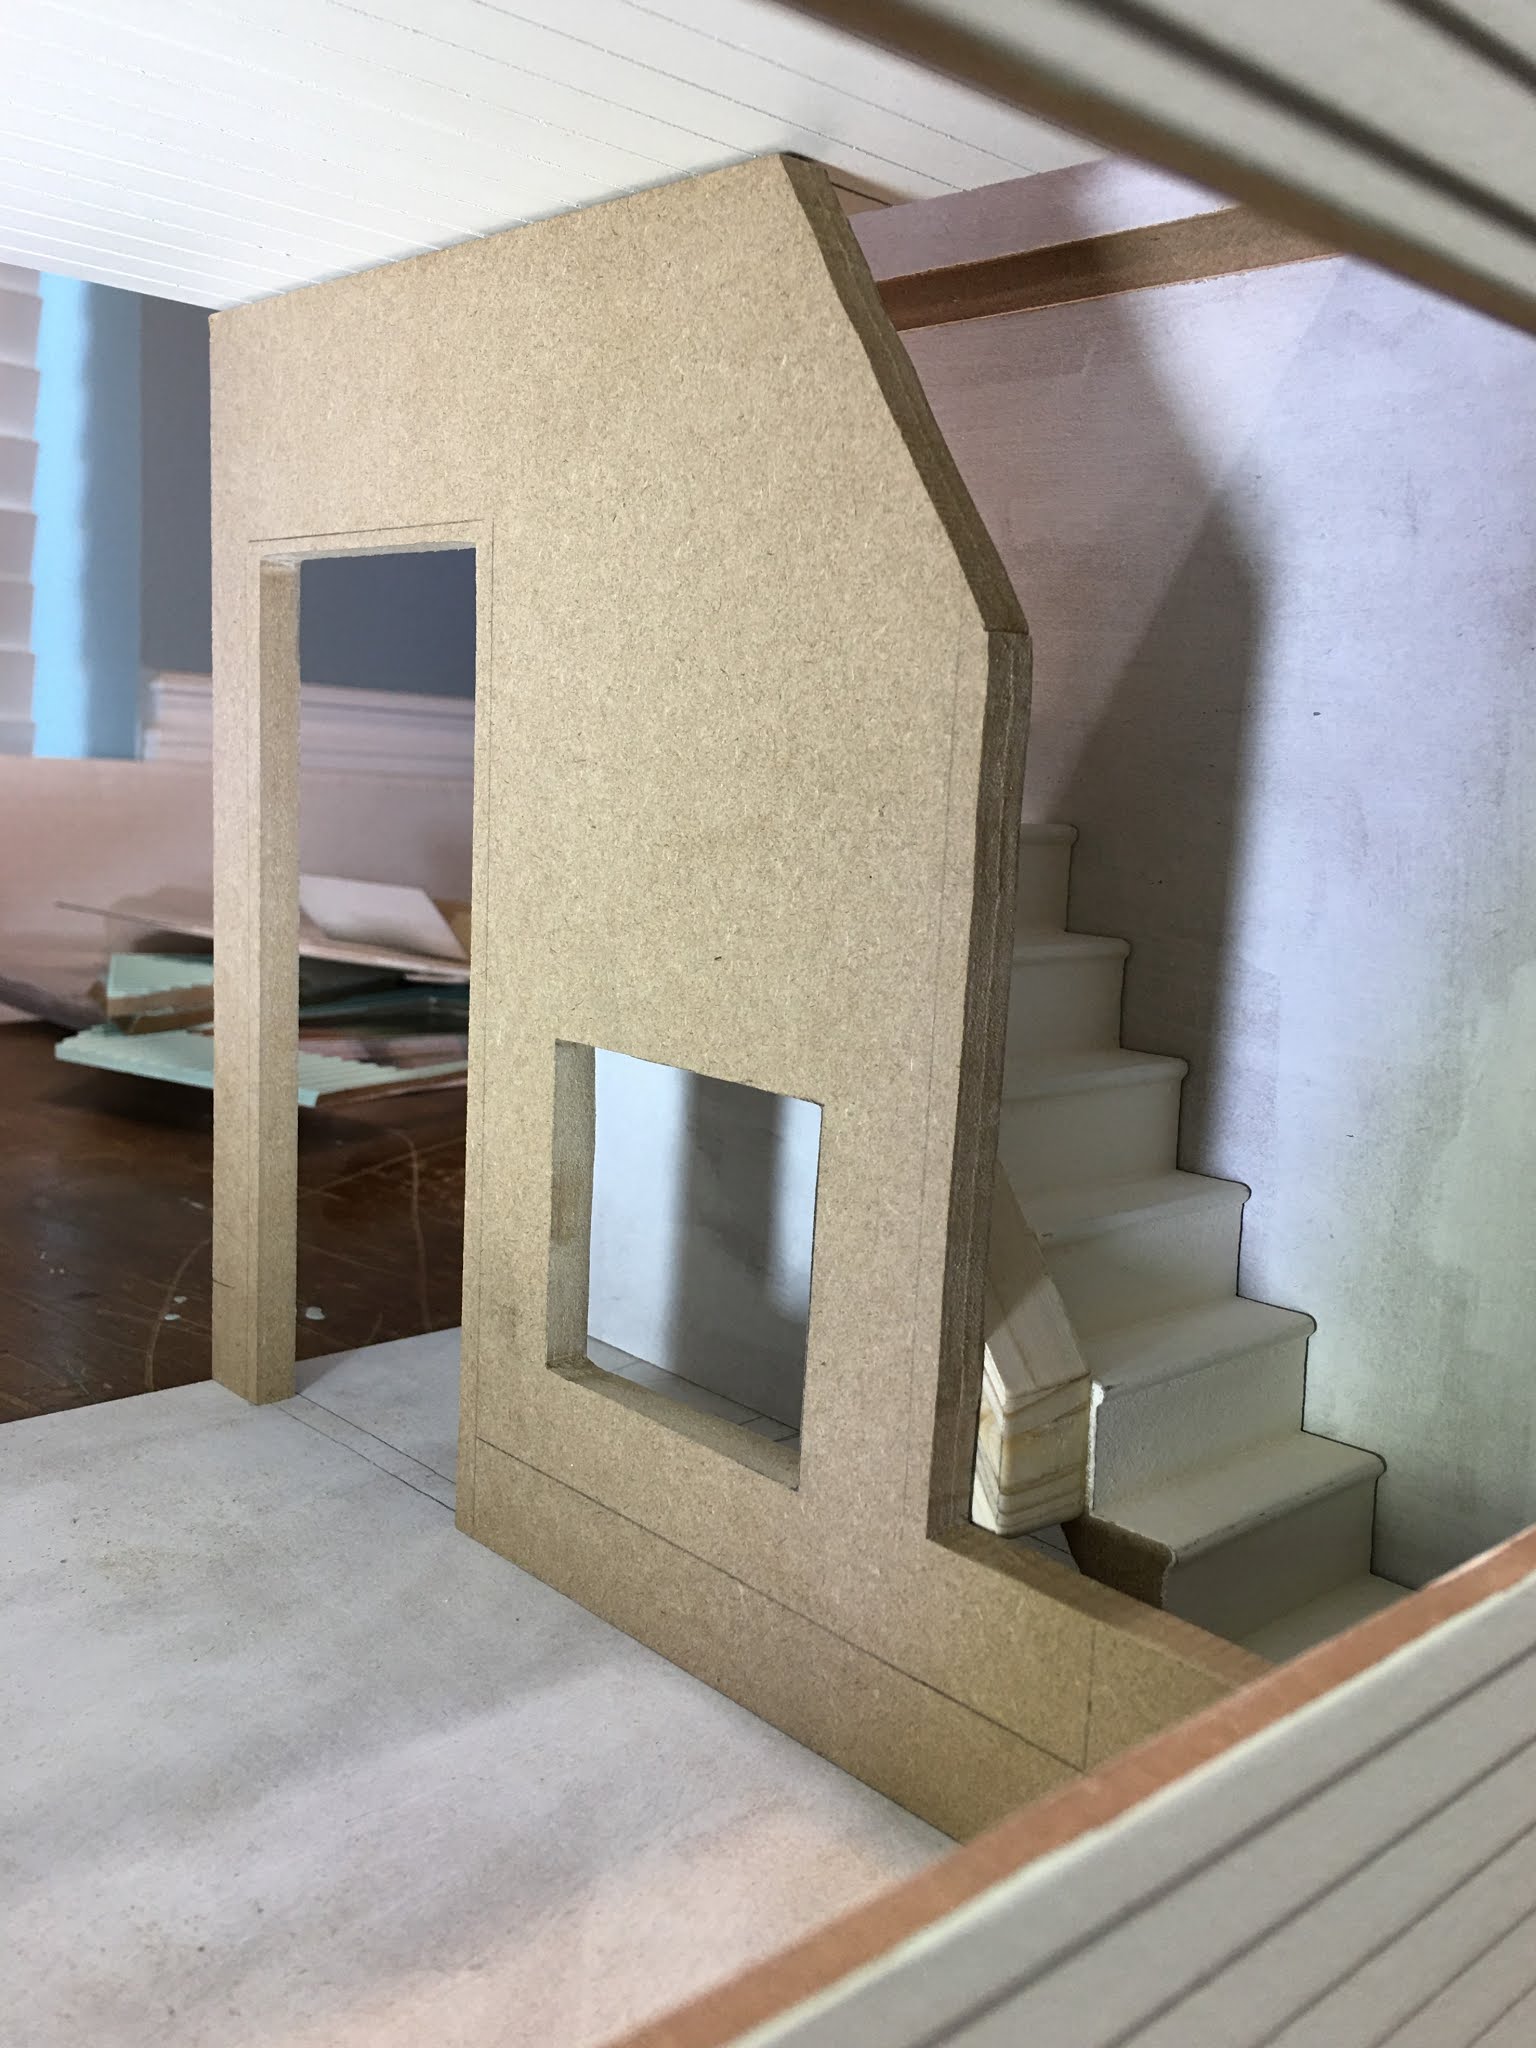
I needed to cut the divider wall to accommodate the stair return. I marked the angle of the stairs on the wall, then transferred that angle to create a wall bannister which is three inches above the stairs. That's standard code of 36" in 1:1 scale. I left a wall support piece at the base for the landing support.
Because 2-1/4" is just not wide enough for a functioning powder room, I added a 3/4" x 5/8" piece of scrap trim, cut at the stair angles top and bottom, to the side of the stairs. This will bring the divider wall out to leave 3" for the width of my powder room. At 4-5/8" long x 3" deep, it will still be a compact space, but a more realistic one. I will have to be creative with the sink and toilet placement, maybe having to create a custom set on my 3D printer. The door will definitely have to swing outward. I considered a pocket door, but that will interfere with other plans for the wall.
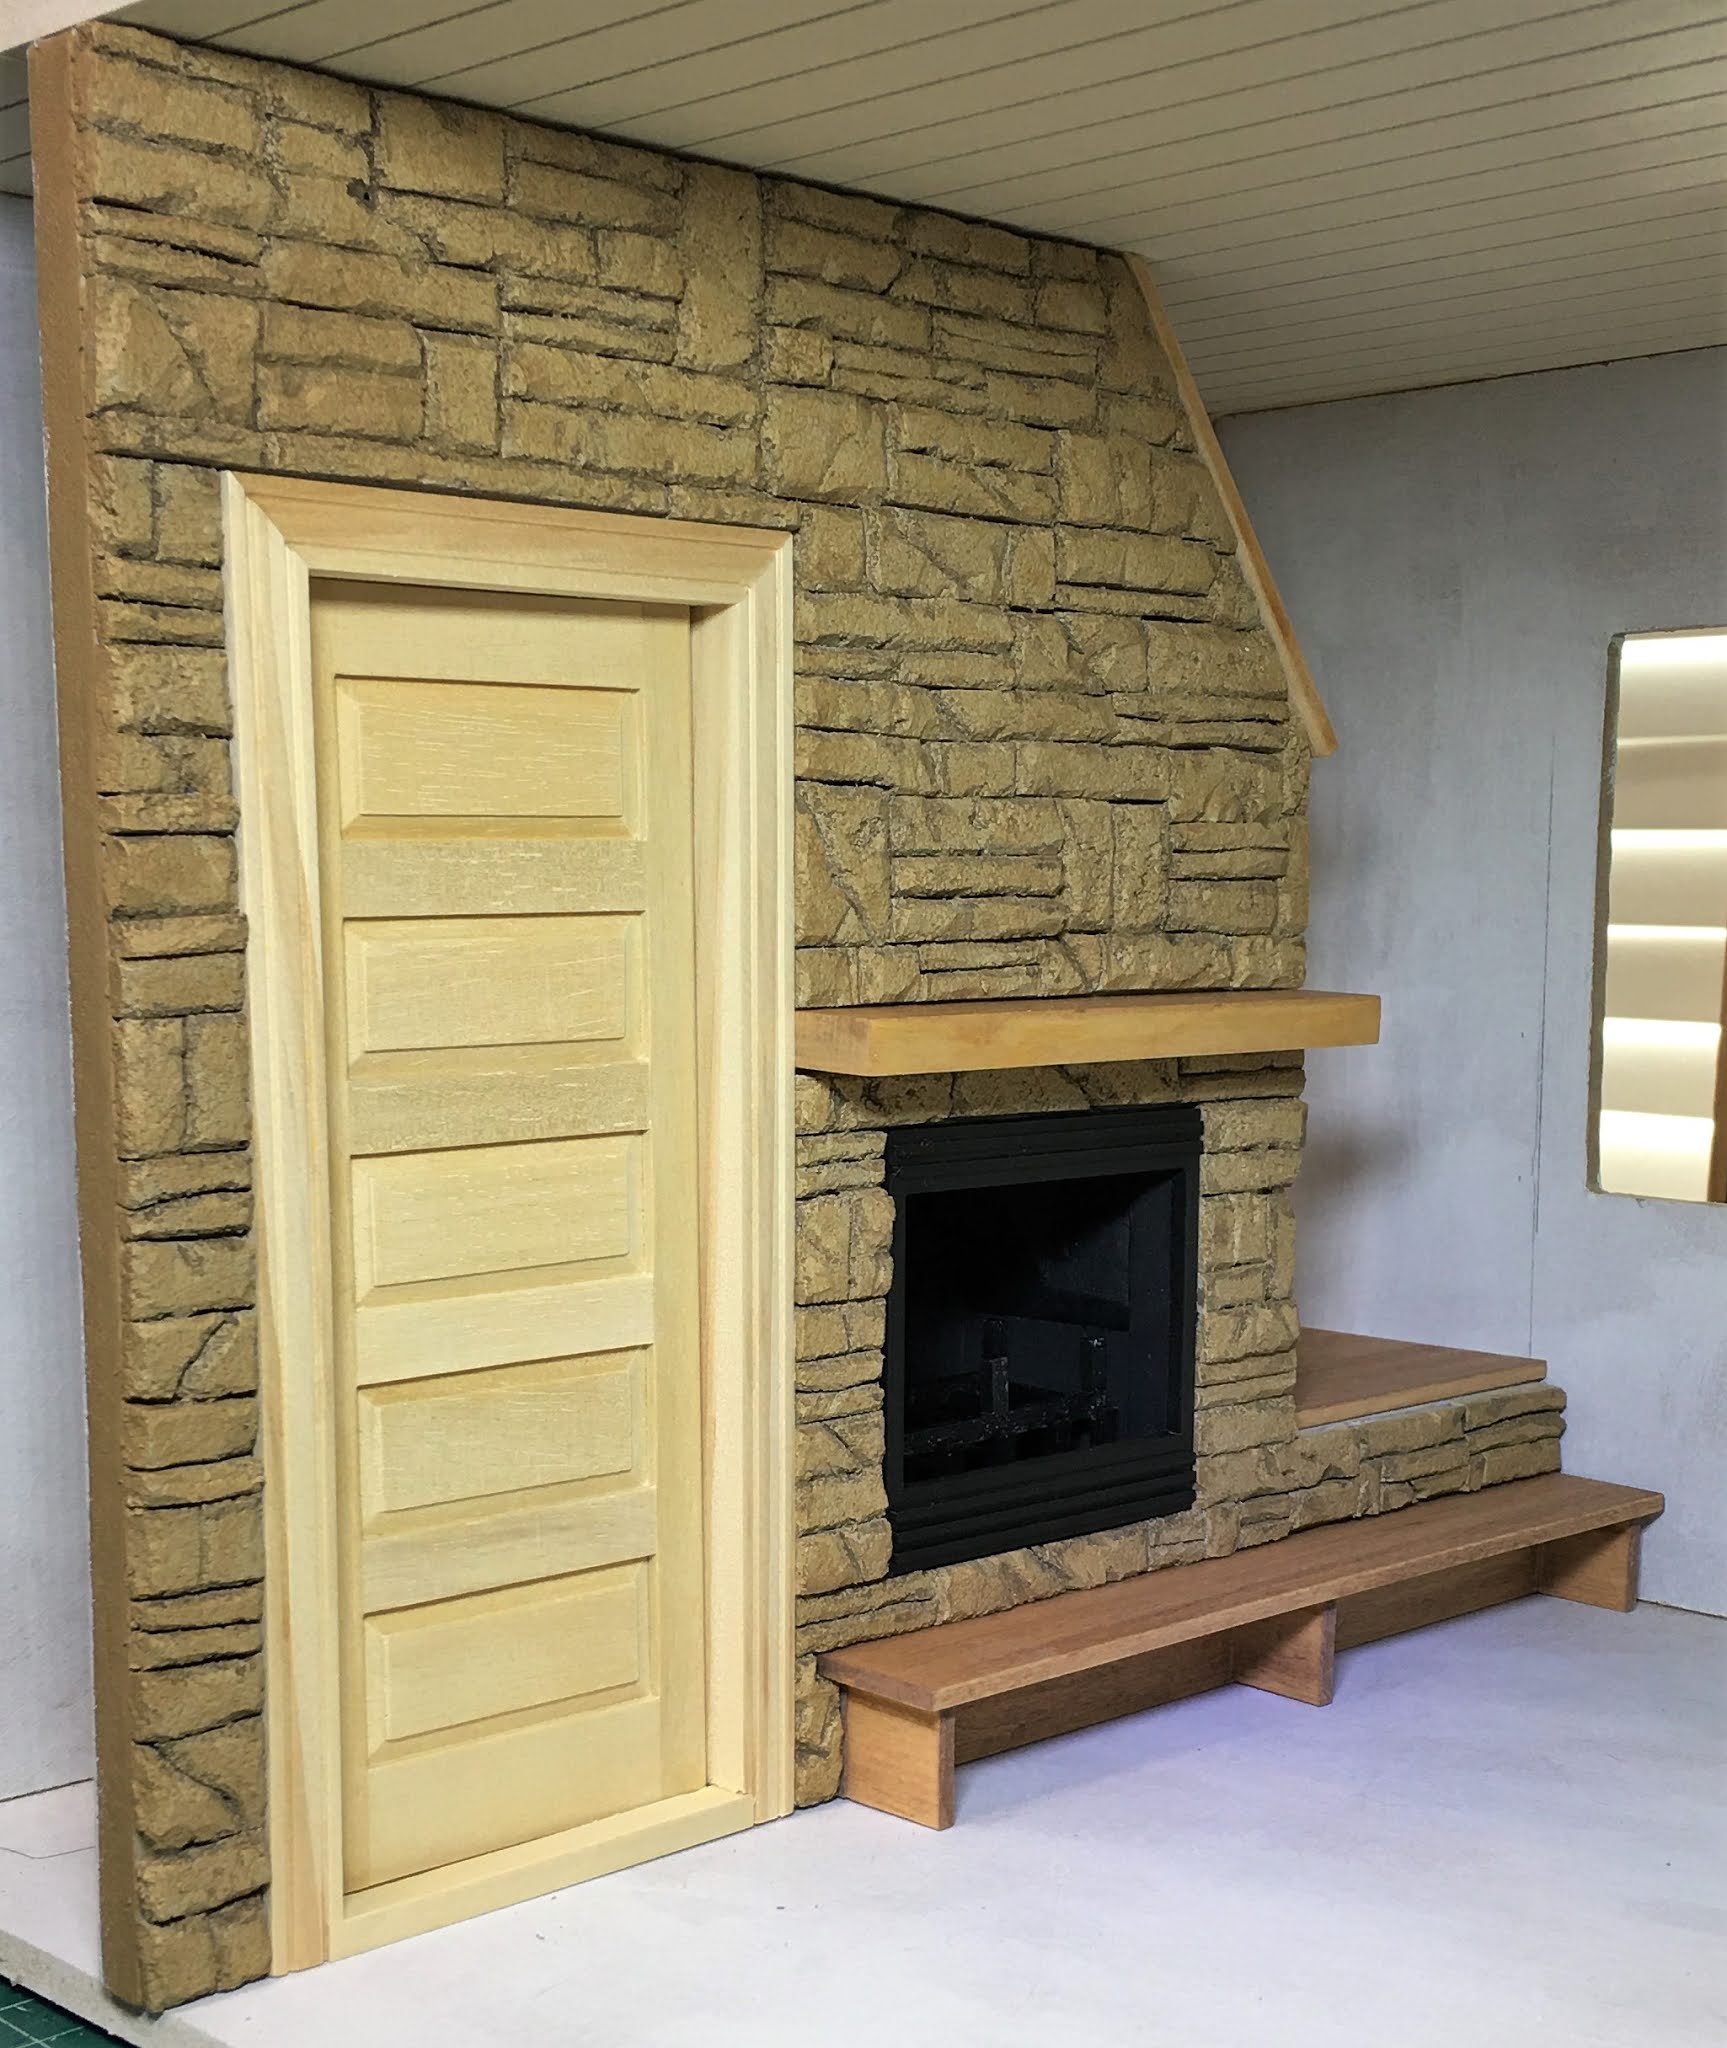
Something I have not seen done on a Beachside Bungalow kit yet is a powder room AND a fireplace under the stairs. This was an exciting prospect! I marked the fireplace opening, then drilled pilot holes in the corners to allow my scroll saw blade to slip in for the interior cut.
Looks good, but my stair angle filler is protruding into the fireplace opening. I told you this might get funky!
Not to worry, I chipped it away from the opening, and once the firebox is painted and has grates and glass on the front it'll disappear, if not look intentional. At least I hope! ;O)
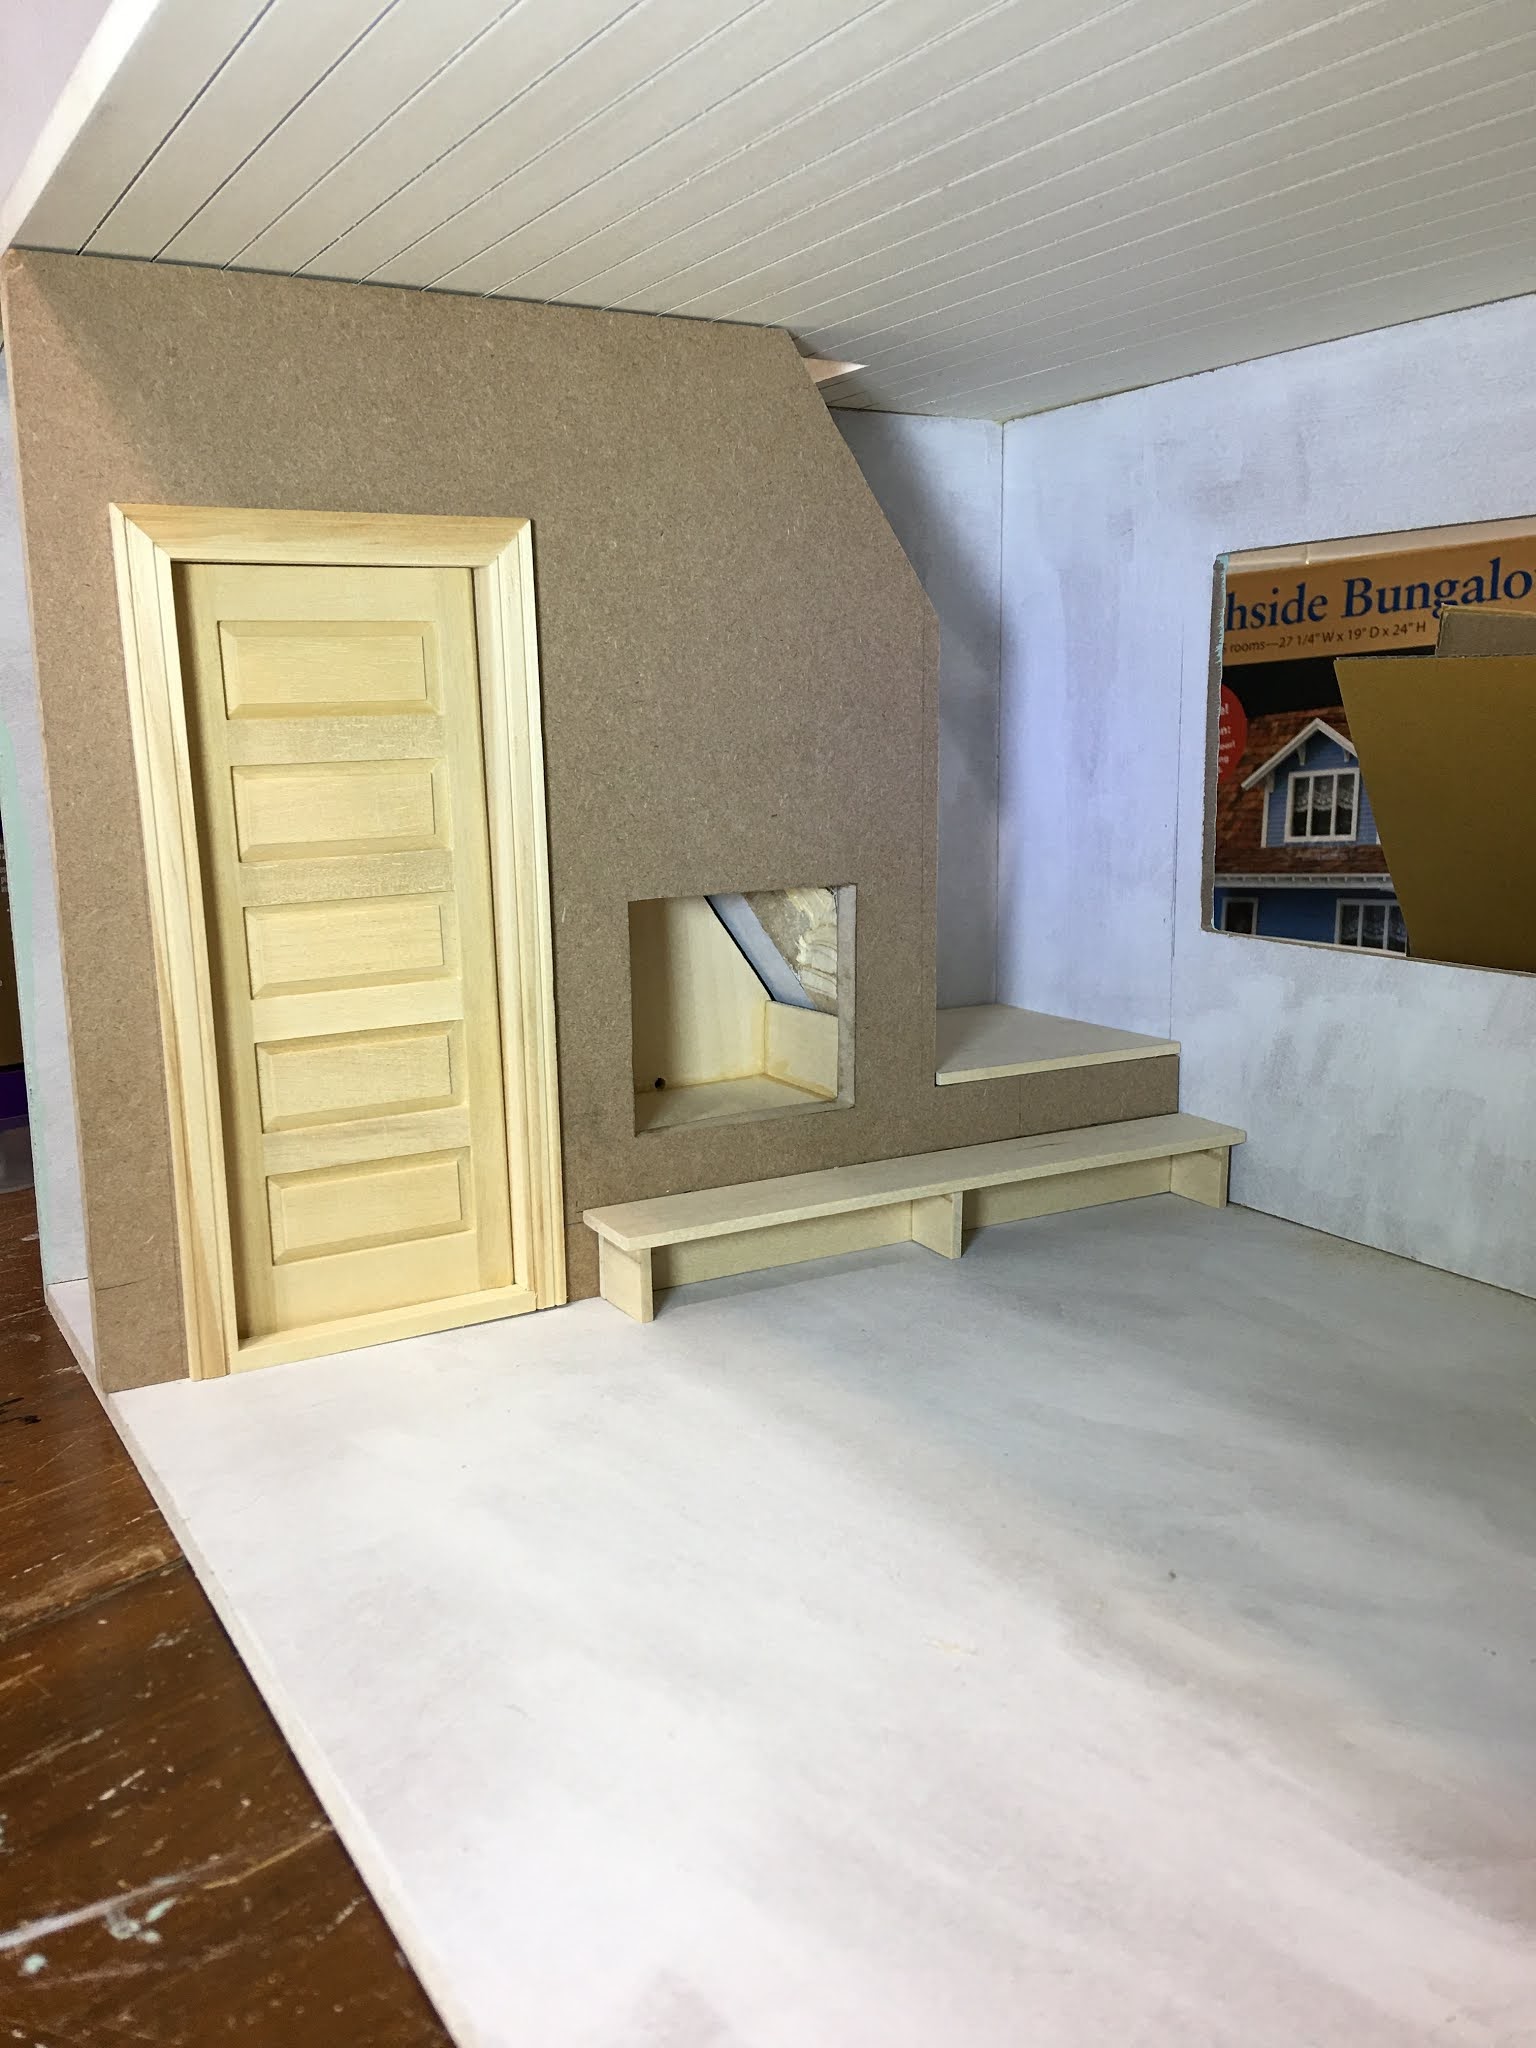
Here's what it looks like so far from the front porch window. I just love a good peek-a-boo staircase!
That stair filler won't stick out once the wall has been clad in stack stone.
Here we have the firebox installed.
From the side.
Here I have cut the wall separating the powder room from the fireplace area. I love a room where you see the stair's angle at the ceiling! So charming! There's no denying that it will be a tight little room. But when you have to go, and the other bathroom is occupied, you won't mind a bit! :O)
Now I needed a brace for the landing. Part of the landing platform will sit on the second stair, part will sit on this brace which I cut from MDF scrap.
Now, how about a final step that is also a seat to sit on by the fire? Beach nights can get chilly! The wall is going to look much nicer with the stack stone installed.
I wanted to have a quick check to be sure there was room for a fridge and cabinets on the opposite wall. I was happy to see that it is more than ample! I just love proof of concept!
It's never too early to start the lighting plan. I will be using a combination of warm white 12 volt LEDs mixed with 12 volt dollhouse lights from my stash. The LED can lights will add supplemental lighting to the decorative and traditional 12 volt dollhouse fixtures that I'll use. Some of the dollhouse fixtures are vintage and are wonderfully funky! I am so glad that I have finally found the perfect project to use them in!
Next time, I hope to have the second floor layout settled upon. Then I can make channels for wiring, prep some walls and move into the gluing phase! It's so wonderful to be excited about an old idea again!
xo xo,
Jodi