It all started with a need to cover the wiring on the back of Tasha's room box and a need to store all of the tiny décor and seasonal items that go with her kitchen when they are not in use. A menu board sign seemed perfect, especially if I could find a way to attach a few spice tins. They would provide a safe storage solution and fit great with the theme. I wanted to make the entire back surface a framed magnet sheet, but none of the magnetic sheets I tried were strong enough to hold the tins. :o( Instead, my solution was to epoxy magnets to the spice tins and affix corresponding ones to the menu board. Not completely ideal, but still a good, functional compromise.
Unfortunately, I made my first attempt at a menu board with scrap oak that Russ brought home for me. Waste not want not and all of that. They were 4" widths, so I just cut them to length and then laminated them together.
It looked fine with the frame painted blue and a chalkboard finish for the main body. I added Cricut Vinyl lettering to make it look like a chalkboard sign. Things were going well until I decided to seal it by pouring epoxy over it. This was not my idea - I learned about it on a YouTube video. I should have known not to trust it - they only talked about using the epoxy and did not show a demonstration. That should have been a sign.
At first, I poured the epoxy over the top of the sign and tried to move the board around to spread it. That was not going well because it was pretty thick. I got out the blow dryer and tried heating the epoxy to help it flow better. It still didn't want to cover the whole board evenly. Attempting to get it into the corners, other areas spilled over the frame. By the time I admitted it was a disaster, I was a sticky mess! Sticky and frustrated. :o(
I let it sit to cure overnight hoping for a miracle. But no. When it cured, areas of the epoxy separated and left big gaps. It did not pool evenly, and the menu board was fit only for the trash bin. What a lesson to learn the hard way: pouring epoxy is just not my forte!
 |
| This is how it looked after it had cured. |
Meanwhile, during the drama, Tasha mentioned over the phone that she needed a coat rack by her front door. She loves the one that Russ and I made when we bought the house. I got the inspiration for it from the Pottery Barn catalog, although mine holds family photos and no coats. I needed a non mini distraction to lick my sticky wounds, so what a wonderful opportunity to make something for her!
She loves all things octopus, diving and sailing, so her house has quite a few décor things with a nautical theme. I found this inspiration coat rack online and then asked Russ to find and cut some scrap lumber for me.
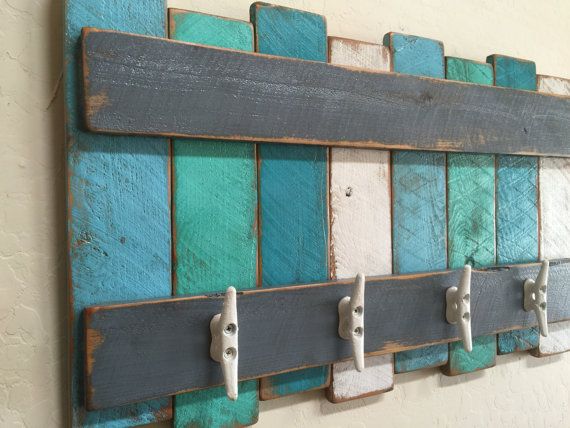 |
| Inspiration Photo |
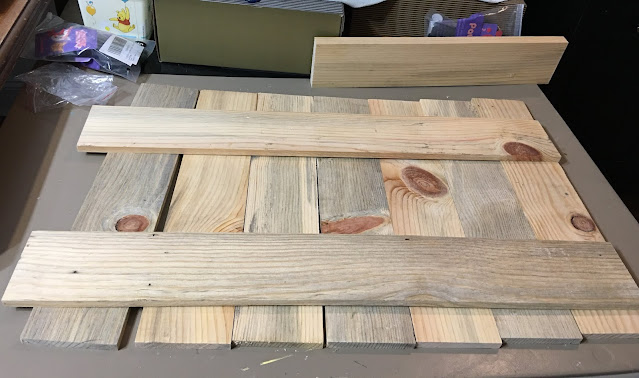 |
Russ always has the perfect scraps! That's one nice thing
about being married to a hoarder, lol! |
It was also lucky that I had a couple jars of chalk paint in my stash that hadn't dried out. They were the perfect beach-y colors for the project. I painted the boards, then sanded to make them look weather distressed.
I found some cute boat cleat and ship anchor hooks on Amazon...
And then added vinyl lettering made on the Cricut. It's about 30" wide.
We're going to deliver and hang it for her this coming weekend. Since it's nothing like mine, I hope she likes it anyway! If not, I'll just have to make her another one, more like mine. :O)
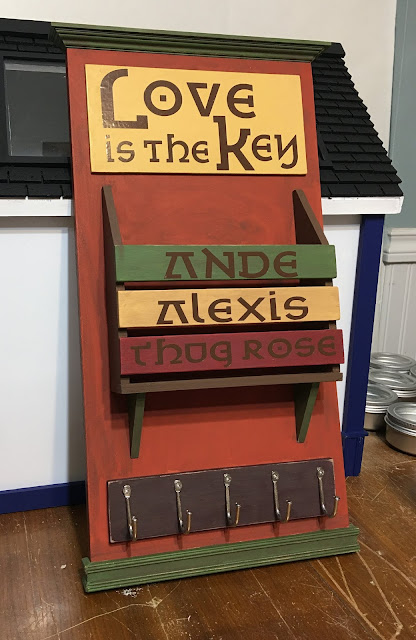
Ande just happened to be here when we were finding the materials. He and Lex made dinner for us - homemade chicken enchiladas! So delicious! I asked him if he needed a coat rack, too. He pointed out that in their loft condo, they really didn't have much wall space. Glad I asked! But he said they did need a place to hang their keys. Apparently, they forget where they set them and lose them quite often! So for them, I made a key holder. :O)
Lex likes fall colors, and I had a lot of them on hand to choose from. Luckily, I was also able to find every piece of wood and trim I needed from my scrap bins. I guess I'm a bit of a hoarder, too!
The wall where their key holder will be hung is painted with chalk paint, so I included a set of liquid chalk markers and a space to store them. Now they can write reminders or love notes to one another!
I added some Cricut lettering, too, with a message and their names. Thug Rose (Rosie) is their puppy. It's so wonderful to be able to make something that will help the kids in some small way!

Believe it or not I am working on yet another "sign" project, This time with our address. You see, when the builder for our development was assigned addresses for the lots, our house was intended to face the cul-de-sac on 200th. Because of the model of house we chose (more wide than long), they turned the house clockwise to the west to better fit the lot. Even though we are on the corner, the front door faces 19th. This leads to much confusion, especially for Door Dash drivers. Even a FedEx driver was so confused that he returned a package back to the distribution center. We have lived here for 13 years, but this has only recently become an issue. What to do? Create a sign for the side of the house where the front door should be. We need to assist these poor, overworked but very appreciated delivery folk however possible! Russ constructed the boards and trim, and I printed the numbers with the 3D printer. I have already primed the wood, but this weekend I will put a few good coats of exterior enamel on it. Then I can epoxy the address to the sign and hopefully get it hung. I should probably order Door Dash, too, just to make sure it's working, lol!

And after these successful attempts at sign making, I was ready to try a second menu board for Tasha's Kitchen. This time, I used a solid piece of plywood and
Patricia Nimock's Matte Varnish spray instead with perfect results.
I also had a little time to make a flower box for under the window. It attaches with magnets, as well, so it can be easily changed out. I hope to make more of them in the future with flowers for every season. For now, I'll just work on having this one filled with Tasha's favorite flowers for her birthday in July.
In spite of the disaster, the week turned out to be fun, productive and successful. And we were able to give the kids a little love! Life is good if you just read the signs!
xo xo,
Jodi