A lot happened over the weekend on Tasha's kitchen - I am super excited about all of the progress being made! But it was so much, in fact, that I think it's too much for one post. I broke it down into three topics, two of which aren't quite completed. I will present one of them here for you today: Molds.

Tasha and her fiancé Brent like to entertain. They are both hard working professionals, but when the weekend comes, they are a fun loving and jovial couple to be around. For this reason, I knew any dream kitchen for Tasha would have to include a wet bar. For a wet bar, I would need a lot of different types of bottles - wine, liquor and mixers. I had several of these types of bottles in my supplies and decided to make molds of them.

When you mold an item with a flat back it is pretty simple: Just place the item in a similarly sized container and pour the mold material over the top. But when your item has a more complicated shape, like a skinny neck and a wide bottom, you have to think creatively. The clay method for the wine bottles seemed like a good solution.

This clay is a non hardening clay - it is made specifically for mold making. For this type of mold, press a level layer of the clay into the bottom of the mold container, press the items in only deep enough for the clay to hold them steady, then pour the mold material over the top.


When you de-mold, you remove the clay from the top of the mold and store it away for the next use. You can keep using it until it has become too gross to want to work with any longer.

 |
| Sometimes you have to destroy the container to get the mold out. Use disposable condiment containers whenever possible. This is a good excuse to eat more takeout! |
Now you'll pull the items you've molded out of the new mold. They are hard to get out sometimes - I use my teeth!


Once the molds are ready, the exciting part begins - making the bottles with resin! You'll need some two part resin, disposable medicine cups (1 oz size works great), disposable stir sticks and pigments.
For the resin, I recommend something that has a working time of about 30 to 40 minutes. This gives you enough time to mix the resin, let it gas off a bit to reduce the bubbles and still gives you time to get it into the molds. I like Ice Resin, but it is about twice as expensive as other comparable brands. If you are going to color your resin, you really don't need to pay a whole lot more for "non yellowing" resin. If you are going to sell your items for a bunch of money, then you have to be more cautious. I have bottles in my Starbucks project from 2013 using Amazing Clear Casting Resin and they still look great.
The Amazing brand comes in clear and white so be sure to get the one you intended. Amazing Casting Resin White only has a working time of 10 minutes, so it is only good for small, quick, NON CLEAR pieces. It can be pigmented, though. Amazing Clear Cast, though clear, takes 24 hours to harden.

I discovered that both brands of my on hand resin was solidifying. The manufacturer recommends that you use them within 6 months but mine are much older than that. I made a valiant effort to stir them, and then gave them a try in spite of the warning signs. Surprisingly, it still produced usable bottles - it just took overnight to harden! Waste not, want not I always say!
Meanwhile, because I wanted to get a replacement supply ~F~A~S~T~ I tried an inexpensive brand that had same day Amazon delivery. It is called FanAut and gets high reviews. It seems to have worked fine, though it took overnight to harden, too. It says it has a 40 minute working time, but I suspect that adding in the Epoxy Pigment can extend that time. As long as I end up with usable bottles, overnight is fine with me!
For my previous post on using the Mold Star 15 rubber molding product, See This Post.
For more on working with resin and pigments, See This Post.
As far as how the bottles came out - some were better than others. I seemed to have had trouble getting the resin all of the way down into the neck of the bottles in the molds. It happened first with the red wine bottles, which told me that I needed to make a specific effort to be sure the resin was not stopped by an air pocket when I poured the white wine bottles. In spite of my effort - taking a toothpick, plunging it in and pushing the resin into the hole, I still did not end up with great necks on my bottles. In the interest of not wasting my efforts, I tried to find a fix for these bottles.

Though the extent of each bottle's misfortune varied, I was missing an average of 3/16" on each of the necks. I decided to try gluing dowels or toothpicks to the ends to see what I could salvage. I cut the dowels to size, put a bit of Tacky Glue on the bottle, a small amount of cyanoacrylate glue (super glue) on the dowel, then held them gently together.


Once the extensions were dry and set, I sanded and shaped as carefully as I could (probably should have shaped them first!), painted them black to simulate the cork labels, then coated in Mod Podge.
Before I show you how they came out, let me tell you a love story... Some of you know that Tasha has always been a really smart kid. She always tested highest in her classes in school, was in the Spectrum and Running Start programs where she attended college classes while she was in High School, and has always worked super hard to do her best at everything she tries. I know I am her mom and am supposed to say nice things about her, but truly, she is an extraordinary person.
She and Brent met on OkCupid in 2009. If I told you that I was horrified that she had met someone online (this was back when it was not as common and horror stories pervaded Dateline NBC), and that the same day they met he took her 60 miles away from home to hike in the woods, I would be underselling my panic. Of course, I did not know these facts until after she had safely arrived home. After they were already on the hiking trail, she finally had some misgivings about the situation, too. In her realization of the potential danger she had put herself in, she decided the best way to discourage her murder was to steer the conversation to forensic science. She told Brent that with modern forensic science methods, her DNA would be all over his truck and probably on him too. He just thought she was weird. Luckily, Brent turned out not to be a serial killer, and instead is the most amazing, smart, kind, loving, and perfect partner that we could have ever hoped for, for Tasha.

They are truly poured from the same mold.💗
They knew they would always be together, but wanted to be finished with school and in good jobs before they got married. They got engaged in 2019 and Brent graduated with his electrical engineering degree last year. They had already waited for so long and were finally planning the wedding, then Covid happened.
 |
| Brent popped the question while hiking the trail of their first date. He designed the ring, too. Blue topaz is his birthstone and teal is Tasha's favorite color. |
So a long love story just to say that during Covid, to keep them busy and focused on their future plans, they began making wine for the reception - banana and watermelon. Tasha graduated Magna Cum Laude in Science, is a total chemistry nerd, and making wine is all about chemistry. Her labels look like elements on the Periodic Table - of course they do! And I knew I had to make replicas of the wine bottles to be included in her wet bar.


My bottles came out pretty well, considering I had to add the tops. But I wanted another try. More on that in a minute...

The other bottle blanks I had just needed labels. I looked online to find actual brands in the colors and shapes of the bottles. I saved the pictures and then resized them to fit on the bottles.


Once they were printed, I applied a piece of packaging tape over them, cut them out with a ruler and an Xacto knife, and applied them to the bottles with Mod Podge. I like it better than glue because the excess is easily removed with a toothpick and leaves no residue.


I wanted to give the wine bottle mold another try. I knew what the problem was - trapped air. Now I just needed to find a solution to get the air out.
Using my pilot hole punch tool, I pushed it through the mold until it came out of the bottom of the mold. Then, using that hole, I pushed a toothpick up into the mold from the bottom.
 |
| Look closely and you'll see the toothpicks in the holes. |
 |
| Toothpicks pushed up into the bottom of the mold. |
When I filled the mold with resin, about three quarters of the way full, I gently twisted and pulled the toothpicks back out the bottom. The theory was that by doing so I would pull any air pockets out while also pulling the resin into the bottle necks in the bottom of the mold. It seemed to work, as the resin level dropped as I pulled. Was this just displacement from the toothpick, or was it going to work? I'd have to wait overnight to know for sure.
While I was at it, I decided to cast a few more things.

When I woke up the next morning, I raced to the dining room to check the results. Success!!! The resin didn't even leak at all from the hole in the bottom of the mold. The rubber just sealed right back up!
Much better bottles and no toothpick tops for this batch!
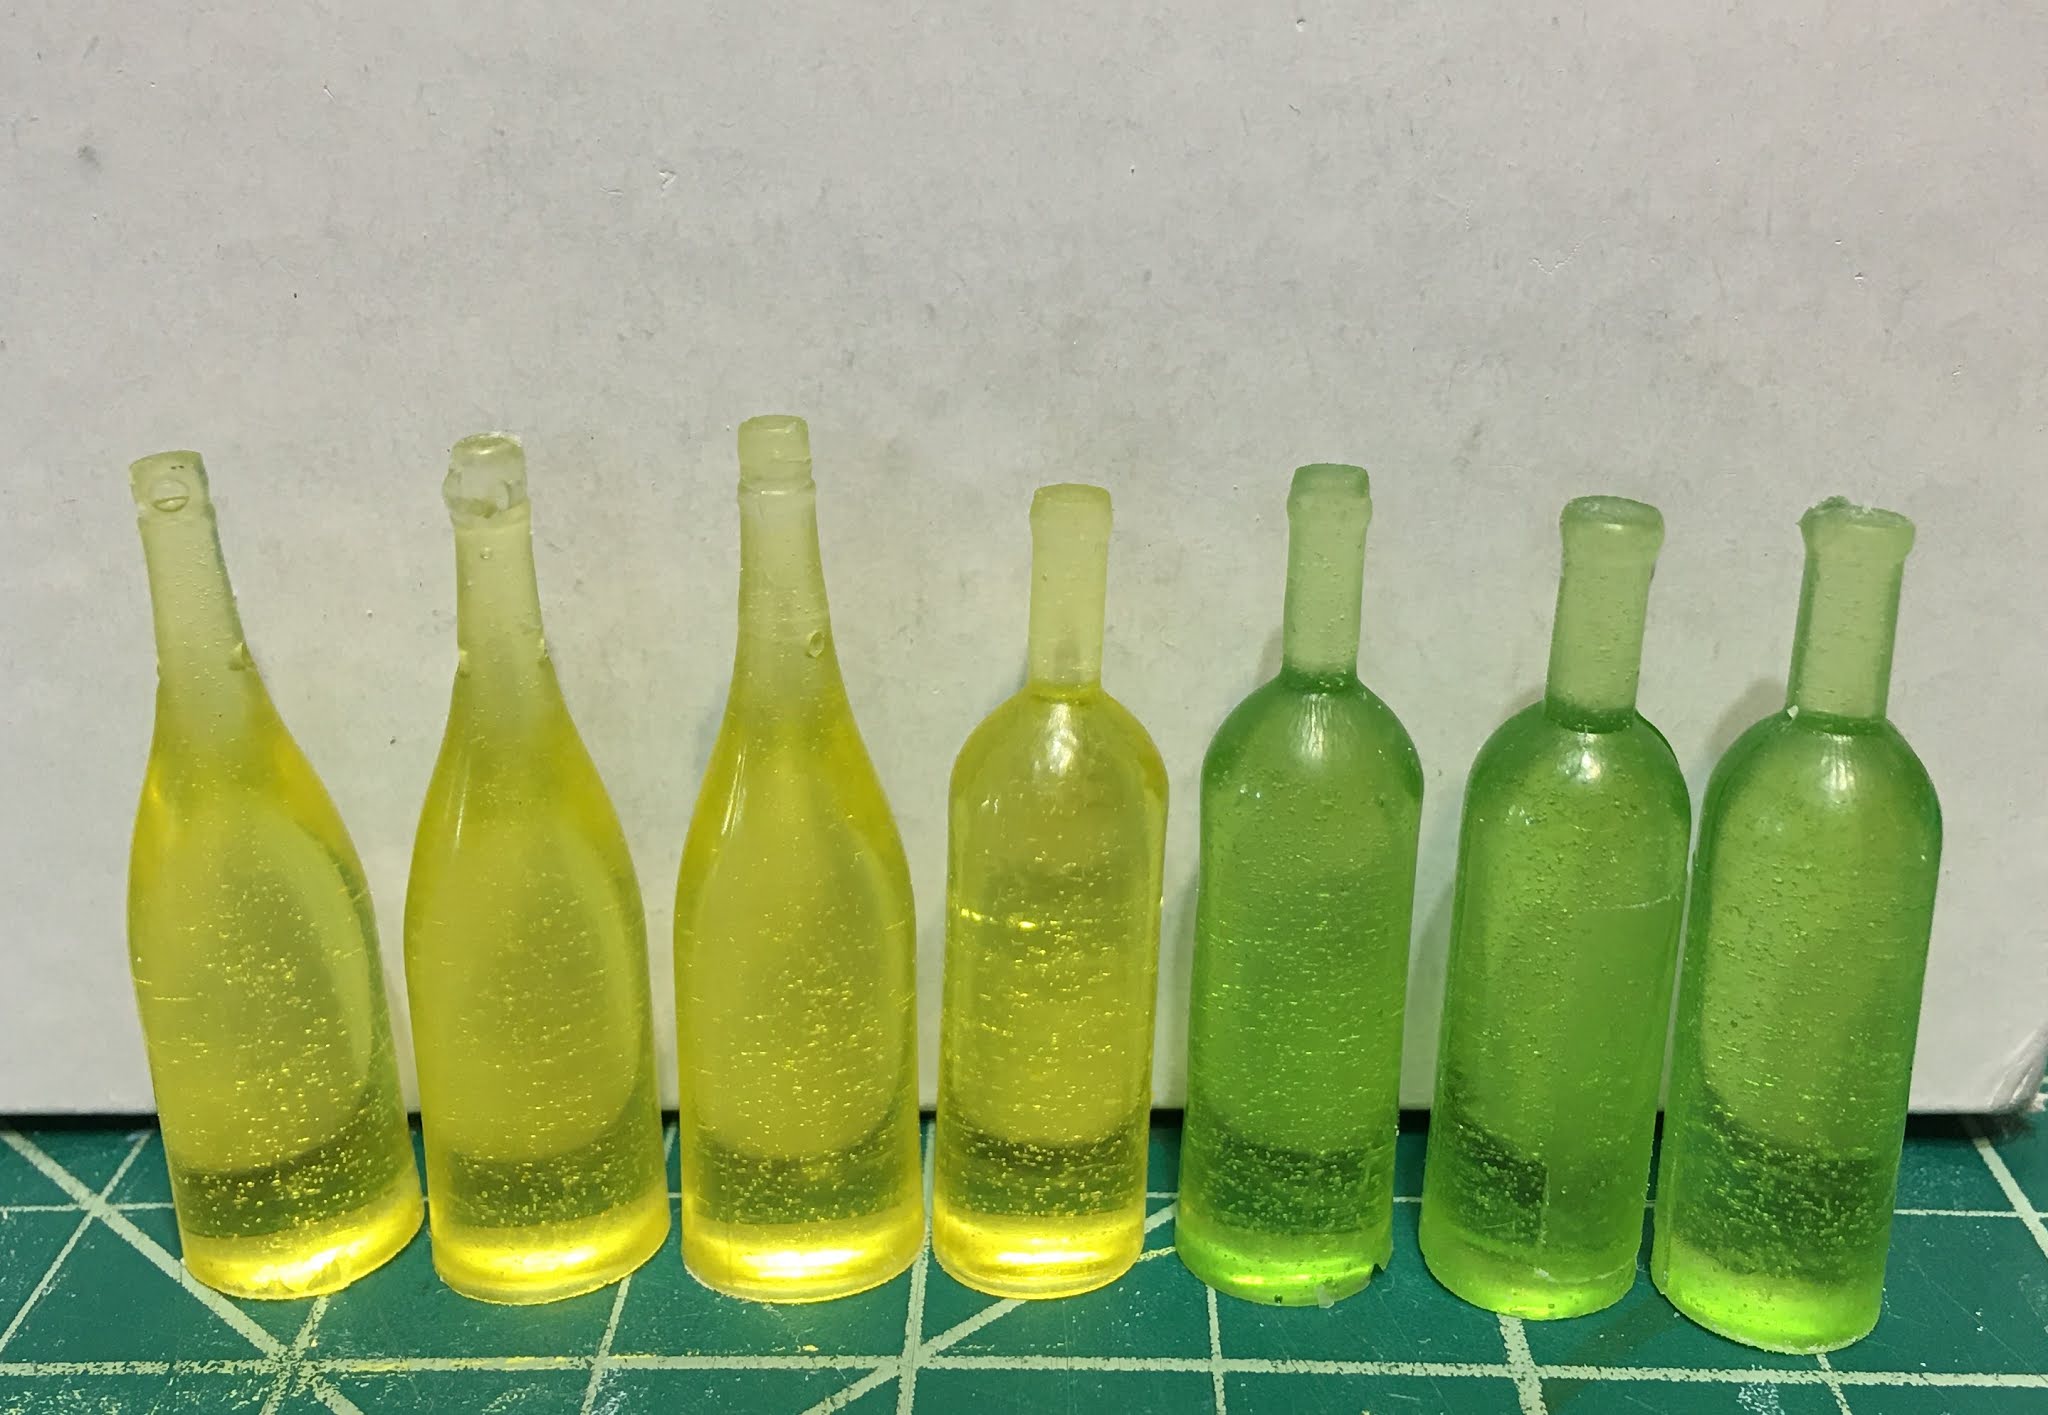
And I even made the watermelon wine in green bottles like Tasha did. A little black paint and Mod Podge for the cork paper, more labels and viola! These are going to work great!

Now I am repeating my experiment with a batch of red wine bottles. I'll have to race down again in the morning to see if my luck scientific reasoning is verified! And, if this weekend is as productive as last weekend, I might even be able to finish the wet bar!
Hope all your mini experimenting and love stories have happy endings, too!
xo xo,
Jodi
P.S.
Speaking of happy endings... Birgit, the creative genius and inspiring artist behind the hugely popular BiWuBären blog, is known for her incredible generosity and thoughtful Christmas Care Packages. She is also very diligent, and so mailed all her packages from Germany in early November. A couple of us U.S. residents just received them within the past week! Poor Postal Service! Those guys have a lot of challenges to overcome in these Covid times! But whether late or not, the kindness is no less joyously received! And as usual, the package was a trove of treasures!
 |
| We ate the marzipan before it made it into the photo! Yum! |
Just look at this darling little house that Birgit made! There are real windowpanes and you can see into the house! Look at the tiny wooden porch posts! The teeny-weeny porch planters and that tin roof!

Amazing! I love it, and most of all I love that Birgit sends her heart out across the world and makes it a much more special place!
Thank you Dear Birgit! You are a treasure!