Search My Blog!

Use the Search box below to find keywords that you're looking for quickly and easily!

Search Feature

Tuesday, September 18, 2018

Growing A Cottage Garden Part 1

Hello Everyone! I know it's only been a couple weeks, but it feels like I've been away so long! Work on the house stuff has taken priority, so my mini time has been in stolen moments here and there. Progress on the Storybook Cottage's garden has been slow! But I do have a little to share, so here goes...


I gathered up all of my kits and flower making supplies - I was surprised how many things I'd collected over time. But with no idea how many plants and flowers I'll need for the garden and flower boxes, I decided to make loads of them. If I end up with extras, I can always use them in future projects, or send some of them on to mini friends.


I have lots of different punches, silk and rice paper, covered wire, flocking and sand, but I decided to make the kits first and see if I could use the supply stuff as a supplement to the kits. I have several kits by SDK Miniatures, Bonnie Lavish (out of business as far as I know but new old stock can be found), Moonflower Miniatures, Artistic Florals and Modern Miniature Succulents + Sundries.


I started with the SDK Miniatures kits. I really like them because they come with everything you need, including the clay pot. Susan also sells inexpensive individual laser cut petal and leaf sheets, so if you want to make more than a flower pot full, it's more economical to do so. She also has an extensive variety of plant and flower species to choose from, and she ships very quickly.


I am focusing on plants and flowers that make good tea blends and also that bees like. I started with Black Eyed Susans, a favorite of honey bees. I noticed in photos that flowers tend to be in varying degrees of bloom, so I made some stems in earlier stages using the kit's paper margin and my punches. The kit came with plenty of extra black sand for the centers. I dipped the end of the 28 gauge wire in Fast Grab Tacky glue (because it's thick), let that dry for a bit, then dipped in Elmer's glue before dipping into the sand. The Elmer's is a lot runnier so it coats the Tacky Glue and makes the sand stick well. This gave a nice bulky center.


Since these were in earlier stages of bloom, I only needed a peek of yellow and a green calyx. Once they were dry I closed them to varying degrees.


I used the three leaf punch for the leaves, cutting off the two outside leaves and using the center since it looked so similar to the kit's leaves.


18 full blooms from the kit plus my 8 partials.


Next I made 59 Conflower. It was handy to have a photo on my phone to reference when coloring and assembling the kit. Another thing I like about the SDK kits is that most come on white paper. I like to pick my own colors.


Next I chose the Aster kit. I really liked the alcohol ink effect on this paper for the leaves. It dries much faster than paint, doesn't bulk up the paper, and looks more realistic with it's variegated color effect. An added bonus is that the top side dries a little darker than the underside just like real leaves.


I also made up some more immature blooms based on the reference photo. The younger, the darker, it seems.


I think my favorites so far are the Sunflowers. One kit makes six, but I had ordered an extra set of petals and leaves so I made twelve. There was plenty of sand in the kit for the centers of all twelve with leftovers.


I did a rough count and came up with 20 varieties of plants and flowers still to make. If four kits took two weeks to complete, I might be at this a while! Fall is definitely in the air here, so thank goodness this kind of gardening can be done indoors! Hopefully, I'll have more flower making and guest room progress to share in the next couple weeks.

xo xo,
Jodi

Thursday, September 6, 2018

Storybook Cottage - Laying The Groundwork

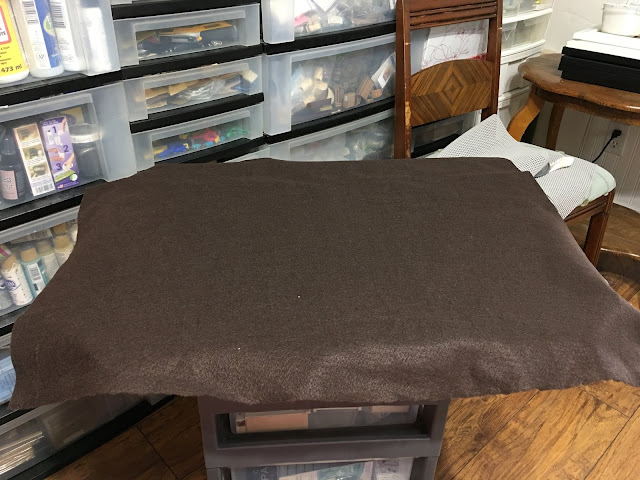
This week's mini time was a continuation of getting the landscape board ready for the cottage and it's garden. Before I got much further, I needed to get the plywood base bottom covered in felt to protect the table it will sit on. I bought a few yards of this brown felt at Joanne's a few years ago when it was on clearance, and I'm still using it up. I cut a piece to cover the bottom with extra allowance around the edges, then gave the plywood a good layer of Grandmother Stover's glue. I laid on the felt, then used my burnishing tool to get good adhesion everywhere. Once dry, I used my Xacto knife to cut a nice close edge. When I missed some, or the cut wasn't as pretty as could be, I used my embroidery scissors to clean it up.


I marked again on the board where the house would sit, then made a planter box to attach to two of the fence sections. They got stucco (and later aged) to match. There will be a stone path along the third fence section, so it didn't need a planter.


Using foam core boards for walls and cereal box cardboard for bottoms, I made a planter for the corner and for under the bay window by the front door. I covered them in "stone", then added foam planting bed to help hold in the future plantings.


With the very limited garden space, I decided not to try to force in a lawn, but instead make a stone path surrounding the cottage. In addition to the planters and window boxes, I can have an extensive container garden with all sorts of creative pots and things. So first, I painted in the path, then edged it in 1/4" wide liner "stones". I checked the fit of the fencing and planters as I went.


Then I filled in the pathway with "stone pavers" made from the same Yankee Candle cardboard packaging as the rest of the "stone" in the project.


I didn't want to grout the stone, because I wanted a more informal path kind of feeling. I had this Bachmann gravel in my landscaping drawer for a long while now, but had never had the chance to use it. I experimented a little, then found that running a light bead of Elmer's glue in the grout lines, then sprinkling the gravel on worked well. I lightly patted the gravel, then once dry, I rubbed my finger across it to remove the excess and loose gravel. I didn't try to save the excess - didn't want to risk gouging my wood floors if I happened to miss cleaning it up, so I just dumped the board out on my gravel walkway in the back yard. With a little future aging using chalk pastels, then planting some rogue weeds and moss in here an there, I think it will look nice.


So here is the table that the cottage is going to live on. I am still mulling over ideas about weather I'm going to paint it, and if so, how? The great thing is that there is room on the bottom shelf for another small future project!


And here is where the cottage stands now, ready for flowers and plants and all manner of living things to adorn her. You may notice that the moss is a little less prominent, having been rubbed to lose some of it's fuzziness. But the mossy rock is kind of growing on me.


But before I can begin to undertake all of that flowery awesomeness, I have some real life homework.

Dresser Handles

Dresser Painting in Progress

Lots of Decor Stuff To Make

Russ has finished the flooring in two bedrooms and the hall, with only the landing and stairway to go. So now I can begin creating a nice, comfortable room for our guests to stay in.


So now that the groundwork has been laid, next time, I hope to have more exciting and colorful things to share both with the cottage, and our real life home!

xo xo,
Jodi