Search My Blog!

Use the Search box below to find keywords that you're looking for quickly and easily!

Search Feature

Tuesday, July 17, 2018

Is There A Moral To This Story?

After I have lived with the leaded glass windows, and been reassured by such thoughtful and encouraging comments (thank you all!), I decided that I really do like them after all. Well, almost. The stairwell windows, having done them in a completely filled diamond leaded pattern, totally blocked the view to the display shelf and clock hanging that I had worked so hard on. So there was really no choice but to try, try again. Below is the photo I took of the first attempt.


On the second try, I used only a portion of the pattern to create the leaded look at the top only. Here you see the new frames, plastic, lead and inner sandwich frames.


And here they are installed, lights on, display items and clock hanging visible as originally intended. Still imperfect, but much better!


I made a valiant effort to figure out how to cut the 22.5 and 45 degree angles on the crown molding for the top of the kitchen's bay window. A smart person knows her limitations, and so I enlisted the help of a very handsome man. He happens to be my husband, and also happens to be a skilled carpenter. I know! Lucky me! For the price of a rigatoni with sausage dinner, he made the cuts for me, explained that you have to cut crown molding upside down and backwards on your saw to make the angles meet correctly, and explained why my degrees were always off with my saw. Boy I wish he'd catch the mini bug! He'd make an awesome project partner!


I wanted the crown to look substantial, like you see on old buildings. Especially since the bay is going to have a flat roof. It needed some umph, you know? So, before we started making the cuts, I laminated a piece of the Houseworks 3/8" crown molding to a 3/8" x 3/8" piece of basswood.


We used my Miter Rite saw from Micro-Mark, which is perfect when you have to cut odd angles. The issue I was having, as Russ explained, is that the angle guide on the saw does not center at zero. So, you have to add or subtract the degrees from the markings on the sides. No wonder I was having such a hard time! Thanks again honey!


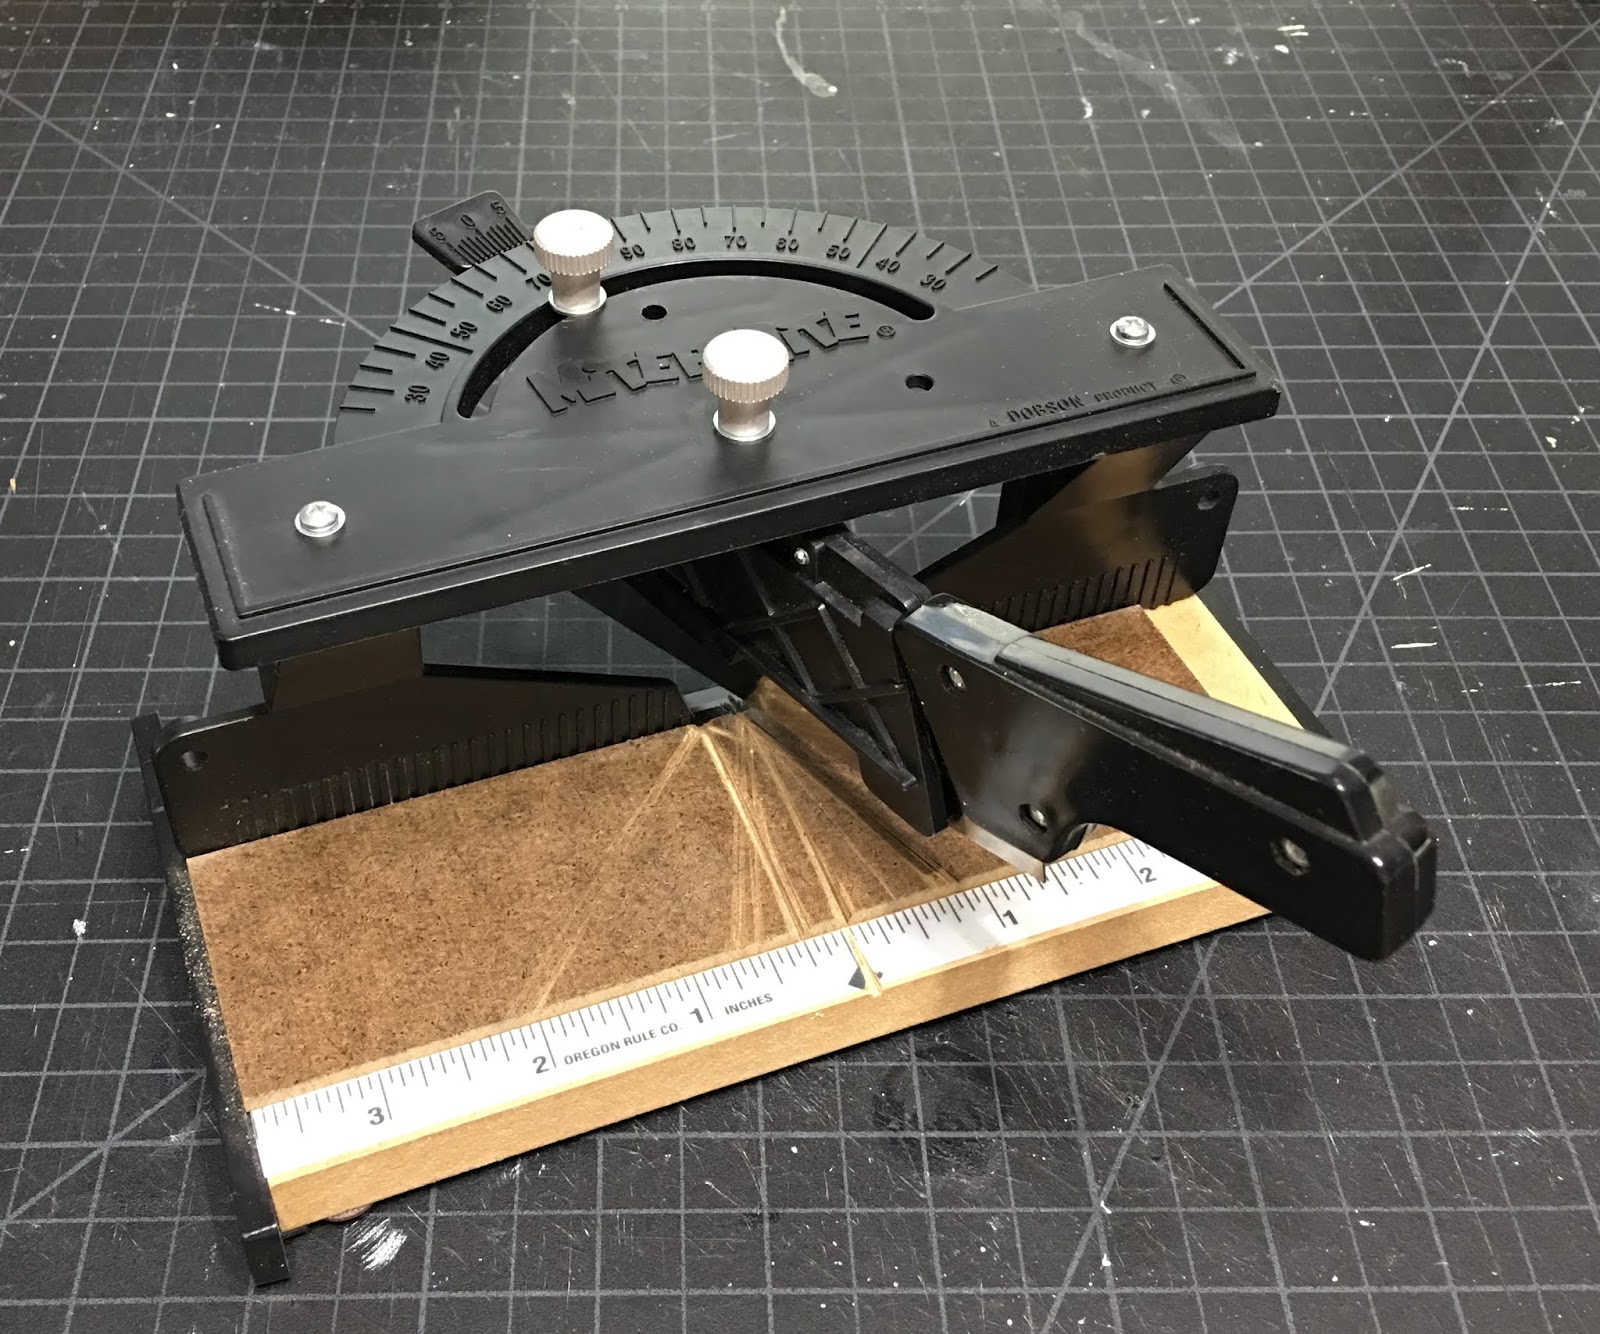
Just look at these gorgeous cuts!


Russ also shared a great tip if you find your saw blade binds up a bit when you're cutting. He took some Tri Flow silicone spray, sprayed a little on a paper towel, then wiped in onto the blade. What a difference it made! The blade did not bind up on the wood, so it was easier to hold in place, and actually made the cuts much smoother. Thanks again honey! BTW... The rigatoni turned out great, and he said he got the better end of the deal! :O)


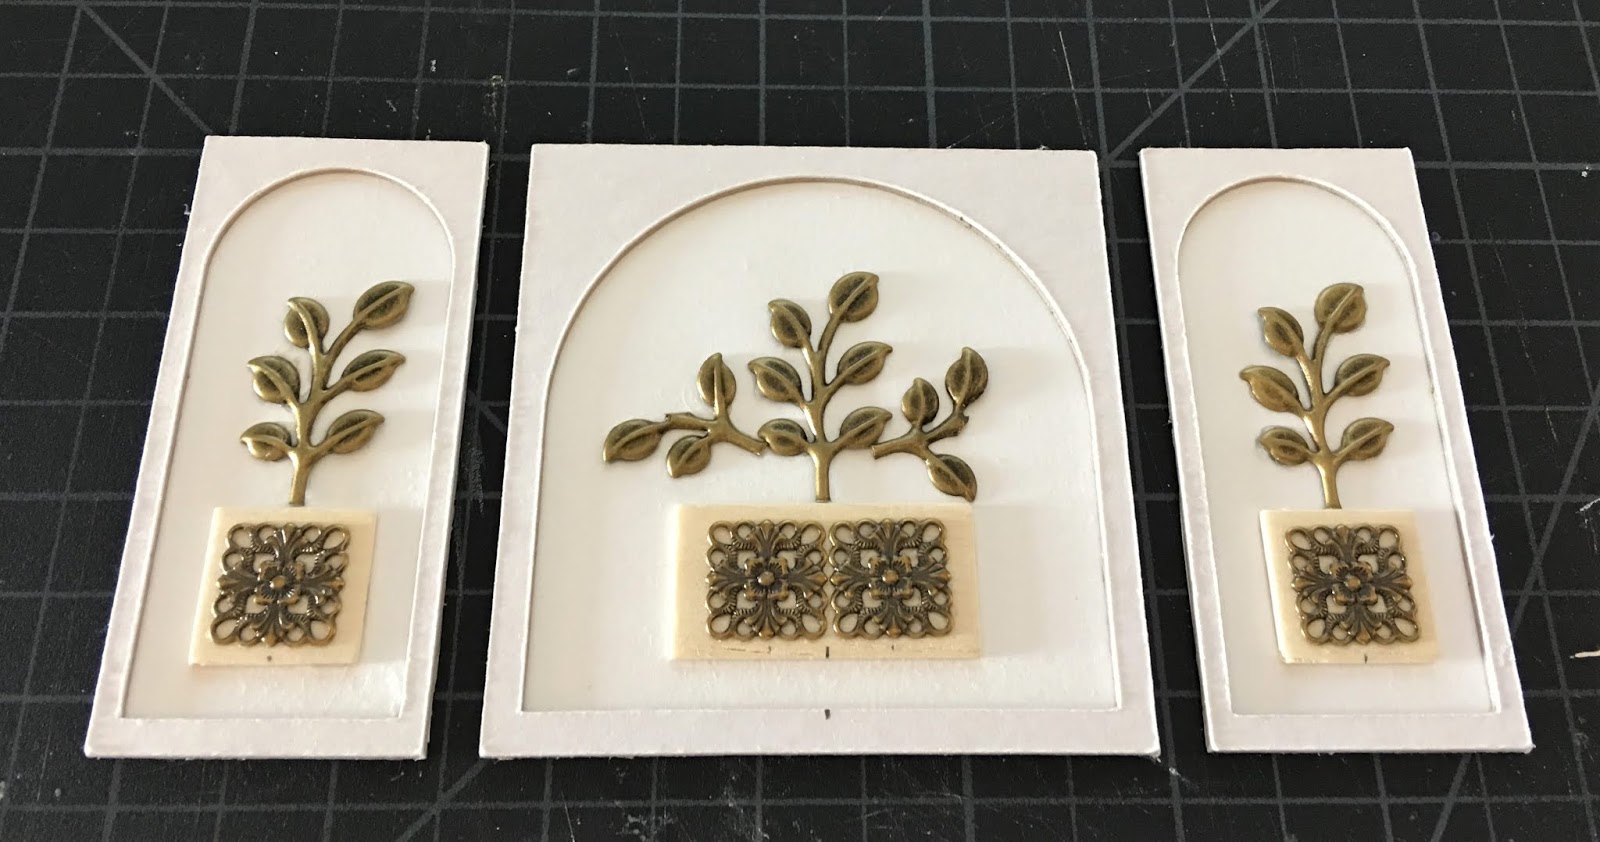
With that challenge solved, I was able to move on to the bottom half of the bay window. I used the Cricut to cut chipboard frames for each of the three panels. I buy my chipboard through Joann's. I have recently discovered that using the Light Cardboard setting on the Cricut (under Custom materials), plus getting the cutting mat extra sticky with Aleene's Tack It Over And Over, helps to get perfect cuts. I still have to pass the Xacto blade through the cuts a few times, but using the Cricut helps me to do a way better job than I can do on my own.


I cut cardstock backer pieces for each of the panels, then assembled each panel with the leaf and pot embellishments (from Alpha Stamps) before affixing them to the bay window. I also used some wood scraps under the pots this time to add a little more depth. I used Fast Grab Tacky Glue for everything.


I added the lace detail around the sill, and keep filling and painting. Eventually, I'll get all of the gaps filled. I just love the look of the bay window, inside and out, and I can't wait to start filling it with plants and flowers!


So, I guess if there is a moral to this story, it is that things don't always go right the first time. But if you're lucky enough to have encouragement from caring friends, and you're willing to try again, it might just work out in the end. Oh! And it doesn't hurt to ask for help from handsome men! ;O)

Back soon with some roof progress!

xo xo,
Jodi

Friday, July 13, 2018

Storybook Cottage: Fable of Gables and Glass

In my last post I told you about the seemingly endless window leading process that I was mired in. I am happy to say that I did finish them, though they are not my finest work, were not easy, and I had several things "go wrong". The first challenge, and one I discovered that I am not very good at, was cutting the strips from the Lead Golf Tape. At first I tried using a straight edge and Xacto knife. I found the dragging metal feeling was like nails on a chalkboard and had to switch to scissors. The thinnest I could get the strips was about 1/16". That was cutting the lead strip in half, then cutting each half in half, and then all four of those halves in half. My cuts, in spite of monumental effort, were not always straight.


I used my saved window frame pattern in the Cricut Design Space and cut another set of frames. I sandwiched the leaded panes between the two frames before I installed them on the house. This made the exterior thickness 1/8" to match the window trim that came with the Storybook kit.


Before adding the "glaze" to the leaded windows, I tested what I had on hand. The first product (T) was Triple Thick, as recommended in the Glorious Twelfth leaded window tutorial. I left it on the window plastic for days, hoping it would clear as it dried, but it never did. The second (M) was Mod Podge. It too remained cloudy, but because of the way the texture stays raised, would make a nice effect if you were gong for the frosted bumpy surface look. The last product I had on hand (N) was regular top coat clear nail enamel as recommended in Casey's Mini's numerous leaded window tutorials. I must have a bad product, because not only did mine remain cloudy, it actually kind of melted the plastic. Faced with zero great results with the products I had on hand, I opted to use the Triple Thick. My panes, after several days, remain cloudy. I may or may not attempt to mitigate in the future.


Here they are, all 18, installed...


Had I known ahead of time, I would have made the four windows (bathroom side, bedroom and two small stairwell) only partially leaded so that you could still see into them under the leaded parts like the other twelve. You can still kind of see the display shelf and clock through the stairwell windows with the lights on. I may remove them and redo if I can find a better product to use in the future.

When I made the interior window frames and tiles for the kitchen's bay window, I knew I would eventually have to make the window sill/shelf. I used one of the kit's exterior trim pieces as a pattern, added pieces to meet up with the exterior window trim, facing, and then applied thick white cardstock for a smooth top surface. I then painted with the vintage white trim paint and installed. I filled gaps, and now just need to do some touch up painting. This will be a nice spot to grow herbs in the window.


Next I began to put some ideas into action on the exterior. I wanted to continue the potted tea plant theme from the interior to the exterior. I cut triangles from cardstock that fit into the tops of all three of the gables, then added the leaf and pot embellishments. I had to cut them down to fit the small area I had.


I also added small crown molding where the roof met the gables, large crown molding with corbels underneath, and board and batten trim.


There's a lot more trimming to do, including all of the fascia boards at the roof line, crown, tea plant embellishments and corbels for the exterior bay window, and framing around the dormer shingles. And then there's the roofing. Some will be copper, some speed shingles. So I'll keep plotting and playing as time allows.


And Camellia the kitty has reminded me that she would really like a comfy place to lie in the sunshine. Better get started on some cushions!


Hope all your experiments are coming out better than mine!

xo xo,
Jodi

Thursday, July 5, 2018

More Storybook Saga

This week's progress on the Storybook Cottage has been very slow and unsatisfying. I came to the realization that to begin on the exterior trim work, I'd need first to get the windows installed. That's been a major undertaking, so I'll just give you a sneak peek at how that's going. I like a lot of windows in a dollhouse, but when I realized I had 18 of them, and 16 needed leading, I had to gird myself for a long haul. The screen printed plastic that came with the kit is cute, but I wanted something more realistic. So 16 windows x 2 sides means 32 panes. Or should I say Pains? I won't even count the number of lead strips I need to cut and attach.


So for something fun instead, I thought I'd share a few of the wonderful and special things I've been collecting for the project. And boy do they inspire and make me excited to get to the decorating part!

Alex Meiklejohn


Ann Gilling


Ina Williams


Janet Uyetake


Janice Crawley


Julie Parrott


Julie Warren


Kim's Mini Bakery


Mini Gio


The China Closet


Valerie Casson


Veronique Cornish


Victoria Fasken


So as I slog through all the boring windows, then through the endless roofing, I'll keep looking these incredibly beautiful things, made by astoundingly talented artisans. They inspire me and keep me going!

Hope you've all got something special to keep you going too!

xo xo,
Jodi