Search My Blog!

Use the Search box below to find keywords that you're looking for quickly and easily!

Search Feature

Friday, January 19, 2018

Sinking Deep

I'm just full of ideas. And because of that, so is my house. This organizing spree has had it's merits: knowing what I have and reacquainting myself with those ideas. It's also had it's drawbacks: knowing what I have and reacquainting myself with those ideas. Um, yeah. So what to do... I know! Start actually making the ideas come alive! Starting with sinks...


Believe it and gasp, but the above photo includes enough stuff to make 26 sinks. Okay, vanities really, but with all sorts and varieties of sinks in them. Bathroom sinks, kitchen sinks, bucket sinks, bowl sinks, butler sinks, farm sinks... You name it, I have an idea for it. So rather than dwell on why in the H. E. double toothpicks any sane person would have stuff for 26 sinks, I'd rather just get cracking on turning the stuff for 26 sinks into the 26 sinks.


I had to start someplace, so I decided to begin with the Barewood wash stands I picked up from Minimum World while they were on super sale - like under $5. They are fun to nuke in the microwave, pull apart and rearrange or finish in imitative ways. I'm turning these three into rustic modern bathroom units with galvanized bucket sinks and pump faucets.

The buckets needed to recess into the sink tops, so the following steps are how I made the holes for them without a Dremel hole saw attachment.


I found a Woodsie that was the same circumference as the bottom of the bucket. I found the center of the sink top and drilled a pilot hole. Then I drilled another pilot hole into the center of the circle. Then I lined them up by pushing the drill into both pilot holes and traced around the circle onto the sink top. 


I drilled holes around the inside edge of the circle, then continued drilling holes until I had a very rough hole.


Then sanded and sanded until the bucket fit as deeply as I wanted.


I scribed boards into the sink top with a stylus and straight edge. Then I applied an undercoat of stain followed by several coats of chalk paint. Since this piece has a functional drawer, I had to cut a section from the back of the drawer so that it could slide past the bucket. Like many old and retrofitted wash stands, there won't be much drawer space, but some.

The back of the decorative backsplash on this piece had a recess. I decided to turn it to the front and fill it with tile. I measured, found a tile I liked, resized to fill the space then printed them onto cardstock.


I mounted it onto a 1/8" piece of soft balsa, then scribed the grout lines into it.


Then coated with several layers of Mod Podge gloss. 


The next steps will be to settle on finishes for the other two, age and rust up the pumps, decide on hardware and such. I also enclosed the bottoms on the two unfinished pieces to create a fake drawer. Theirs had opened bottoms and no drawer. I thought a little more detail, even if it didn't function, would be nicer. Hey - after these ones are done I'll only have 23 more sinks to go!


I drilled holes into the bucket bottoms and added eyelets for drains, I also attempted to make a silicone mold for drainpipes. I have so many to do, I thought I might try to make them myself. I have yet to cast them, as I could not budge the lid from the hardener bottle. It's been sitting in a drawer for a LONG time! Need bigger pliers!


Because of the shape of the pipe, I had to slice the mold to remove it. The masking tape is my attempt to hold it together long enough for the resin to set up. There will be sanding.

My attempts to bend copper, aluminum and brass rod to form my own drainpipes is still unsuccessful. They all seem to split past 90 degrees, heated or not. My future experiments will include solid rod. Hopefully, I'll have good info to share on that.

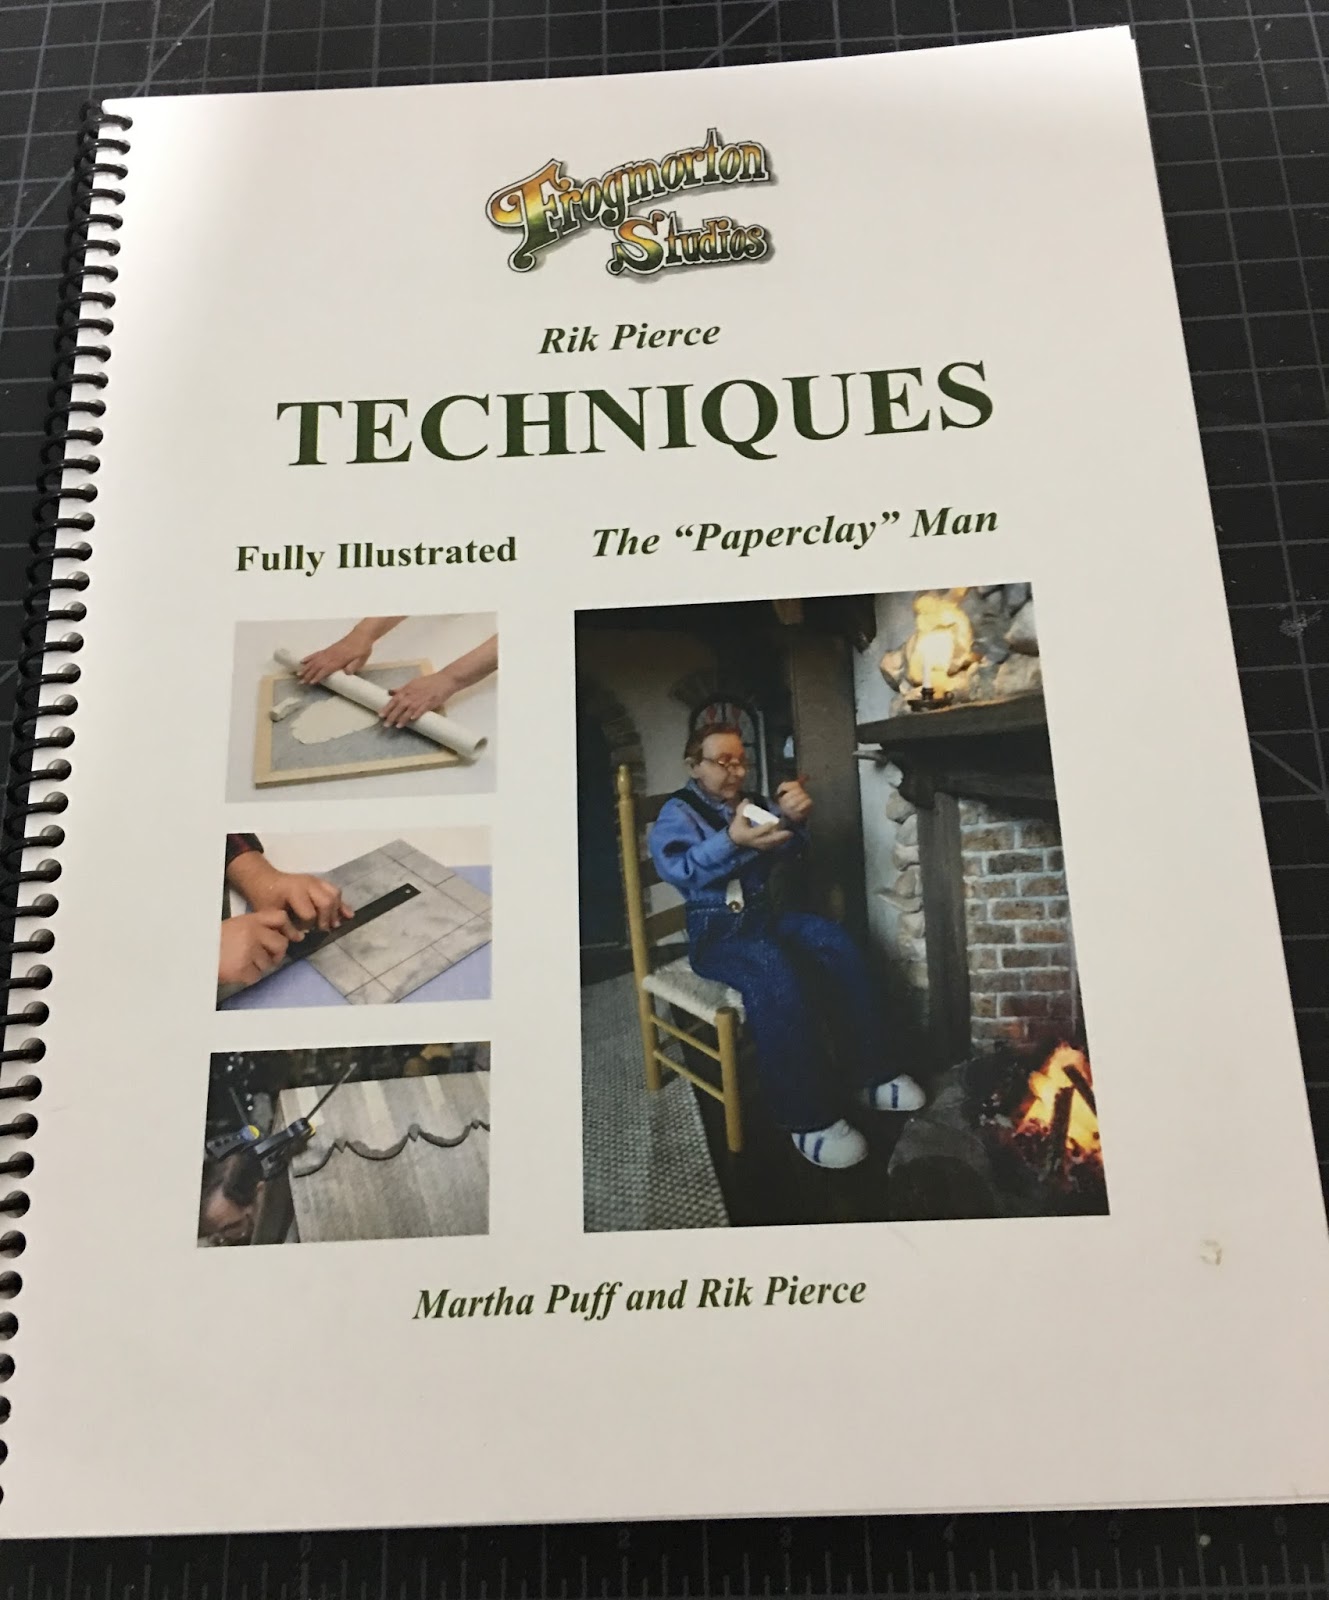
And finally, a recommendation. I received the Ric Pierce Techniques Book for my birthday last month and highly recommend that anyone who did not have the opportunity to attend his classes go get one! Your mind will expand, then explode with ideas! My daughter is coming over to work on our 1/48th scale fairy houses tomorrow, and I feel a whole new direction coming on!


Hope all of you are finding ways to turn your ideas into something marvelous!

xo xo
Jodi

Friday, January 12, 2018

Organizational Time Out

First of all, Happy New Year everyone! I hope you're all off to a great start! My resolution should be "no more mini purchases in 2018"! But why start out only to fail?


I thought I'd start the New Year by spending a couple days doing a little organizing in the craft drawers before I started or resumed another mini project. Ha! That was a gross underestimation! 12 Darice Floss Thread Organizers later, I am realizing it's taken nearly three weeks, working as I have time. I may still need 12 more organizers and another month to finish!


I won't bore you with details, just a photo of the chaos that is currently my craft table. I am sure you all know how quickly a hoard collection of kits, materials, accessories and supplies gets overwhelming, and how it becomes nearly impossible to find anything.


Let's just say that I have finished organizing and inventorying the kit drawers (yes, there is more than one), and a good number of the rest of the drawers have been sorted. Previously in "sorted by kind" zip seal bags, things have been put (mostly) into the divided storage containers. I think this will prevent so much of the time I spend searching and inevitably buying unintended doubles.


I won't scare you (or me) and count how many drawers I still have left to go, but I am making enough progress that I think I may be able to start actually making something again soon! And, it really has been fun to rediscover so many "back burner" dreams again!


Living vicariously through your posts - keep 'em coming!

xo xo
Jodi

Sunday, December 24, 2017

And Don't It Make Ya Merry!

I am so happy to have completed the Sweet Christmas cottage in time for Christmas! Here are my favorite photos of the project. For those that don't know (mom and dad), just click the first photo. It will take you to the viewing screen where you can click through them all in a much larger size.


Here we see Ellie and Jim enjoying the first of many Christmases in their tiny but perfect home. Ginger is pretty excited too! She can smell the treats in her stocking!


Here they are again about to kiss under the mistletoe.


May the blessings of Christmas, or whatever has you celebrating and finding life's meaning, fill you and yours with love that lasts forever!

The kitchen's smellin' Christmas like
with cookies, cakes and 'nog is spiked
the turkey's roasting juicy crisp
makes ya hungry just gettin' a whiff
anticipation, happiness
and don't it make ya merry

The tree's all strung with pretty lights
and ornaments strung perfect right
the gifts all wrapped with festive bows
and stockings lined up in a row
the firelight all warm, aglow
and don't it make ya merry

The night is peaceful, quiet, still
like every creature has the will
to reflect upon the grace
and put perspective in it's place
worry none, there ain't no trace
and don't it make ya merry

Christmas means a lot of things
and varied are the joys it brings
remember why we do it all
and you'll be ready when He calls
gratitude will fill your heart
and don't it make ya merry

It all boils down to just one phrase
"love one another", so simple and straight
show that love, you'll get it back
the more ya give the less ya lack
and on it goes, just works like that
and don't it make ya merry

(inspired by Speakin' O' Christmas, Paul Laurence Dunbar, 1913)

Merry Christmas!
xo xo xo xo xo xo
Jodi