Search My Blog!

Use the Search box below to find keywords that you're looking for quickly and easily!

Search Feature

Wednesday, June 21, 2017

Cornice Progress

Now that I have the cornice moldings painted and installed, I really like them. So much better than the original trim I had on the window tops. I learned how to use on hand supplies, just 1/8" basswood and chair rail trim, to really dress up the frames. If I'm smart, I'll make molds of the fancy resin pieces and have them on hand for future projects.


I like the lower profile and finer detail of the decorative resin piece I used on the dining room cornice, but I only had one. I still like the ones in the living room, just not as much.


I assembled the cornices using the arched front pieces I made on the Cricut, then added structure pieces on the top and sides using 1/2" x 1/8" pine scraps that I had on hand. I painted them with the Americana Blue Mist, the darker of the two shades in the color scheme since it was a closer match to the almost see through fabric.


The fabric is nice and lightweight, so it was fairly easy to mold onto the cornice forms using only Quick Grab Tacky glue. I really like the texture and wish I could get my hands on more of this fabric in different colors!


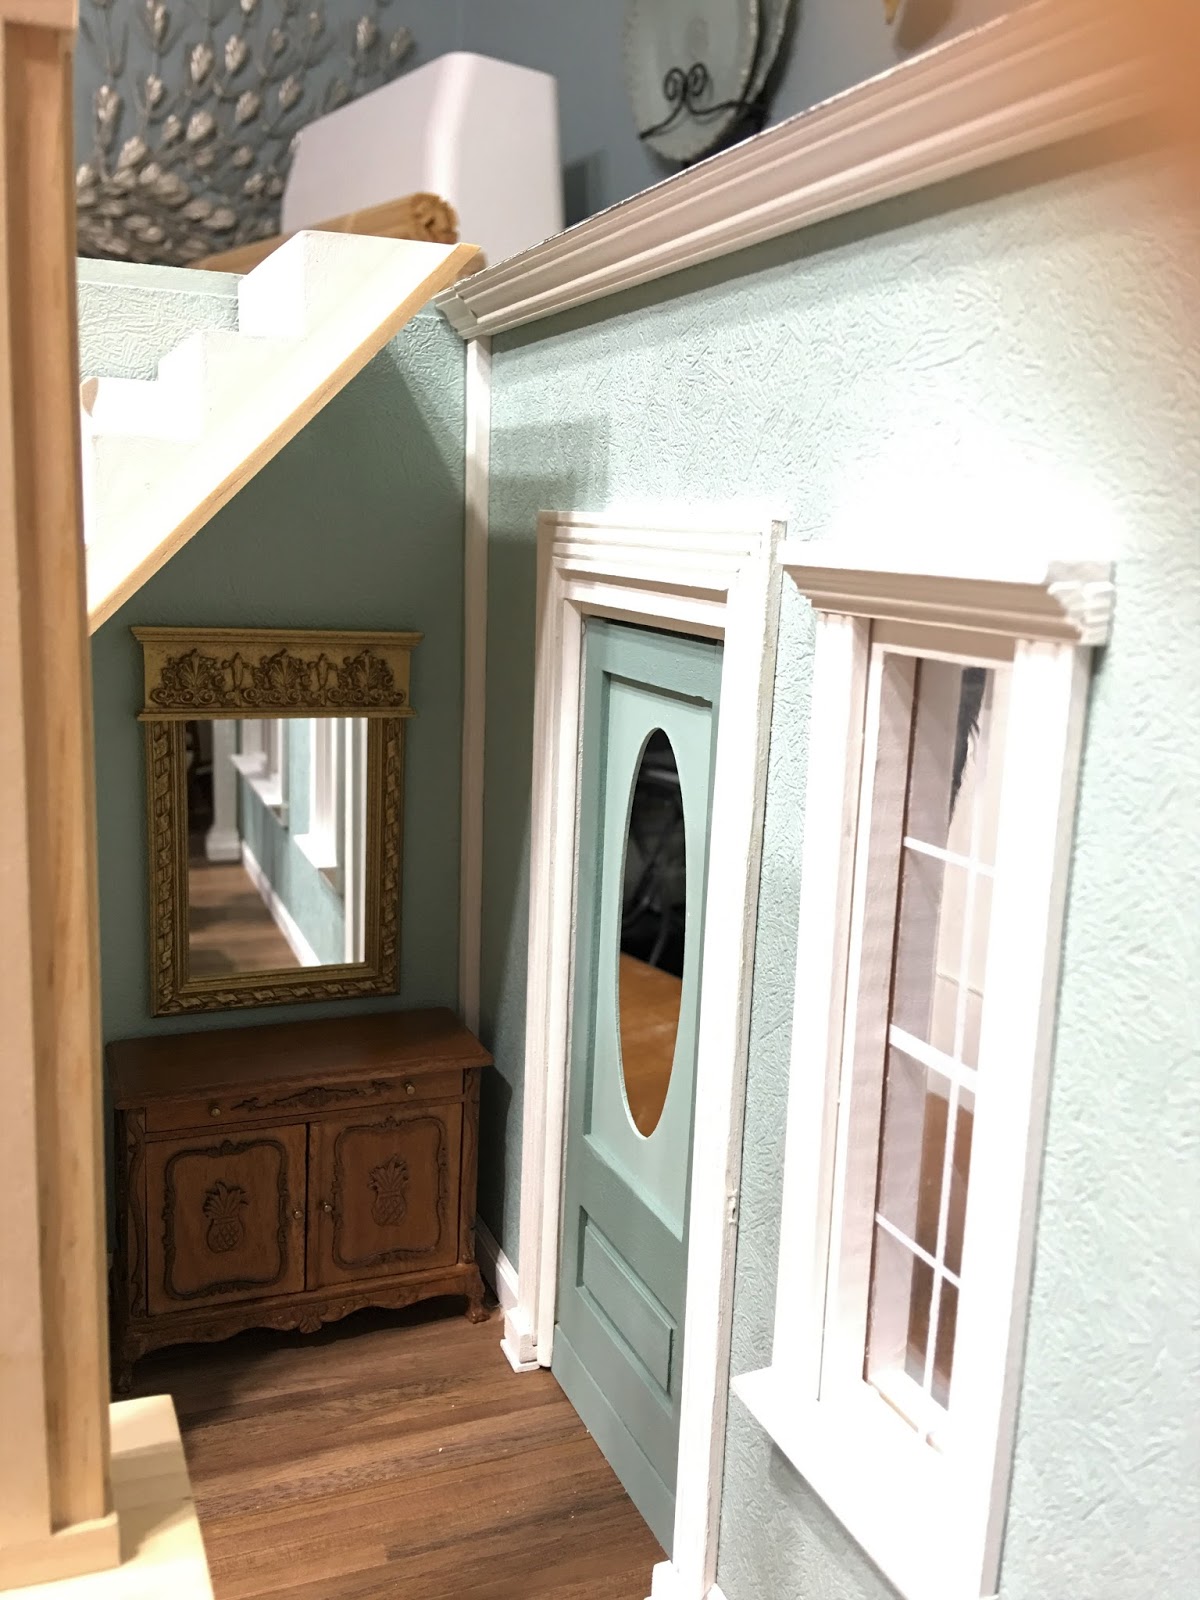
You can see that the color is a nice complement to the wall color, and is an almost perfect match to the darker door color. I like the way you can see the decorative moldings under the arch, so I'll most likely just have straight panels hanging down on either side.


I have the test pieces iron hemmed, pleated and sprayed. I'll pull them out when dry and see if the Stiffen Quick seems like it will do the job (from Brae's tutorial). If not, I'll try additional test pieces with Elizabeth's damp fabric/gel glue tutorial, or Sheila's watered down white glue method. One thing I noticed on my test fabric is that I'll need to have careful measurements overall and carefully calculate the hem into them. I ended up with a longer pleat on the end of the right fabric because it was too short for another pleat. I imagine this would look bad if it happened to my "real" fabric.


Also, I was watching a movie called The Queen. I noticed that all of the white moldings appeared to have some sort of gilding or highlighting and it looked amazing. Not so stark, and the detail showed up better. I found a couple photos online. What do you think? Should I give it a try? Maybe just a bit of chalk pastels brushed on would make a difference.


Anyway, off to bed to dream about the panels. Hopefully, I'll have some show and tell to share in the next few days!

Sleep tight,

Jodi

Monday, June 19, 2017

Redeux or Re-Do?

And I had such plans to make noticeable progress...

But instead I am in a bit of a do over...


It started out promising... Just add a couple thin strips to the window trim to make them appear that they open out. Then add pulls and viola - something done. Got the brass handles and door knobs coated with gilders paste to make them look more gold than brass. Did the same with the dining room chandelier and fireplace sconces. Liked it. The that's when the setback happened...


While I'm here, I thought - better start figuring out the window treatments. Some luck there, as a random piece of clearance fabric that I bought ages ago seems to blend nicely with the color scheme. Had previously made up a cornice with decorative molding for over the door to add some oomph. Thought "why not do something similar for the windows"? You know - turn them into cornices for the drapes to tuck behind. I have some nice resin pieces left over from the ceiling decorations.


Great idea, until I made the mock up. Should they be painted white or fabric covered? The white looked too stark. If I covered them with fabric, the molding pieces would look silly just sitting on top. So, all progress stopped which was just as well since I was out of ideas. Then that night, while laying there with a migraine and unable to sleep, it came to me. White decorative cornices over the windows as part of the trim, then arched, fabric covered cornices as the drapery treatments. You'd be able to see the good stuff under the window treatments, reference the arches everywhere in the build and it would make it more interesting. That idea had to sit there and marinate as my attention was focused on Father's Day activities.

Note how far it protrudes.


As I was testing different mock ups I realized that the trims I'd added to the tops of the windows stuck out too far and would interfere with the way the drapes draped. At least this was an easy re-do - they came right off with only a little encouragement.


I haven't had occasion to play with the Cricut in several months, but I knew this was my opportunity. I made mock ups for all three windows with card stock, printed and gave them a test fit. Once I made a couple adjustments, I printed again on chipboard.


The arches themselves will be covered with a little batting and the same material as the drapes which will hang down between the decorative cornices and the arched cornices. Now I just need to learn how to use the pleater. On some scrap fabric first.


I also cut the new piece of "glass" for the front door and got the interior handle attached. The decorative glass came in the same eBay lot as the door but was a little too tall and narrow. I am hoping that a couple more syringe applications of tacky glue in the cracks will be enough to make it appear like glazing and not look weird. If so, I'll have to cut some trim pieces to cover it up.

Hopefully the window covering part goes well and does not require any more do-overs. Then I can turn my attention to getting the ceiling on. That will surely feel like progress!

Have a great first week of summer, everyone!

Jodi

Friday, June 16, 2017

Casting Call...

I am finding myself a bit sluggish when it comes to getting started on The New Orleans again. I looked at the To-Do list I'd brainstormed before I left for AZ - the stuff I need or should do before I attach the ceiling/second floor, and had the old chicken/egg conundrum. Complete brain fog, and honestly what I really needed to do was to become excited about my ideas again.


I decided to just start something, so I reached for the Dremel to drill the holes for the lamp wires to run down through the floor. I had a rough idea where the lamp for the dining room would go - on the buffet, but thought I better just get it out and check the fit and placement. Not wanting to commit to either end at this point, I drilled a hole on either end. I'll make outlet covers later and feed the wires into them so they look more realistic. They may be hard to see in the second photo if you don't know where to look.

The dining room is difficult to access so I turned the house on its side.


Once I had that piece out, I decided I better audition the rest of the furniture and make sure it was all going to fit. I originally planned to have four dining chairs, but after loading everything into the narrow room, I think I'll go with two.


Since I added the larger staircase, the entry space by the front door became very limited in width and height. I exchanged the originally planned entry table with the small buffet because it was narrower. I had a couple mirrors but I wasn't sure which one was going where. In the end I opted for the shorter gilded mirror for the entry space. I'll adjust the height later when I know what lamp and accessories I'll be using here. For now, it was enough just to make sure the pieces will work and to get the lamp wire hole drilled.


I had a small table in mind with a lamp on top for in between the chairs. I am glad I didn't drill the hole in the floor until I checked the fit - with the shelf and column supports there is just no room. Now I'll plan an access hole on top of the shelf so I have the option to place a lamp there. Although there is not much room, I think the two chairs, coffee table and sofa are going to work out fine for the space.


Today I am going to spackle some gaps and touch up the paint. In looking at the photos, I am not thrilled with the white corner moldings and may paint them to blend in with the walls. I'll also decide on window and door hardware and get that installed. I have material to make the window coverings and probably also want to get them made and installed before the ceiling is permanently installed. Oh, and drill a couple more holes for can lights in the dining room, and install the can lights everywhere, and install the power strip plug behind the chimney breast and, and, and...

Okay - I think I'm rolling again. Just hope I don't forget something!

Have a great weekend!

Jodi