Search My Blog!

Use the Search box below to find keywords that you're looking for quickly and easily!

Search Feature

Wednesday, May 24, 2017

Very Little Progress...

I started to wonder why in the heck I wasn't making encouraging progress on the New Orleans build when it dawned on me: I've been busy doing other real life stuff for the past seven weekends! No wonder! And it's not about to get better any time soon. I am heading down to Arizona with my mom tomorrow morning to get the new retirement house all set up. We'll be gone at least two weeks, and when I get home, we have a family Father's Day camp out. Good thing all of this real life stuff is so fun and interesting - it makes the slow progress on mini dreams more bearable!


I got the enlarged stairwell opening cut, then traced out the rooms onto the ceiling so that I could decide where and how many can lights to add.


I laid out some of the ceiling decorations to help decide on the light placement.


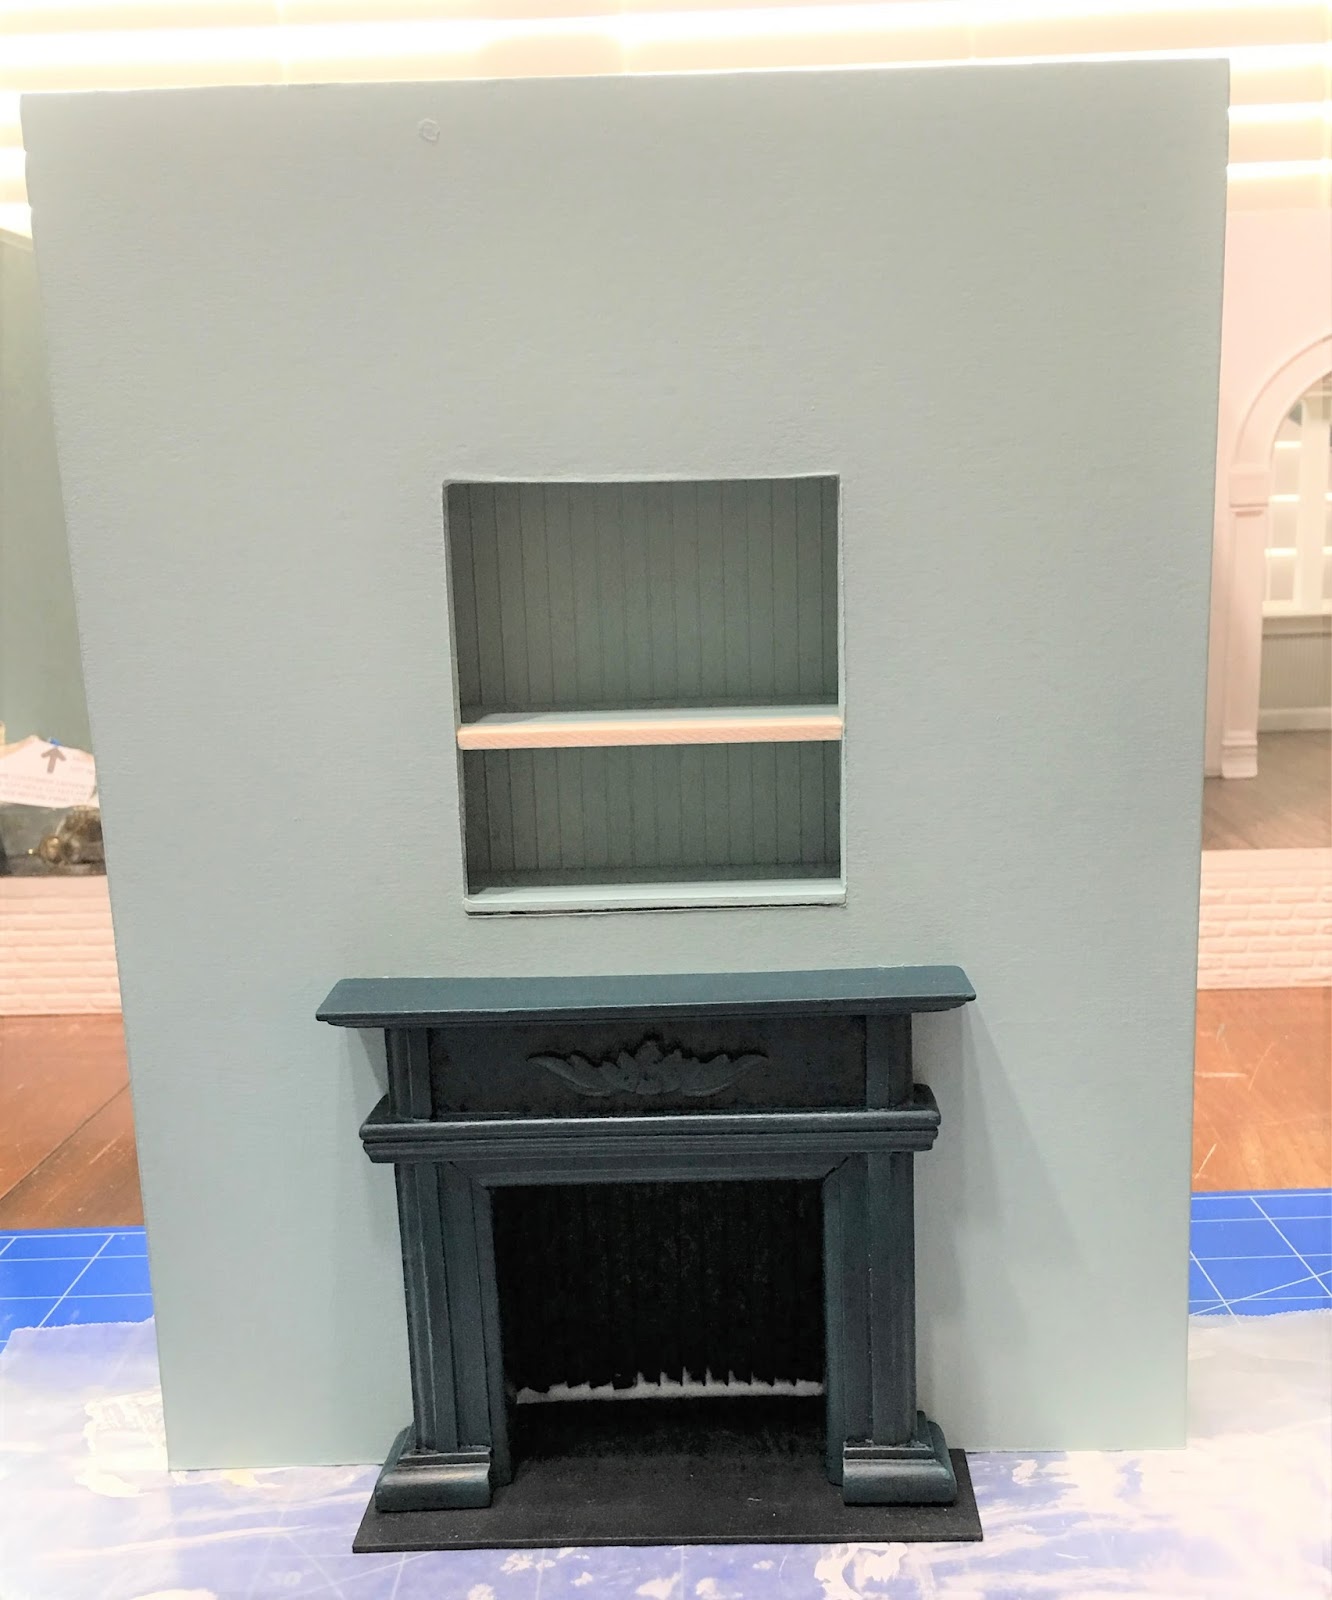
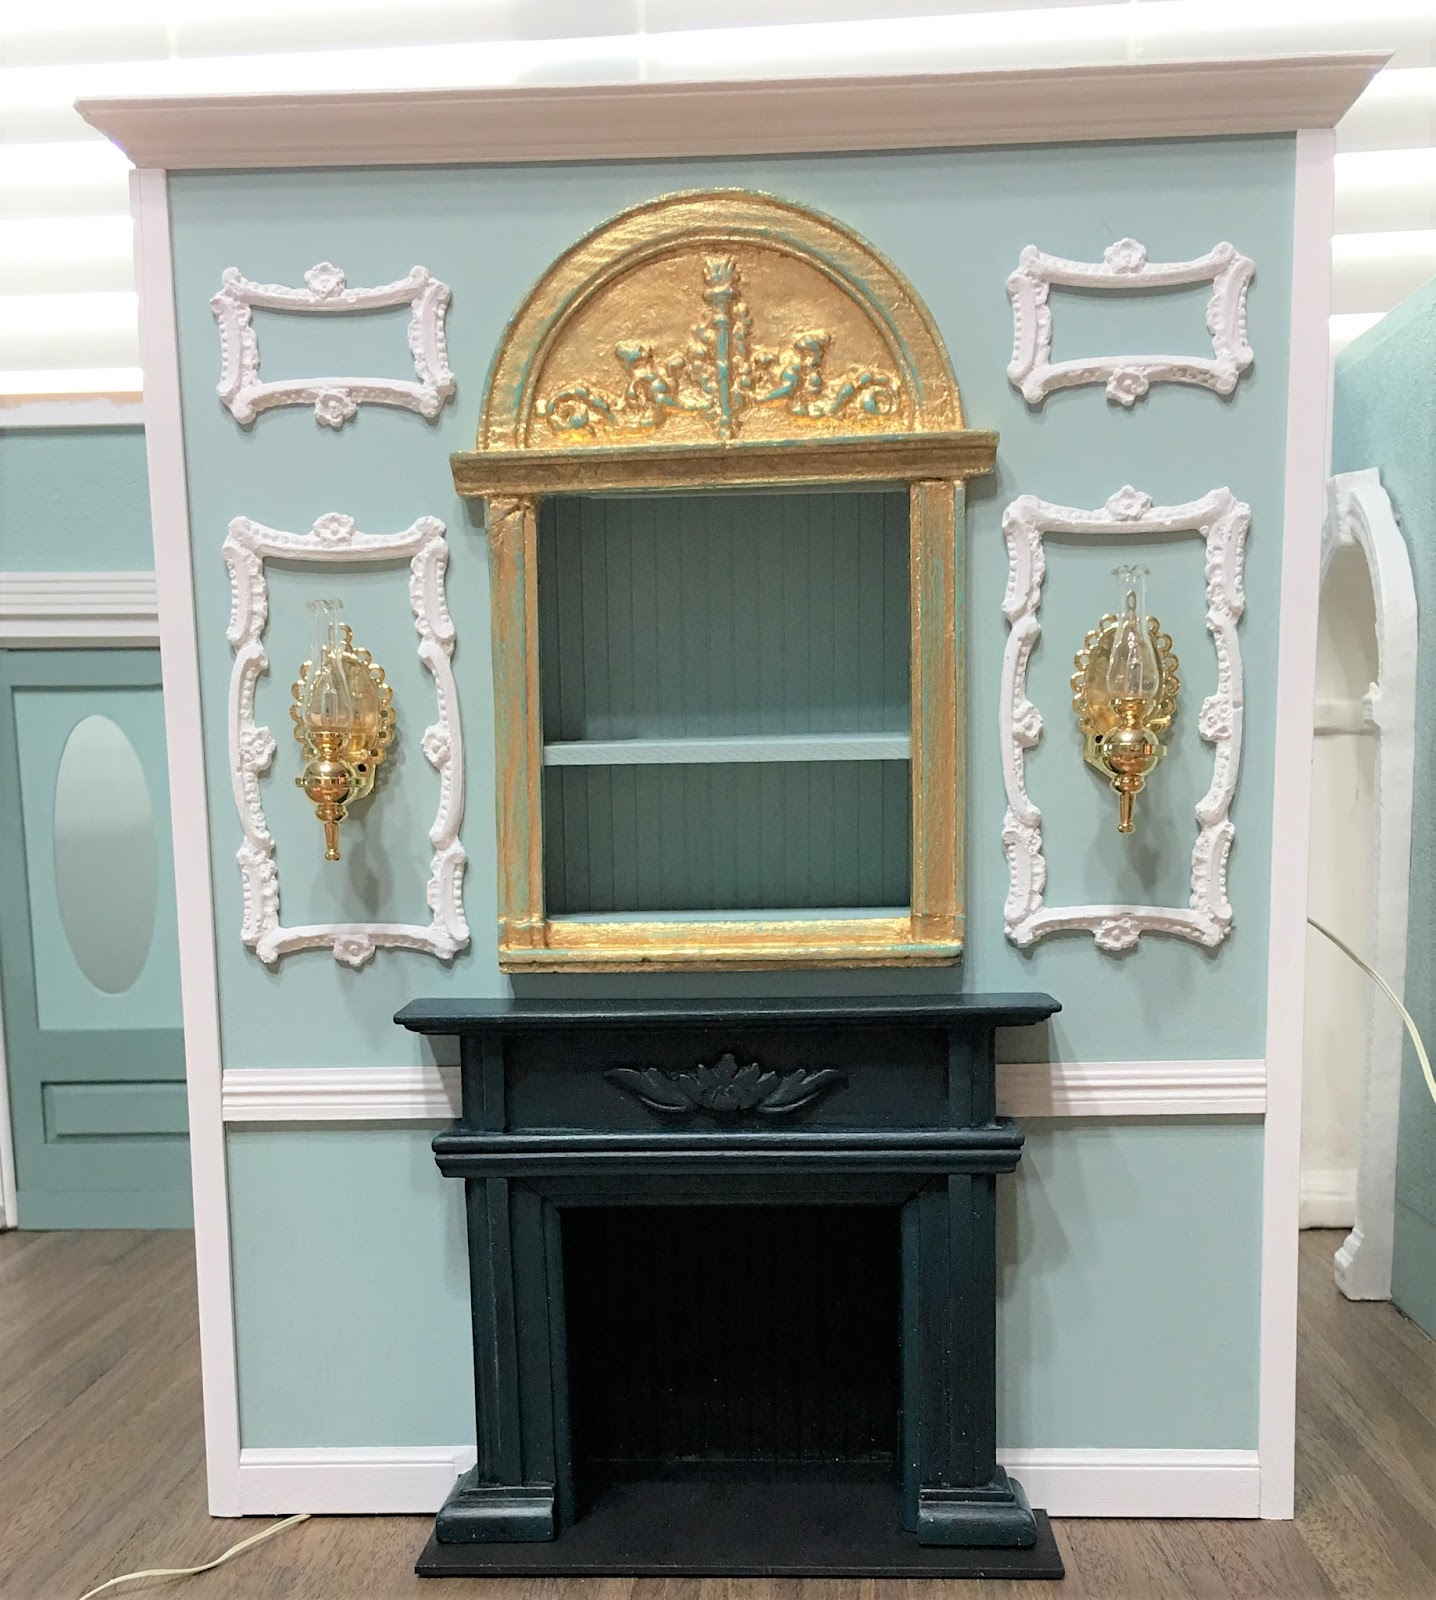
I decided not to put any inside the living room ceiling decoration because I will have the fireplaces sconces and a couple of lamps. I did leave myself the option of adding a ceiling fixture later if it looks like the room needs more light. The hall at the back of the room will have two can lights.


The kitchen is going to be a little more modern, so I decided to plan for four can lights and a possible hanging fixture over the sink. I still have a few left from all of the 3D printing and testing I did for Alki Point.


I'll have two in the porch ceiling in addition to a wall fixture by the door.


The lights I have are spotlight LEDs from JS Miniatures. They come in a set of 10 with the lights and eyelets for around $30 including the shipping from the UK. Although the bulbs are not flush with the ceiling, they are a much more economical option that the Novalyte can lights which run about $12 each. 


They don't seem too intrusive, so I think at 1/4 of the price that they'll work out fine.


Once I had all of the 1/8" holes drilled, I had to make the channels for the wiring. The large hole in the center of the floor is the hub where all of the wires will run to the power strip behind the chimney breast. I basically just marked, scored then chipped out the plywood to make the grooves. Hopefully they are all deep enough or it will mean more sanding.


Oh! One quick tip for getting a good non slip grip - put a silpat under the board or saw. It's nice not to have things move on you! This one is dedicated for minis, and I also use it to cover the cookie sheet when I bake polymer clay.


Here is the ceiling after the ceiling paper has been applied.


And the test fits.


Next I dug out a whole mess of stickers, Dresden and findings to try and come up with the ceiling decoration for the living room. I hope in the end it's not too busy and not too plain.


For the dining room, this is all it needs. The crown starts where the pencil lines are, and because it is behind the kitchen and the arched doorway you will hardly see it at all. I'm going to add a fancy chandelier from the center above the dining room table.


I debated adding the faux tin ceiling in the kitchen, but in the end decided to add it and paint it sea foam. The rest of the kitchen will be white, including the tile, so it was a chance to add some texture and a little color.


Here's the living room ceiling after two coats of ceiling paint. I also added trim to the columns, but haven't gotten to paint them yet.

I hope all of you have a ~W~O~N~D~E~R~F~U~L~ Memorial Day Weekend! I'll post anything interesting and/or mini related while I'm basking in the Arizona sunshine. A Trip to Auntie Em's, perhaps? I hope so!

Jodi

Friday, May 12, 2017

Everybody's Catching Spring Fever!

Every day when I come to check out my blog roll, there seems to be new posts! It has made it such an awesome week getting to see what everyone is working on - seems like we all have a touch of mini spring fever!


Russ and I threw a bag in the Jeep Saturday morning and headed for one of our favorite places to camp: Gifford Pinchot National Forest. Skate Creek Road, closed seasonally as soon as the first snow appears, was finally open. It's a beautiful and lush drive that starts just before the Mt. Rainier National Park entrance gate. So many waterfalls, and thanks to record rain and snow pack, the rivers and creeks were running high. We found that several forest service roads had been closed due to severe storm damage, but we were lucky to find a beautiful spot on FS Rd 26 just north of Mount St. Helens. The weather was beautiful, it was so peaceful, and we came home Monday with a full tank of zen!


With the remaining free time since my last post, I was able to make some ground on the New Orleans living room and stairs. Because of the sunny/cloudy/sunny/cloudy light fluctuations this week, I had to use a combination of flash/no flash in the photos. I usually don't like using the flash - it makes the photos seem like they are caught with their panties down in some weird way. Anyway, I apologize in advance for the lighting in the photos.

No Flash

With Flash

I never have built in a staircase, so I wanted to give it a try. It seemed that the best material to use might be illustration art board. It's very sturdy, cuts easily with an Xacto and is made for watercolor, so it's not going to mind moisture from glue or paint. I took a piece and placed it behind the staircase so that I could draw the correct angle to cut.


I planned to box in only a portion so that there was plenty of space to enter the front door. I love how old houses have these quirky little features. When I cut the piece for the left side, I left it a little higher so that it would also become the stair trim on the wall.


Sun is out!

Once all of the pieces were measured and cut, I did a dry fit to make sure all of the angles were right and that the bottom edges were even. Tippy stairs are no good! Luckily, it fit and functioned perfectly! There is no room at the end of the stairs, but it is what it is and I am okay with pretending that the floor extends beyond what is presented.


To make everything square and secure, I added support strips to the art board and to the stairs. This made the gluing and clamping much more stable.


In keeping with the little touches of frou-frou in the build, I added some pre-fab resin wainscot molding. The stuff is easy to cut with a scroll saw, but not at all easy with a razor saw (at least that was my experience). Sanding the stuff is also very easy. I don't have a way or the right tool to miter the edges vertically, so I had to play around with the trims I had until I came up with something acceptable where the corners met. I am okay with the cornice molding, and hopefully when I fill and paint, it will look meant to be. One other note about the resin pieces from Unique Miniatures - I had 5 pieces of the wainscoting and none of the thicknesses were consistent with each other or from one end of the piece to the other. Also, two of the pieces were slightly taller than the other three, and the baseboard relief was a little different. The stock numbers were the same, so maybe they were just manufactured at different times? Anyway, if you are planning to use it, maybe ask when you order for them to check the consistency for you.


One of the changes that I am making to the kit is to eliminate one of the three upstairs dividing walls. I'd also like to expand the staircase opening so that the house has a more open feel. The opening is going to be roughly 10" deep x 5-1/2 wide. I'll add railing around the opening upstairs so that it creates a balcony looking down onto the hallway and stairway.  Because I am removing some of that structural support, I decided to add in a half wall with columns. I am hoping it will not only support the ceiling, but will add visual appeal and more space for displaying decor.


Between the chimney breast and the divider/support the floor space in the living room is getting tight. I'll have about 8" x 12" left to fill. I think it will turn out fine as long as I carefully choose the furniture. I do like the look of a crowded dollhouse, though - it seems more homey and less formal. If I can achieve a nice amount of architectural detail in the background with a lot of lived in too, I'll have reached my vision!


I left the top free from the shelf thinking it would be a good idea to attach the columns to it with glue and nails. Then I'll add some trim where they meet the surface and ceiling.


Next I have a lot of filling, sanding and painting to do before I can begin the ceiling lights. It will be so nice to have consistent interior lighting to help with the touch up and trims. Prudence tells me NOT to install treads and railing to the stairs until I absolutely HAVE to. It will be so much easier  to install the remaining trim work with removable stairs.

Happy Mother's Day to all of you who are moms and caregivers! I hope you feel all that love coming back to you, and that you are as treasured as you should be!

xxx ooo.
Jodi

Thursday, May 4, 2017

All That Glitters...

The garage sale with the folks last weekend didn't rid my parents of all of their unwanted stuff, but they got rid of some, and in-between customers and in the evenings we had a wonderful time together. Mom took all of the unsold items to Goodwill on Tuesday, and said that they are a lot closer to getting the house listed. We are hoping that mom and I can head down to the new house in a couple weeks and start getting it set up. She loves the heat and is looking forward to 110 degree temperatures. My perfect day is sunny, 75 degrees with a light breeze. I predict that I'll be feeling grateful anyplace there is air conditioning!


Okay - on to the New Orleans kit update...

I really thought that I'd be farther along than I am by now, but I've run into a few things that were a bit challenging. One of them was my desire to have arched doorways and the resulting structural changes and additions to accommodate them. The other was having to scrap the first chimney breast wall/bookshelf/fireplace and make a whole new everything. As is usually the case, try 2.0 was a big improvement.


I started the same way as before with some foam core. The measurements I needed for the wall were 10" H x 8" W. It just so happens that I have pieces of foam core in that exact size. I love when that happens! Instead of using another of the thicker arched doorways for the outside frame of the bookshelf, I had a much less hefty door frame. All it needed was to be cut down to the right height. I cut out a section on each side then rejoined the bottom trim to make the bookshelf frame. You see in the photo that rather than try to fit the bookshelf and the fireplace side by side, this time I opted for a stacked arrangement.


I had this fireplace - it was one of those "changed my mind" leftovers from the flower shops. I also had the fru-fru wall moldings in the "maybe, someday" drawer. I figured I'd run the crown along the top of the chimney breast to make it look more permanent, and the corner moldings would tie it into the rest of the walls in the living room.


One of the design elements I have in mind for the room is to sprinkle in some gold accents. I've had the fake gold leaf and sizing in my "just have to try this" drawer for a long time. I was happy to come across it again and the bookshelf frame seemed like a perfect piece to try it on.


There is definitely a learning curve, and to that end I had to go at it three times with the sizing/glue to cover spots I'd missed the first two times. It's the nooks and crannies that are tricky. You have to apply an even coat of the sizing without letting it puddle. I was too stingy or too generous, it seems. In the end I liked the results and can't wait to try it on other things!


I felt that the finish was a little too shiny and new looking, so I rubbed some Inca Gold gilders paste wax on to add deeper toned highlights. I really like the effect, so then I added a bit of the patina wax, too! I like the highlighting effect and that it ties into the color palette for this room.


I built a new shelf box but was able to recycle the fire box from the 1.0 chimney breast wall. I've purposely lined it with bead board painted black - I want the fireplace to be a reno that's been updated to accommodate candles rather than a fire. It's just something different to try out.


I sanded down the shiny black finish on the fireplace but had no earthly idea what to do next. I had just about made my mind up on painting it white when a blue thought came to my head. I reached into the back of the color coded paint bottle drawer to see what blues I hadn't used already.


That's when I found it! A wonderful peacock blue! I knew right then that it was no chance encounter - it was a synchronicity! One thinly brushed on coat over the sanded black was perfect! I added a coat of beeswax and I love the finish! And I love the color against the sea foam wall!


I love the gold, too! Even the gold colored light fixtures (for the first time ever)!


It took me every spare moment to get the chimney breast wall to this point, with trims and lighting installed. I have some ideas for lighted candles, so the next chance I get to play I may start in that direction.

When I think about the To-Do list I have the optimistic impression that I can finish it in a weekend. More likely, I'll be lucky to have the crown molding installed and stairs built by the end of next weekend.

I hope everyone has a festive Cinco De Mayo and a fun filled weekend to follow!

xoxoxo
Jodi