Search My Blog!

Use the Search box below to find keywords that you're looking for quickly and easily!

Search Feature

Saturday, August 6, 2016

Making A 1:12 Scale Bath Pouf


I'm making lots of accessories for the HBS Creatin' Contest build and one of the items I thought would be fun for each pig to have was his own shower pouf. I have some tulle in a few different colors, so I went in search of a real life tutorial. I found this one, and thus began some trial and error to adapt it to a 1:12 scale, doable project.

Supplies needed:

  • 3 strips of 6" x 1.25" tulle or netting with a small weave for the pouf
  • Scissors
  • Needle
  • Thread
  • 1/4" x 1/4" basswood (or scrap wood of close measure) cut to 1.5" long for the handle
  • Sandpaper
  • 3/32" drill bit and/or pilot hole punch
  • Thin string or hemp rope 
  • Tacky Glue


For The Handle

1. Cut handle wood to 1.5" long. I am doing multiple at a time hoping that the odds will help get me a better result.


2. Using sandpaper or sanding block, round off edges to shape as a handle. Be as basic or as fancy as you like.

3. Drill a hole towards the end of the handle which is large enough for your string or hemp to pass through. Mine were about 1/16" from the end.


4. Paint and/or seal as you like. I experimented with different stains, but ended up liking a Folkart Honeycomb watered down a bit.

5. With your string, tie a hanging cord through the hole. I found that by coating the string in some tacky glue I could get the knot very small and it would not come undone. Cut off excess ends.


6. Set aside.

For The Pouf

1. Cut 3 strips of tulle 6" long x 1.25" wide


2. Fold each strip in half lengthwise. I found that I needed to set something heavy on top because it would not stay folded while I folded the other strips.


3. Stack all three folded pieces on top of one another with the folded edges on the same side. I used a clamp to hold them in place while I worked.


4. Using a matching thread color, run a basting stitch down the center of the entire length of the folded pieces.


5. Cut the open edges to make them straight if necessary.


6. Pull the thread to begin bunching the tulle.


7. Coat the end of the handle in a little Tacky Glue and then place the handle into the center of the bunch.


8. Cinch up the tulle wrapping it around the handle, then wrap the thread around the center of the bunch about three times to secure it to the handle. Tie off the thread and cut excess.


9. Leave to dry a bit before handling too much.


I made about five of them before I got the hang of it. It is a bit fiddly, and maybe one of my mini genius readers could suggest a better method. Please feel free to leave comments!

I am happy with the results and am happy that Bob, Joe and Sam don't have to share a bath pouf!


I am going to keep going with this marathon of little projects and postings until the minute I get pulled away to real work! This deadline thing is kinda working for me!

Enjoy your weekend!

Jodi

Thursday, August 4, 2016

Still Waiting...

A couple of weeks ago I was told that the "take over your whole life" part of my job was likely starting a week early. Now the news is that it might be another week. It sure is difficult to make plans when you're in "wait mode". So, what better to do than a series of little projects on the HBS Creatin' Contest build!


It seems to me that little pigs would have lots of indoor activities at their disposal. You never know when a bad wolf might be lurking outside. So, having books to read and games to play would be essential!

I have a few of those cute but not always in scale cabinets that Michael's sells. They are always good for quick projects, like a bookshelf. Here is what I started with.


About 30 to 45 seconds in the microwave will usually loosen the glue up enough that you can pull parts off. TWO IMPORTANT CAUTIONS:

1. PULL OUT ALL METAL DOOR PINS BEFORE YOU ZAP IT! THERE ARE USUALLY TWO FOR EACH DOOR - TOP AND BOTTOM.
2. HANDLE WITH A POT HOLDER WHEN PULLING OUT OF THE MICROWAVE AND AS YOU ARE PULLING OFF THE PIECES! THEY ARE ~H~O~T~!!!


These are the parts I pulled off to use in another project someday...


These are the parts I will use. I had to add my own bottom shelf piece from my scrap bin because the original bottom was an inside fit and did not want to come off without splitting. This sometimes happens. Sometimes you will even have to make a small repair to splintered off pieces after you pull the doors off. A little wood glue and some sanding does the trick.


I taped off the top of the shelf and painted the body in the same Georgia Clay that I've used for much of the furniture in this build, then stained the top and shelves in the same Chrysnbon Fruitwood stain that I seem to have oodles of packages of. After it dried, I put two coats of ultra matte sealer on and let that dry thoroughly.

Now, to fill the shelves... I ordered a sheet of the vintage cut & glue game boxes from HBS. It was my first time using them, and they are really cute! Patience while cutting them out, and then letting the glue dry thoroughly before handling them is the trick. The mini clamps are also a must have. I suppose you could use paper clips in a pinch. I also went over the edges with a sharpie where necessary.


I saw 
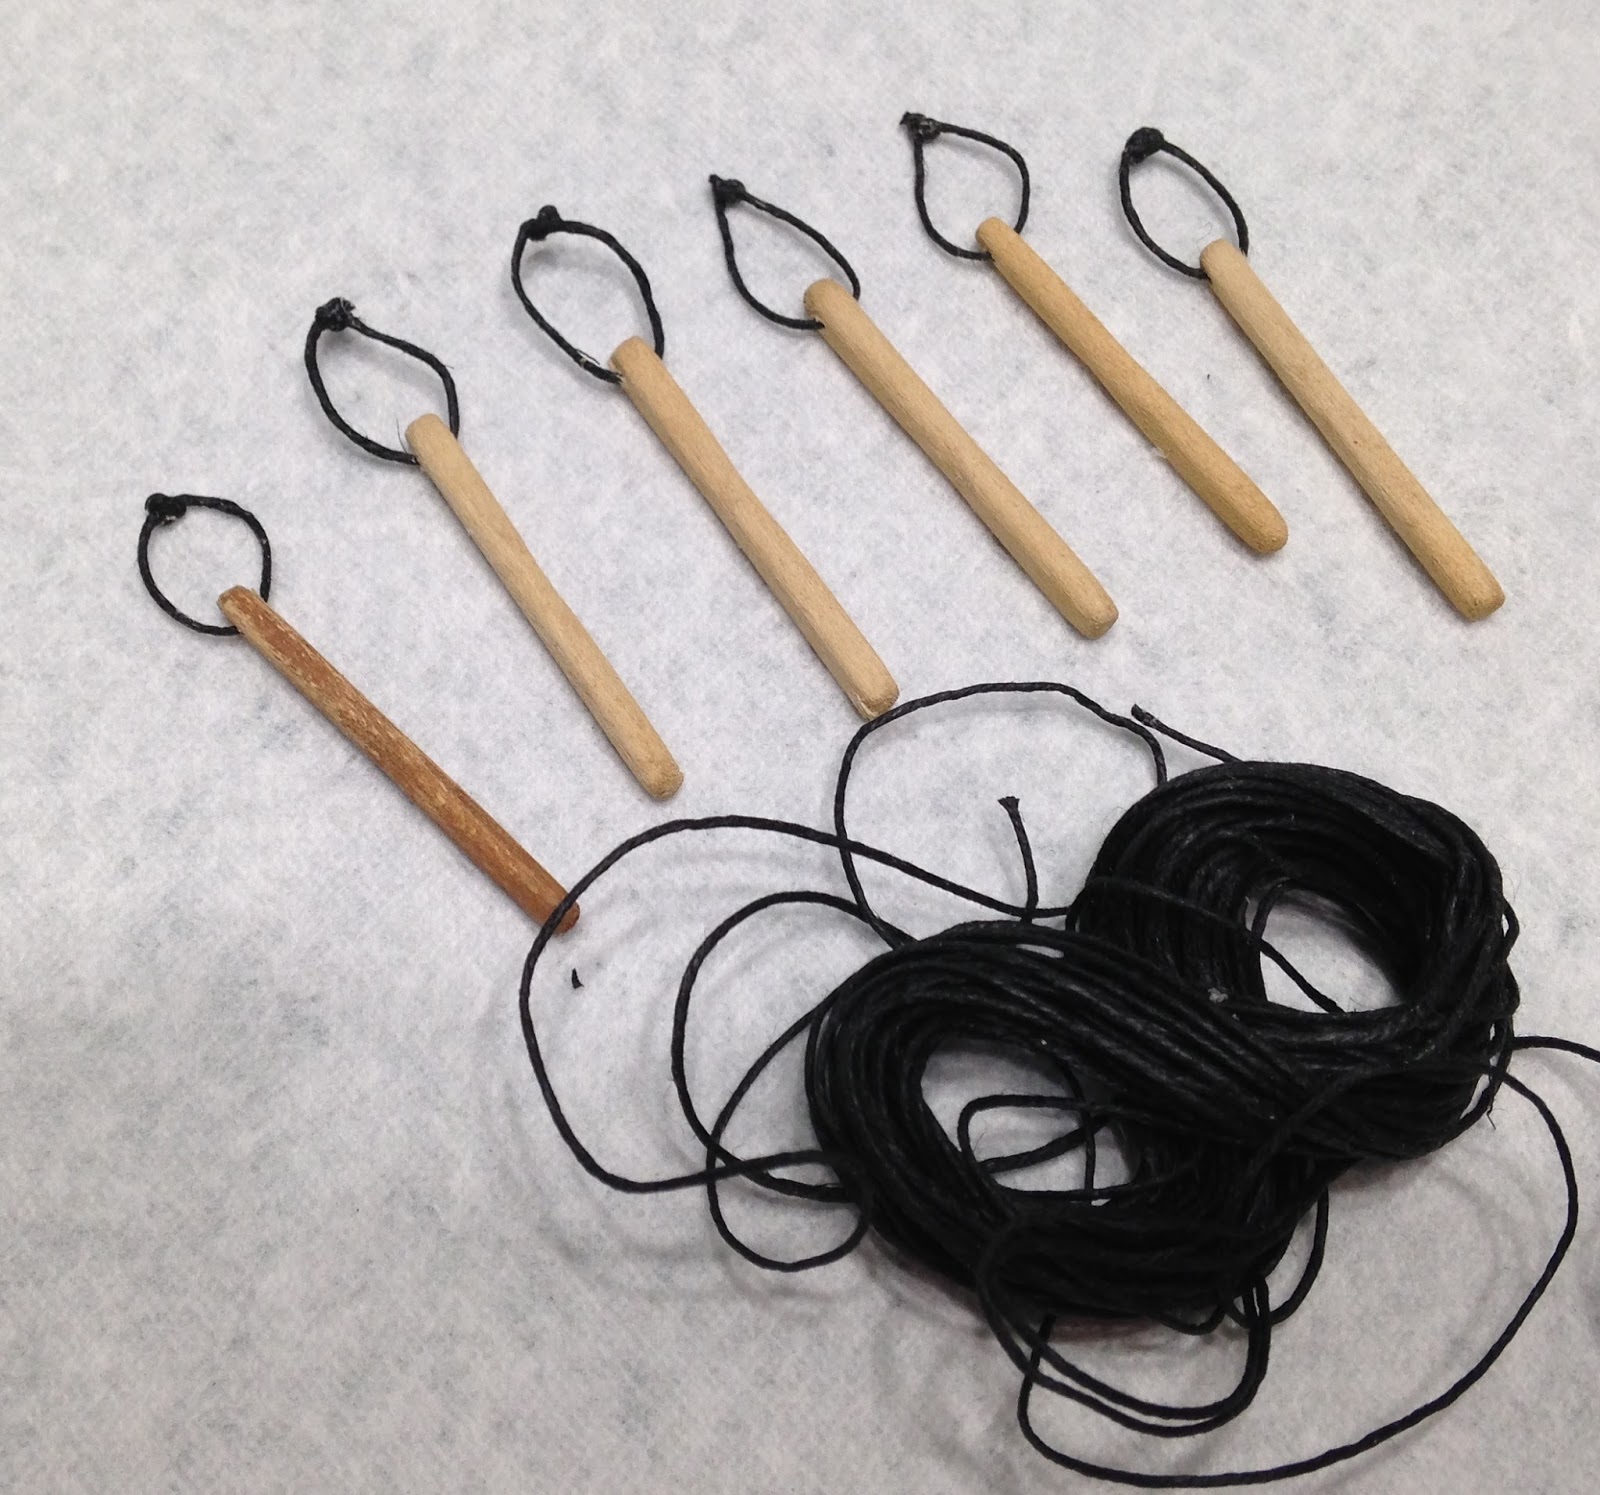
Marilyn's video about a kit she purchased to make loads of books. I decided to give it a shot using my own blocks of wood and my own printed covers. Some of the books were double thick by gluing two pieces together, and some were just a single piece of wood. Once I had them measured and cut for the shelf, I painted the edges with a Folkart paint called Linen.


To make the covers, I just measured how long and high they needed to be as follows:

Front 3/4" + Spine 3/8" + Back 3/4" + a smidge more to fold the front edges under = 2"

Height 7/8"

I converted the measurements to decimals using this handy Fraction to Decimal chart. This meant I needed them to be:

Front .75" + Spine .375" + Back .75" + a smidge more to fold the front edges under = 2.0"

Height .896"

In my drawing program, I made a box for the front, spine and back at the height I needed. Then I grabbed nice book jackets off the interwebs and resized them to fit into the boxes. In some cases I had to cut up the images, regroup and reconfigure them.


Then I printed them out on matte photo paper and gave them a coat of matte Mod Podge.


Once dry, I cut them out and colored the edges and a bit of the inner cover with coordinating sharpies. I used Mod Podge to adhere them to the wood blocks.


Once the shelf was dry and the books and games were completed I could load them up! I even had a special little piggy bank to add to the shelf.


A fun, easy and quick project to fill the time until there is no time. For minis. that is. Now let's see what else I can bang out before the chaos begins!

Back soon, I hope!

Jodi


Tuesday, August 2, 2016

Furious Finishing!

I've been working as furiously as possible trying to get as many of the mundane tasks done as possible before my attention has to shift to work. This way, I'll have the fun and impactful stuff to look forward to when I can finally get back to mini-ing!


For this project, the set design includes loads of bricks! That's a lot of fiddly and repetitive detail just for a backdrop, but it is all about the details, right! So, I got out the egg cartons and paint to make a ton of bricks (snicker). I recycled a priority mail box to build the chimney and the chimney breast.


I covered the exterior in a layer of mud brown before applying more of the Magic Systems brick stickers. There was a lot of area to cover, so when I applied the mortar I had to work quick! Thankfully, it went very smoothly and I even managed to contain the mess to the brown craft paper I'd lined under the structure!


Just like the inside, I did not care for the flat monotone brick red color of the mortar, so I went at each brick with a warm color palette of acrylic paint. Once I was satisfied that there was enough diversity I gave them an overall ageing wash of watered down burnt umber.


Luckily, I had enough of the egg carton brick left to do the front porch floor. It and the chimney assembly also received the burnt umber wash. I think I'll wait to actually attach the chimney assembly until after I do the roofing. This will save me from having to work out complicated cuts in the speed shingles. These are the diamond shaped ones I was going to use on the Sugarplum roof but decided they were too big for that small house. I think they'll work perfect for the little pigs roof.


I crafted the kitchen faucet out of a couple spigots and a piece of scrap wood. I had the soap holder and bar of soap from the sink kit, so I added those and made the little bar of Lava. That seems like what crafty little pigs might use.


I was able to cross some things off the long list, and I am trying not to think about the fact that by the time I start working on the contest build again I will have less than four months to finish. I have some adorable things in mind, so I am really looking forward to getting back to the fun of it! I hope you all are truly enjoying your builds, as well!

See you again soon!
Jodi