Search My Blog!

Use the Search box below to find keywords that you're looking for quickly and easily!

Search Feature

Showing posts sorted by date for query geraniums. Sort by relevance Show all posts

Wednesday, June 19, 2019

Summer In New Orleans


As I begin to put this post together, I am realizing that it may end up a little long. There were a lot of little things to do, none of them post worthy on their own, but now that they're done, they've really added up! I skipped around on the tasks, too, so I'll try to make sense of the potentially disjointed photos. Hopefully, you won't get too board or overwhelmed before the end!

This was the electrical tangle coming from under the house that needed to be camouflaged into something that looked like it belonged there. In addition, the second floor wires had to somehow join up with them. A shed and drainpipe seemed the best way to organize the mess and make a convenient electrical hub.


I used 1/8" basswood to construct a basic shed.


I had some really old and stiff hinges for the top of the shed. The outlet strip fits just inside. I mad an access hole in the floor to feed the first floor wires into.


The second floor wires are fed down from the roof and hidden in "copper downspout". You can see in the second photo below that I also added braces to the pipe and the roof crown molding is installed. The front doors are completely removable for wide access, and slide into a groove on the lid.


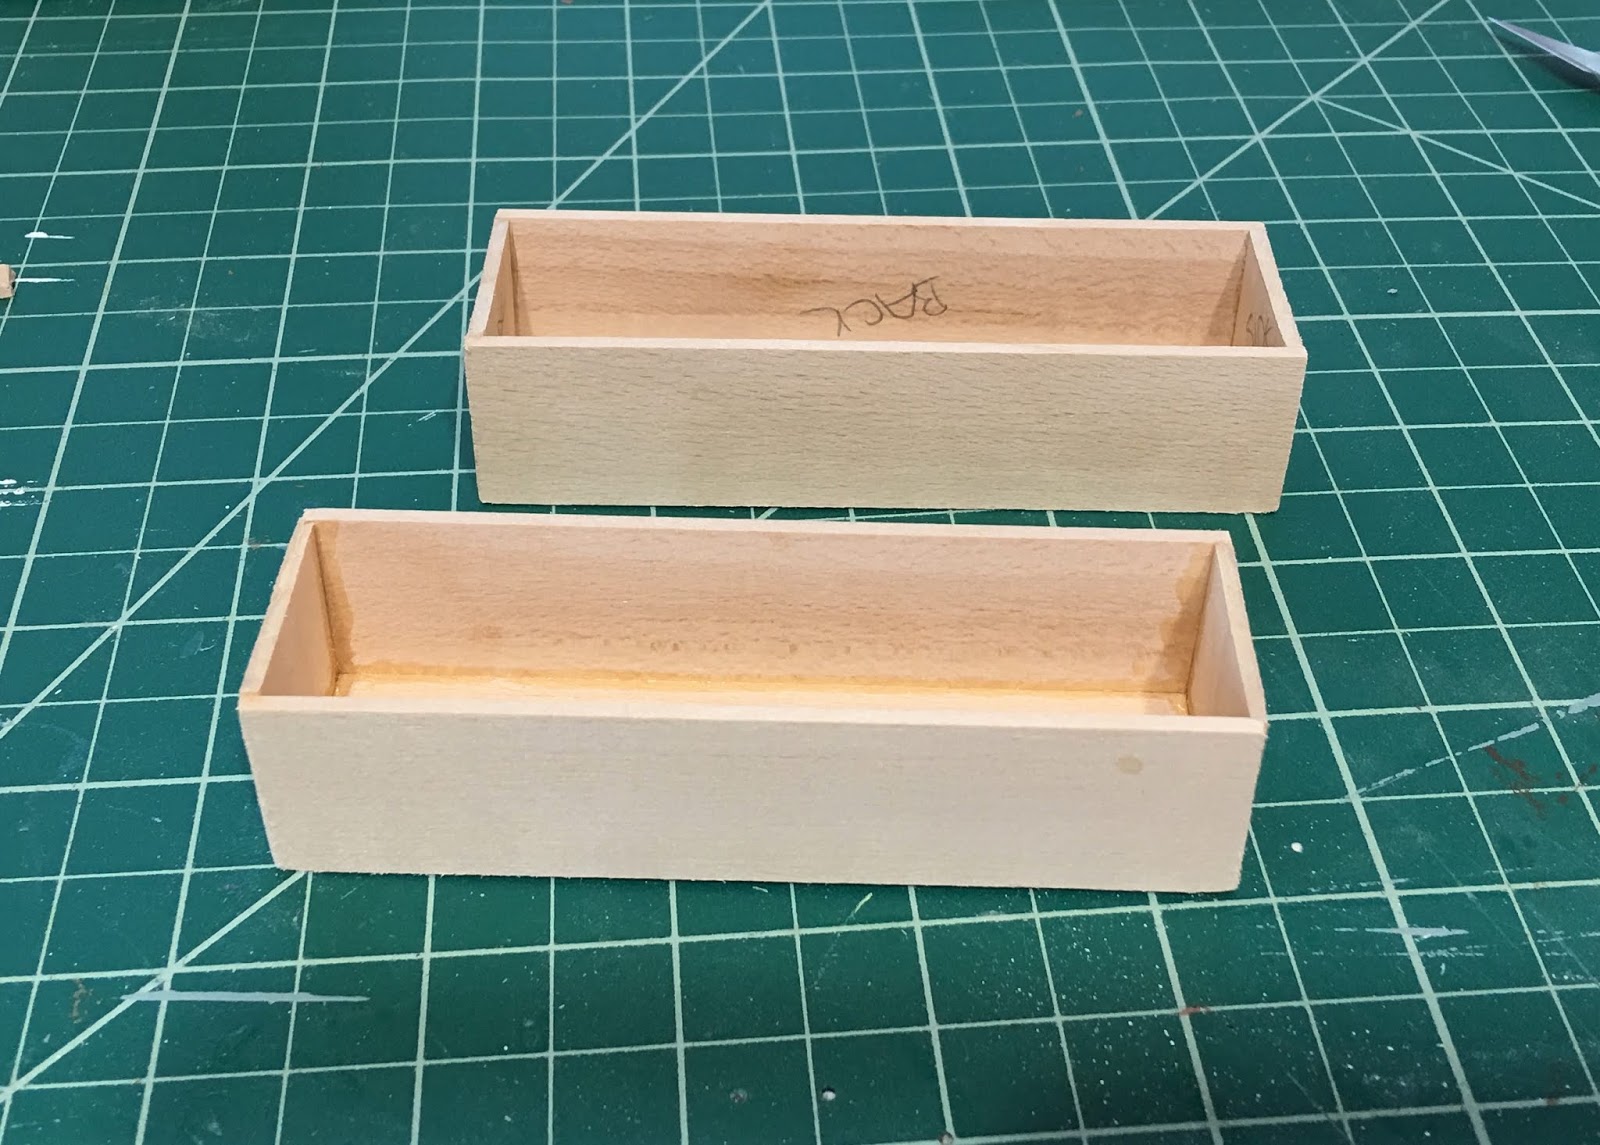
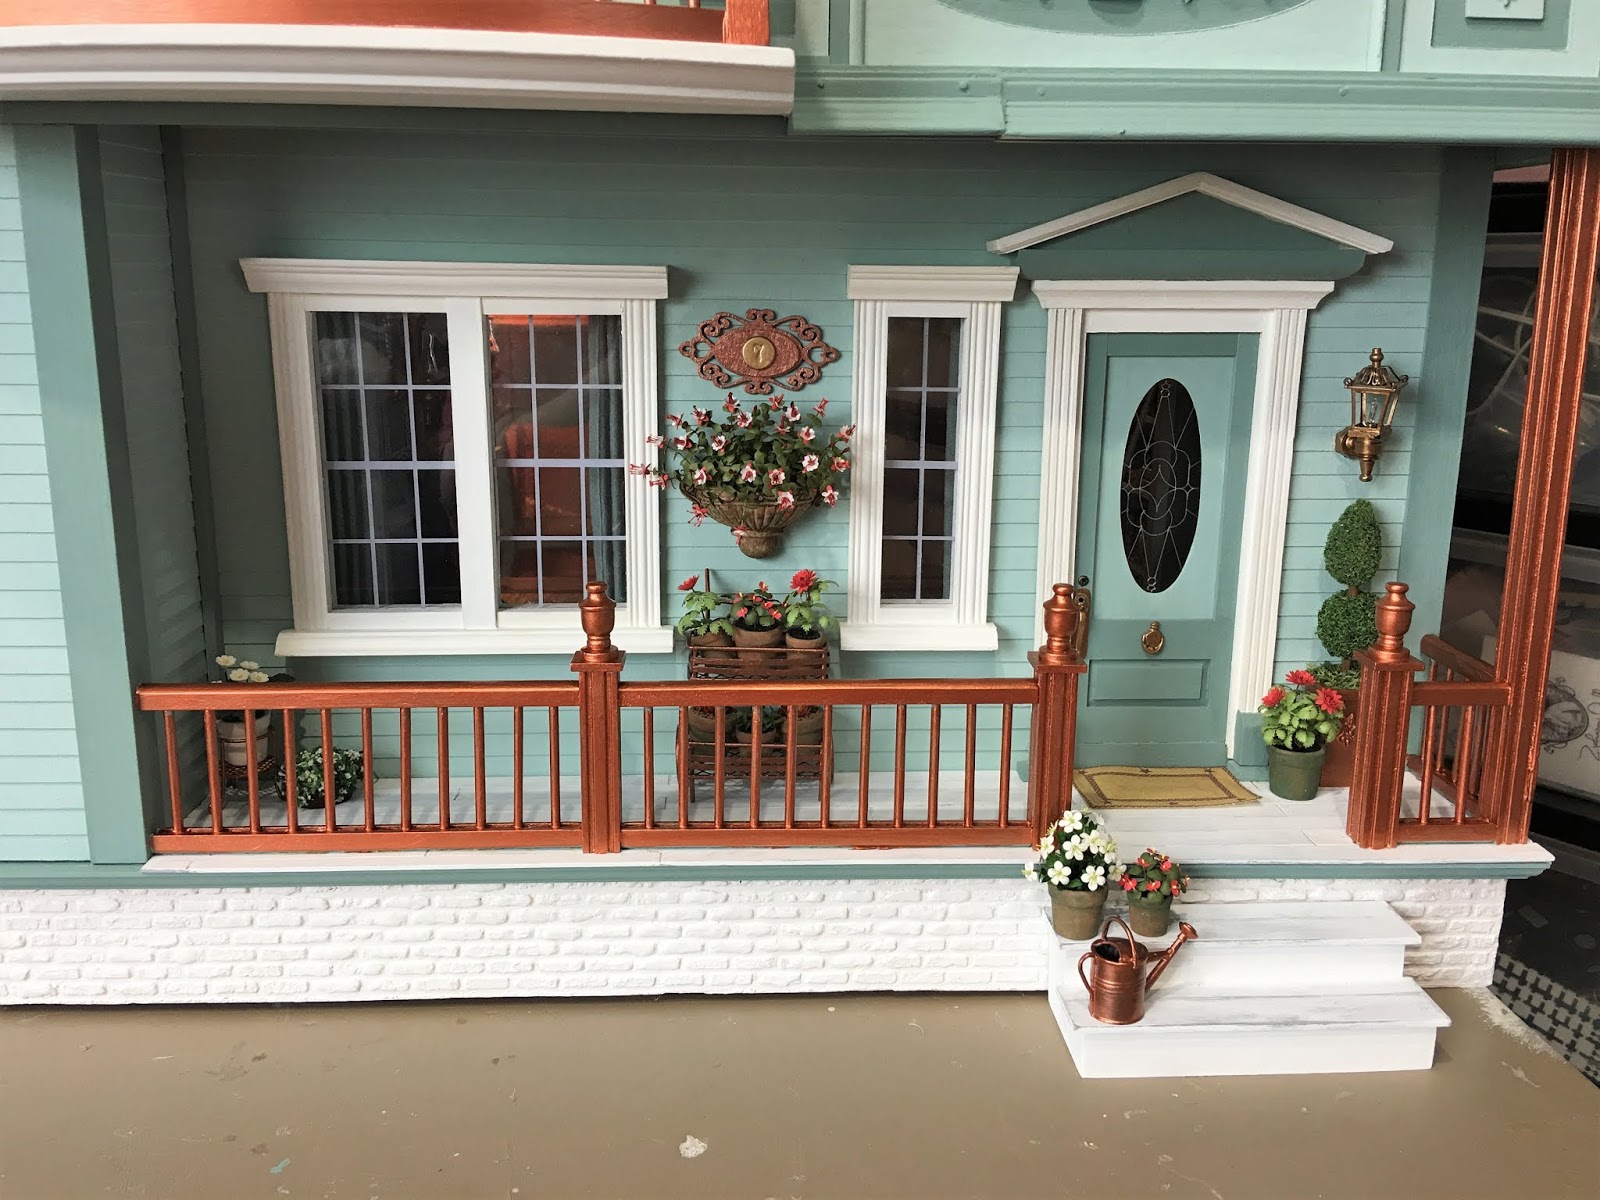
I began working on the finishing details for the front of the house, too. I needed to make a couple flower boxes for the dormers. I added some molding and trims to basic boxes to jazz them up a little, then decided to paint them copper to match the dormer roofs and balcony railing. I was torn for a bit about the flower colors. It was between yellow or red, but I am glad I went with the red and white combo.  It just pops against the teal.

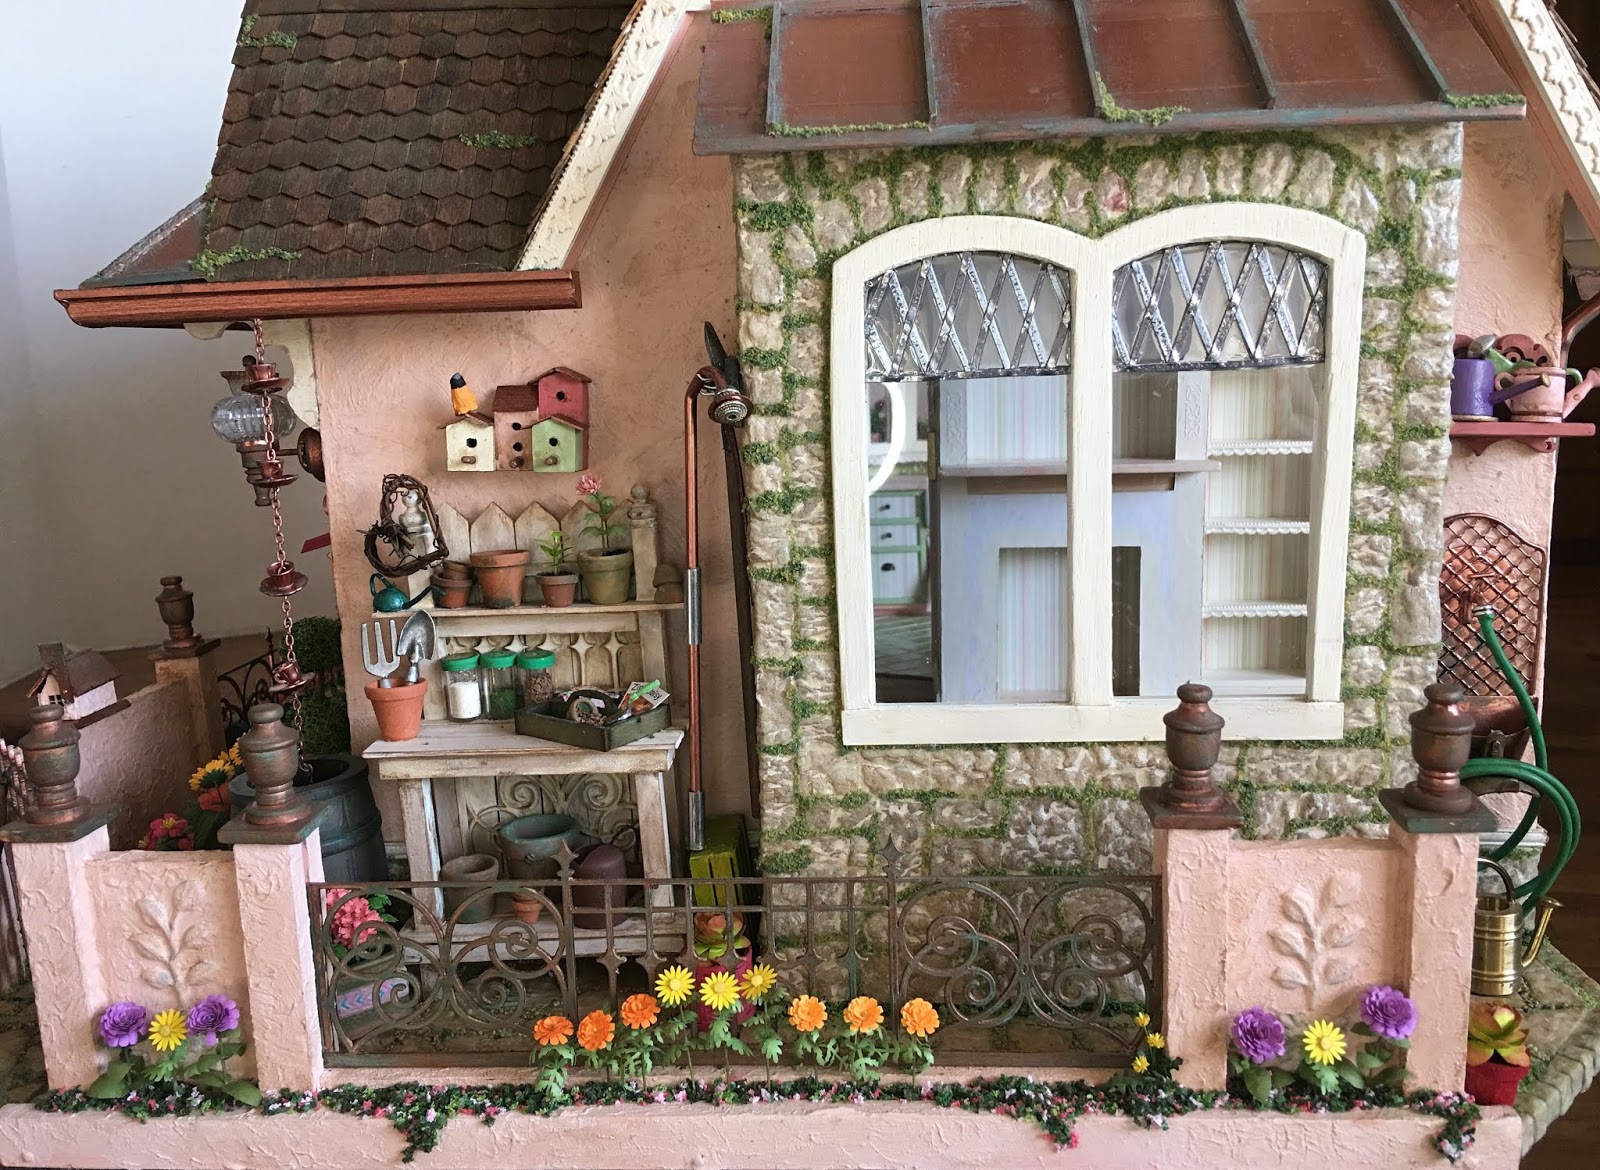
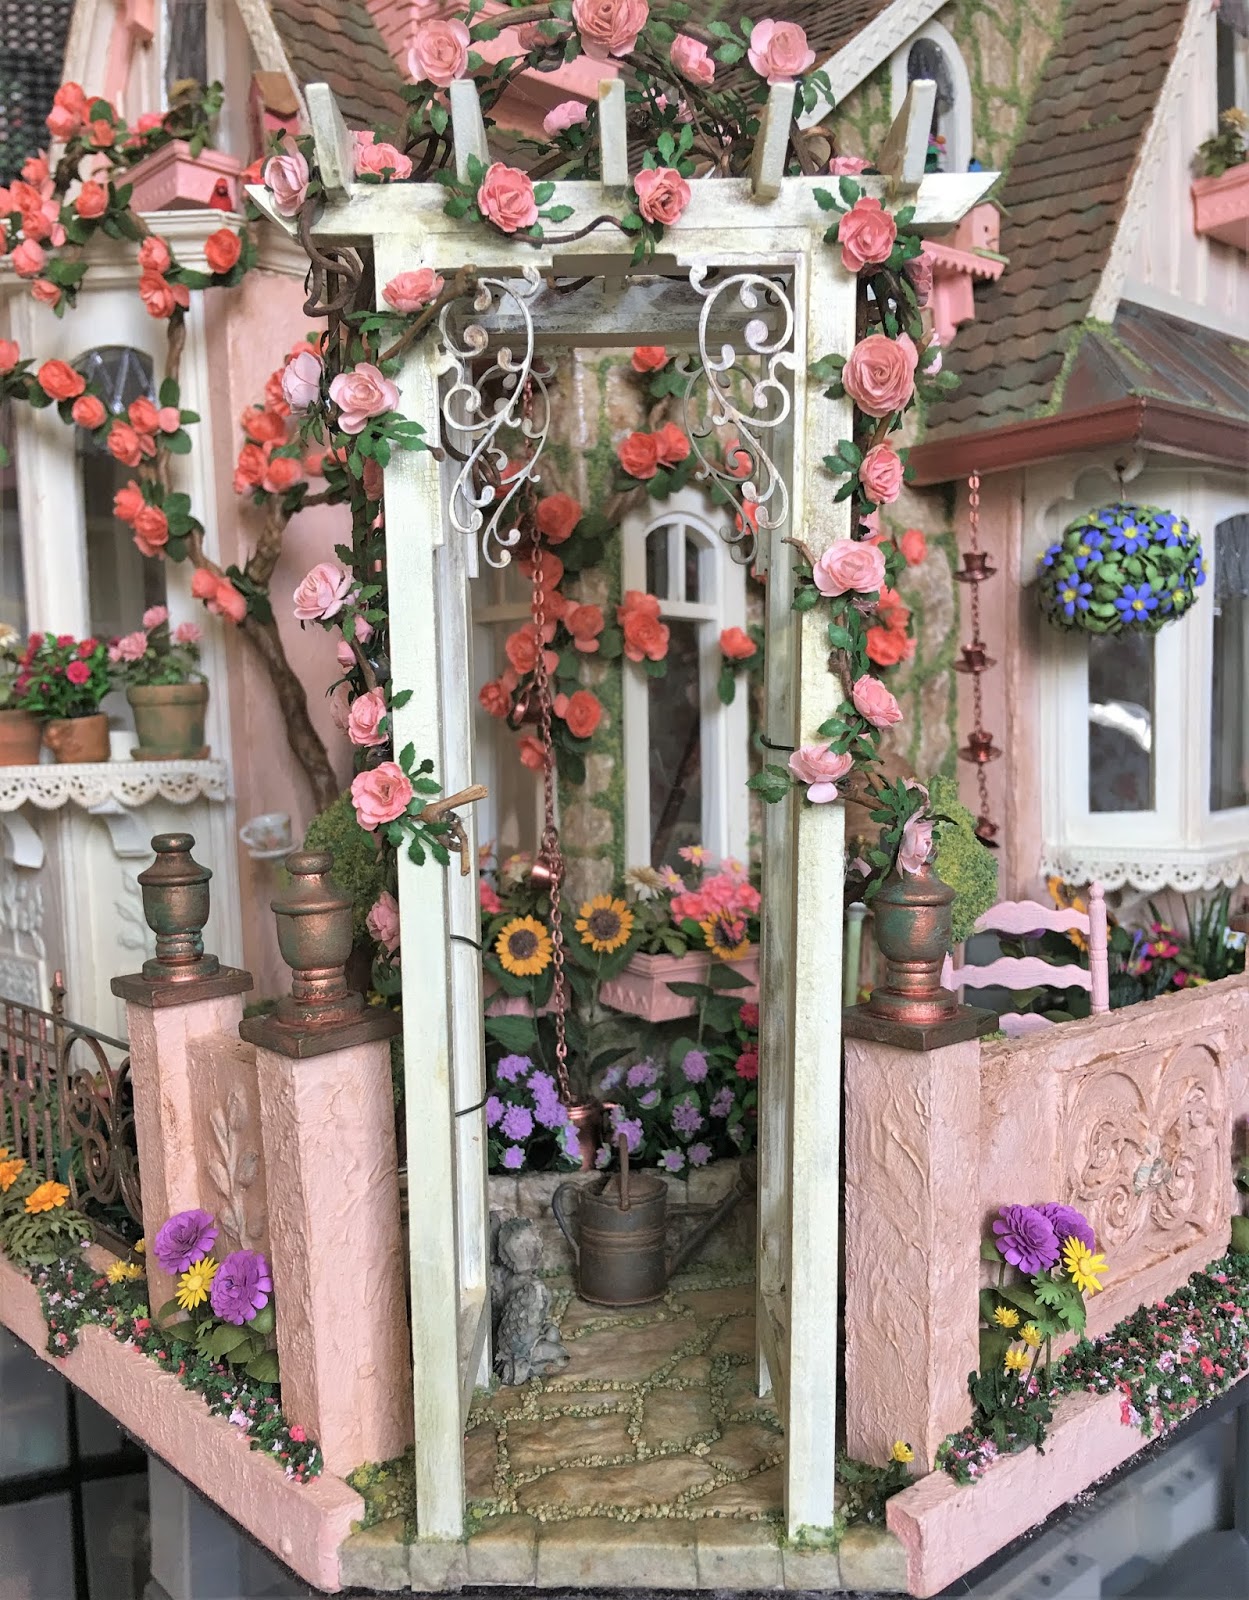
I tend to get carried away with landscaping (remember the Storybook Cottage?) so I have tried extremely hard to keep it minimal on this build. The footprint on this house is already imposing, so when I do add the landscape board, I'll be keeping it restricted to some shrubs and lots of mulch.


For the flat roof, I went with a roll of skateboard grip tape. Here's the Amazon Link so you can get a better look at what it is, but it's too pricey on Amazon. You can go into your local skate shop and pick up a 12" x 46" roll for under $4.00. It has an adhesive backing on it, which makes it easy to install. It also peels up easily if you later need to track down wiring issues. It's a nice thickness and also makes great asphalt road if you're making a neighborhood diorama. Just add lane stripes!


The window boxes are filled with red Dahlias and white Geraniums. I made red Begonias, white Azaleas, red and white Fuchsias and red/green Echeveria, too. That was me being conservative. Now you see why I am not allowed to garden any longer in real life. At least it's harder to kill the miniature varieties! I didn't end up using the yellow Pansies, but now I've got them ready for some future endeavor!


I kept staring at the front of the house, trying to figure out what was missing. I decided that the lower porch railing needed to be copper, too, otherwise it just felt as if it disappeared.

Before in teal instead of copper.
After painted copper.

Keeping the balcony simple, each side of the door got a topiary in a fleur-de-lis copper pot and a pot of red and white flowers.


I;m still debating about a flower box for the lower floor bay window. I may just do shrubs but will decide once I get the house on the landscape board.


The landscape board won't stick out farther than the front steps.


The Fuchsia basket took two Bonnie Lavish kits of twelve each plus an additional 12 bud stems that I made using painted glue bulbs and extra leaves. I had planned on two additional hanging baskets for the porch, but ran out of Fuchsia kits!


I think it looks just interesting enough, though I could fill it completely if I didn't reign myself in! This is my compromise and what I'll call Summer In New Orleans.


The landscape board and the back opening trim are all that is left before I can finally get inside to furnish and decorate. I haven't officially finished a dollhouse since the Sweet Christmas Cottage in November of 2017, but with a little luck and perseverance I may just finish the New Orleans and the Storybook Cottage this year!!!

Saturday, November 17, 2018

Growing A Cottage Garden Part 9

The title of this post should include the words "Cloud 9", because I think I am finally finished with the Storybook Cottage's Garden! Oh, I may add a bell here and a teacup there, but all of the major elements I wanted to include are done!


Due to my wonderful "play day" with Sam's art gallery, and the fact that we'll be flying out to spend Thanksgiving with my parents in AZ, I did not take any "in progress" photos, but I'll do my best to explain the "after" photos as I go. First, a photo of the sides and back...


I don't think I posted a photo with the back window box planted and installed. It is removable so that I can get to the interior without crushing the geraniums!


The gutters and downspouts have also been added...


On the Potting bench side of the cottage, I added a shelf with watering cans above the garden sink.


I also made additional flowers, took some of the leftovers, and made many more pots for the front step.


The front gate is decorated with Keli's favorite wreath.


My attempt at making tiny bees for the bee skep only resulted in my fingers becoming yellow, black and having wire stuck to them. I wanted to get these amazing bees on Etsy, but $12 each was a little more than my budget could justify. I settled for nail charms at 10 for $3. This way, I had enough to place a few on flowers, too. The birds got teacup feeders. They're not Barbara Meyer birds, because I forgot all about her wonderful birds until Keli reminded Sheila about them for her dovecote pigeons last week. Maybe I'll replace the Falcon birds with Barbara's in time.


I had a black wire hanging basket that I picked up at Aunty Em's in AZ. I painted it with copper leafing pen, lined the bottom with reindeer moss, squeezed in a Squeeze Me bush then planted some clematis flowers and leaves into it.


I had a little cottage kit from Michelle's Miniatures that was intended to make a purse. I think it makes a great mailbox! I added a knob instead of a handle, added a little working flag on the side, then used stucco and copper roof to simulate the cottage. I mounted it on a base to give it some detail. I just love to add cute little details like this to my miniatures. It makes me feel like a kid again!


Of course I had to plant the flowers on the inside fence planters before I could get them installed on the landscape base. I used up a good deal of the flowers I had left, I used purple coneflower, cosmos, daylilies and ground cover. I hope you're not allergic to bee stings!


With the inside planters finished, I was able to attach all three fence sections, then plant the exteriors. I ran out of flowers and had to stop and make more!!! Zinnias, marigold and more daisies. My flower kit supplies are now pathetic! :/ All I have left are red flowers! I did not want any red in this garden. Red does not like to share the limelight!


I kept a count of the number of flower stems I made, and it's a little insane. Hey - my blog is all about my miniature madness, so I do give you fair warning!

55 Coneflower
59 Aster
26 Black Eyed Susan
27 Ageratum
18 Dandelion
51 Geranium (plus 140 leaf stems)
16 Daylily
24 Dahlia
41 Daisies
15 Chamomile
9 Lemon Balm
9 Spearmint
9 Peppermint
10 Bee Balm
12 Lavender
12 Rugosa Roses
7 St. John's Wart
34 Cosmos
72 Roses
12 Mums
144 Camellias
18 Zinnias
9 Tulips
18 Marigold
24 Clematis

Grand total? 734!!!

After the exterior fences were finished, I affixed the rose arbor. My grapevine tree trunks did not want to play nice and get into their pots without lifting the arbor up off the ground. So, to solve this problem, I cut them off just above the height of the pots and made rose tree trunks out of air dry clay. They looked okay, and I could have done a much better job it I wasn't having to work over the top of the fence and around the back of the arbor. But as usual, problems are really just opportunities in disguise, so I had a little fun with camouflage.


Using a couple teapots that were just too large for 1/12th scale, I covered them in glue, then in fine ground cover to made topiary out of them. I glued them to the top of some more grapevine and added another Squeeze Me bush below. Now the rose tree will share a pot with the teapot topiary!


There was just enough room left to squeeze in a chair and a couple more pots, and still be able to walk down the path..


And so, my friends, the Olympic flower making saga has come to the end! Now I think I'll sit in the garden, smell the fragrant air, and nap for a while...


I thank you all so much for your encouragement as we moved through this epic journey together! For without you, your comments, suggestions and friendship, the cottage would have sat upon an empty lot!

xo xo,
Jodi

P.S. You know what this means, don't you? We get to move onto the inside!!! Yippee!!!