Search My Blog!

Use the Search box below to find keywords that you're looking for quickly and easily!

Search Feature

Thursday, January 3, 2019

The Storybook Cottage Gets A Bathroom!


As you know from my last post, I was able to get a new set of Phoenix Models appliance kits to try for a better result than my first attempt. The kits are fairly complicated and take many several steps to complete. To help fill the time waiting for paint to dry and cure, and also for several phases of epoxy curing time, I started on the Storybook Cottage's bathroom. It's fun to finally be working on it, because way back in April 2018 when I began bashing this kit, it didn't even have room for one! Let's take a small walk down Memory Lane...

Original kit attic floor configuration.
 I had to lower the height of the original kit's floor, add in additional floor pieces, create a shed dormer to allow sufficient head space, and then make a dividing wall with a closing door for privacy. There wasn't even a place or plans for stairs to access the attic space in the original kit design, so I really had my work cut out for me! It's been a long and exciting journey, and I am just tickled to begin seeing my plans come to life!


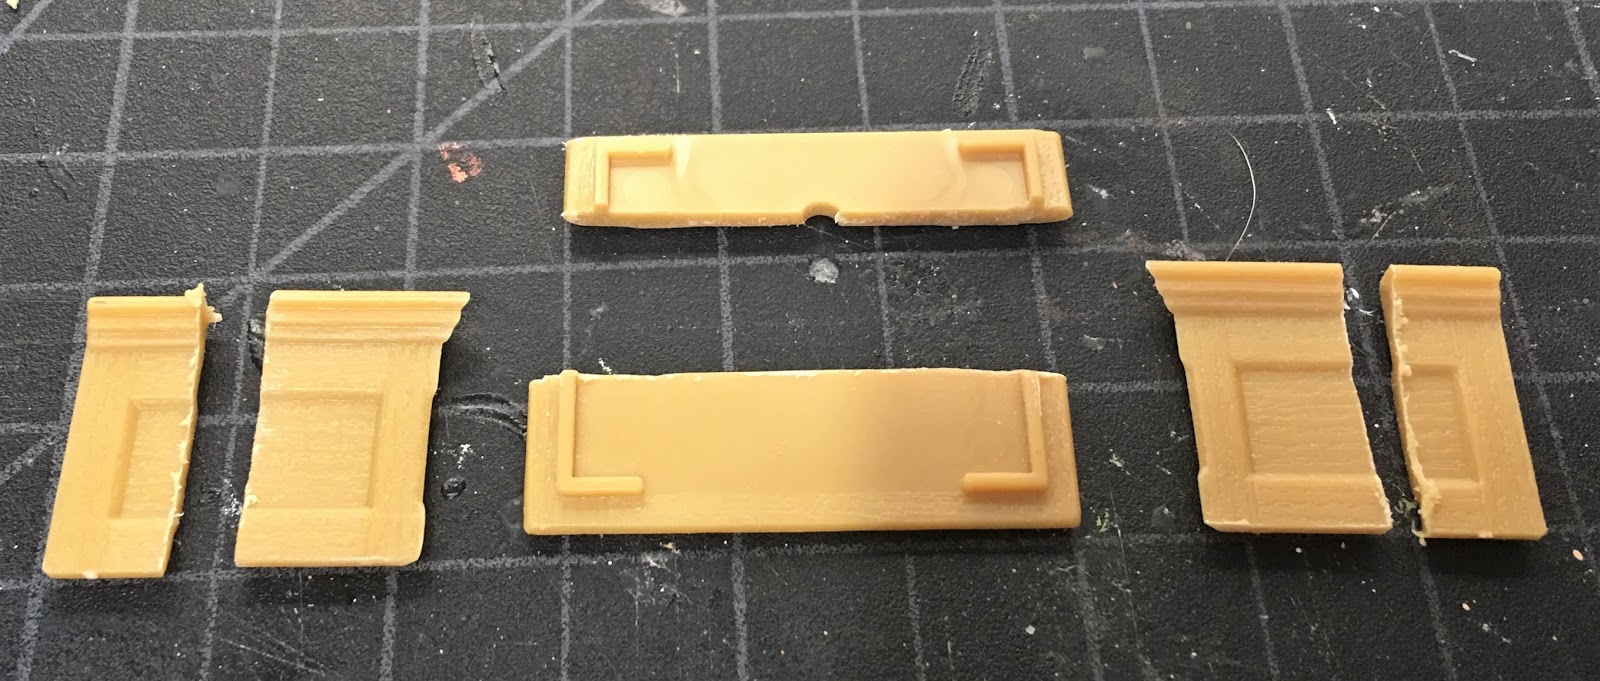
I started with a Chrysnbon bathroom kit but quickly realized I'd have to modify some pieces. Specifically, the toilet had to be modified because the angle of the ceiling left no room for an overhead wall mounted tank. I decided to make a more modern toilet, and this would fit in just fine with the 1940's era plumbing upgrade. The tank seemed a little out of scale in depth, so I trimmed a little off with my mini table saw. I also gave the new tank configuration a top using a piece of scrap wood.


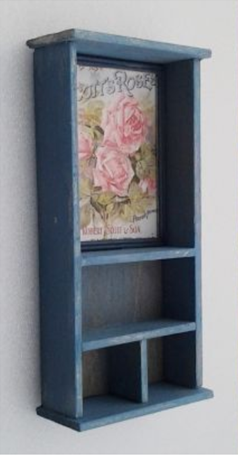
The modifications continued. I wanted to make the medicine cabinet into one with a "glass" door so that I could display some of the incredibly beautiful perfume bottles and vanity/bath things that Elizabeth made for me. Using one of the toilet tank cut offs, I made a shelf and replaced the mirror from the kit with "glass" using the kit's clear plastic packaging.


Just look at those gorgeous perfume bottles and the bath bead jar!

I spray painted all the kit pieces in stages using Rust-Oleum 2X Painters Touch in Heirloom White and Sweet Pea, then sealed and gave a porcelain finish with Krylon Triple Thick Clear Glaze. It's the worst time of year here to be spray painting, so I had to spray in the garage, then bring the pieces in the house to dry and cure. It was a long process!


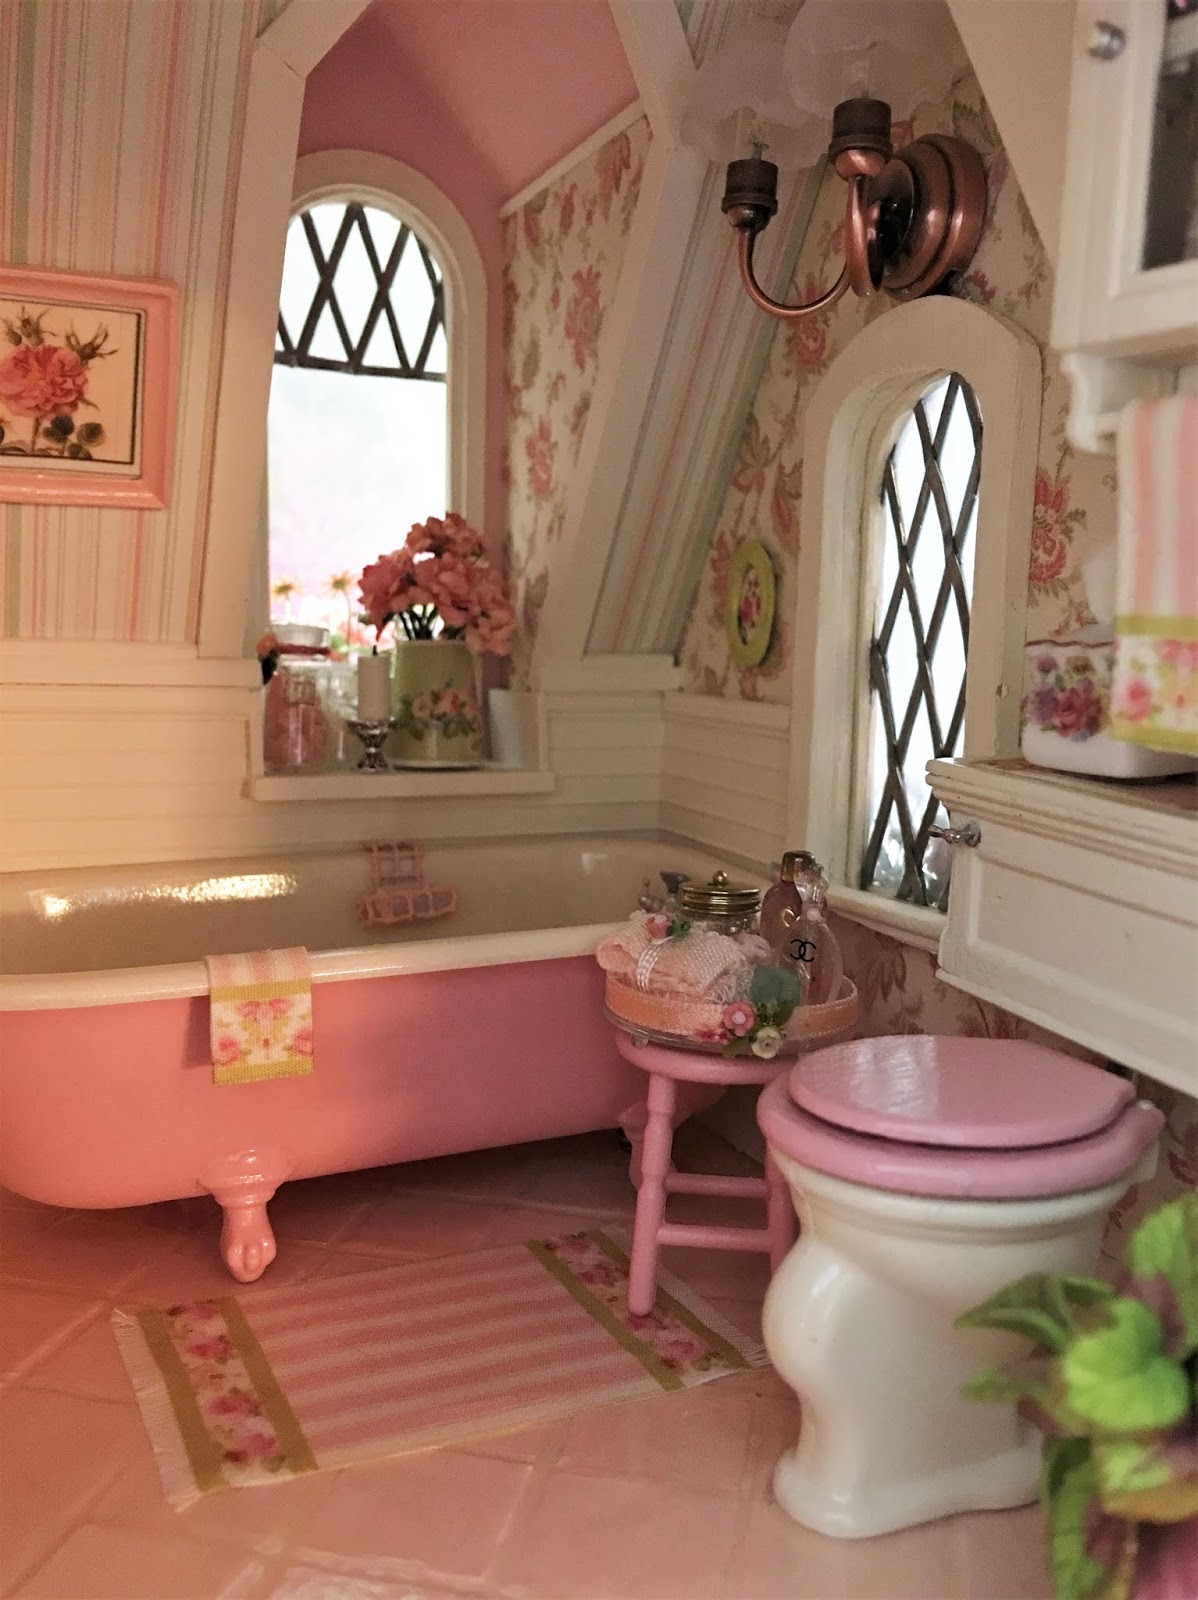
I figured it would be hard to get good photos in the tiny bathroom with my giant phone and I was right! So, I had a little play time with the room box for photos before I began the actual installation and decorating process in the cottage's bathroom. Here's everything all together...


Here's the adorable little stool with Elizabeth's incredibly amazing tray loaded with bath essentials!


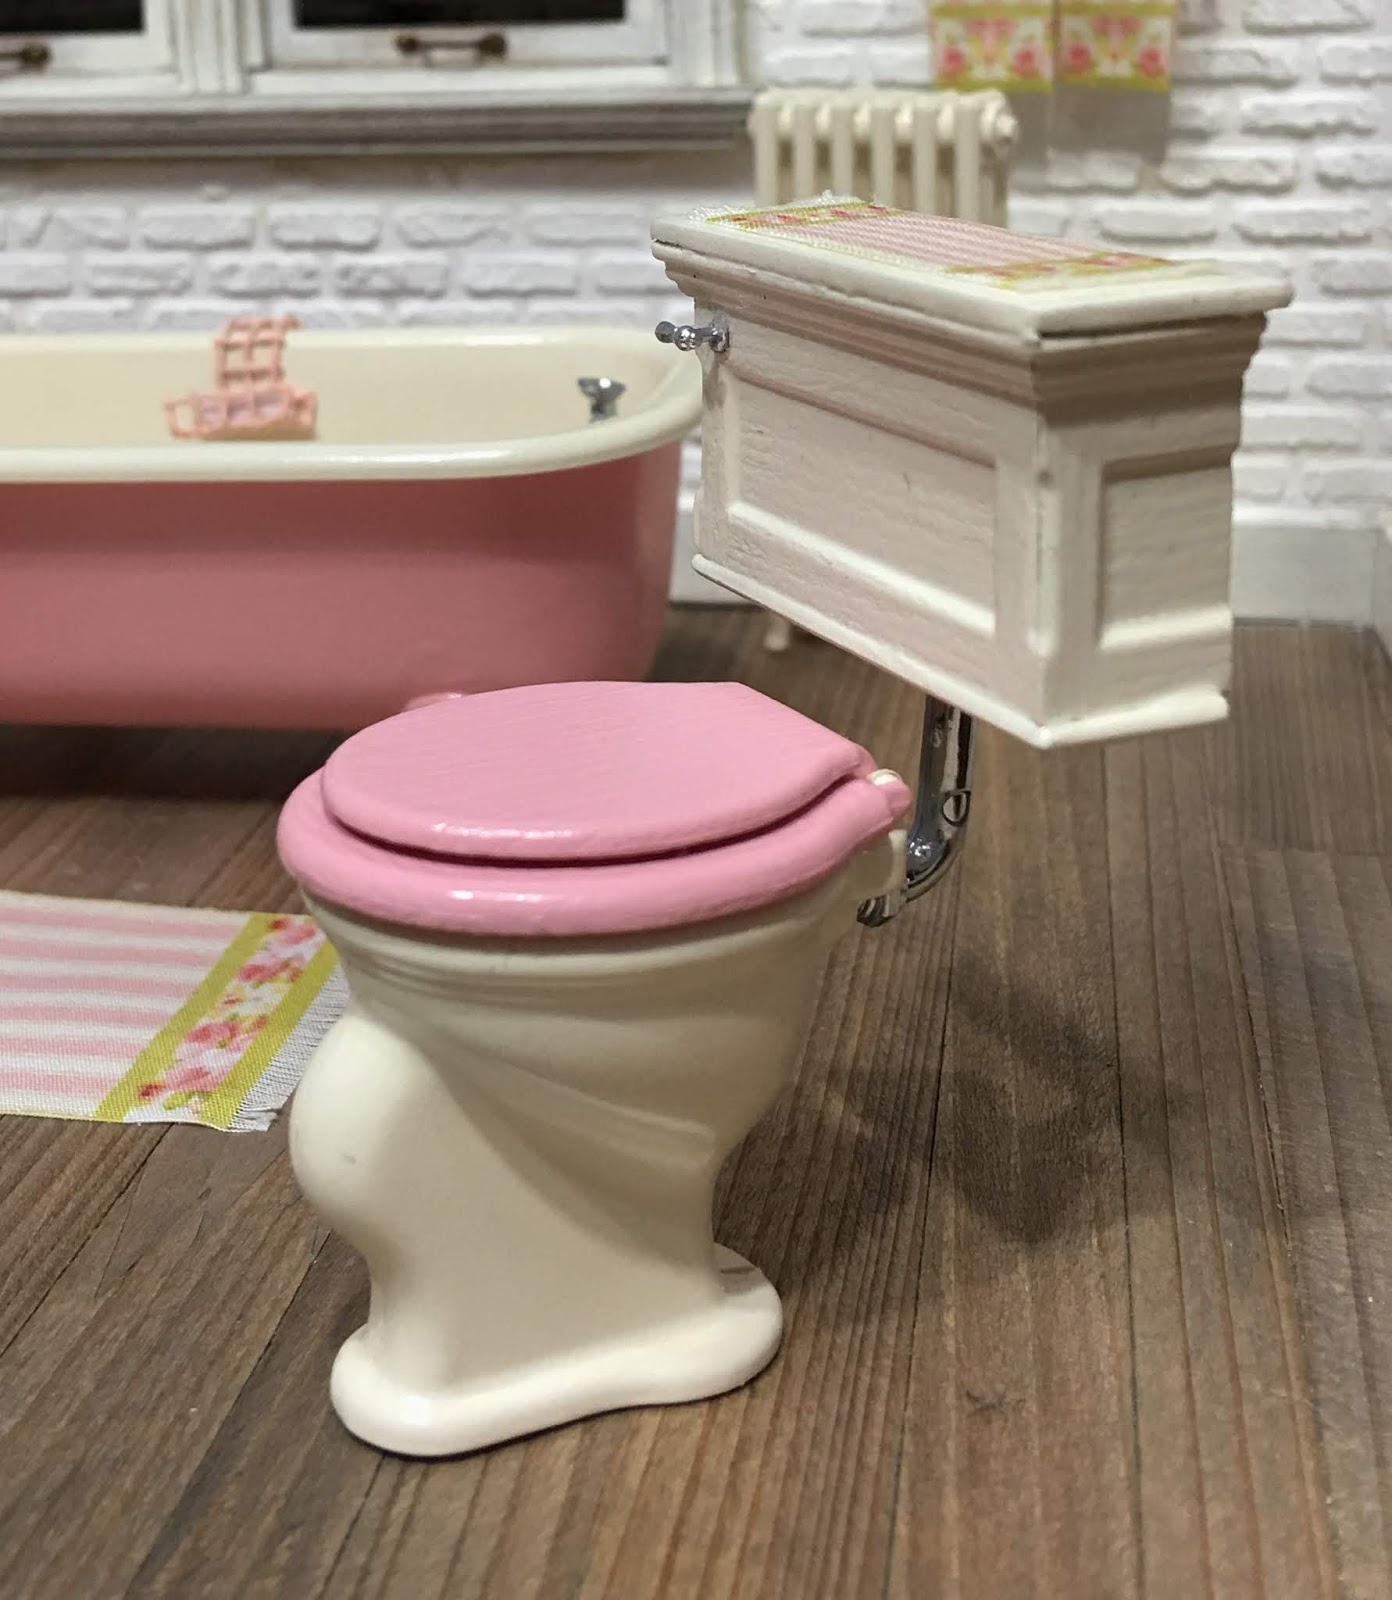
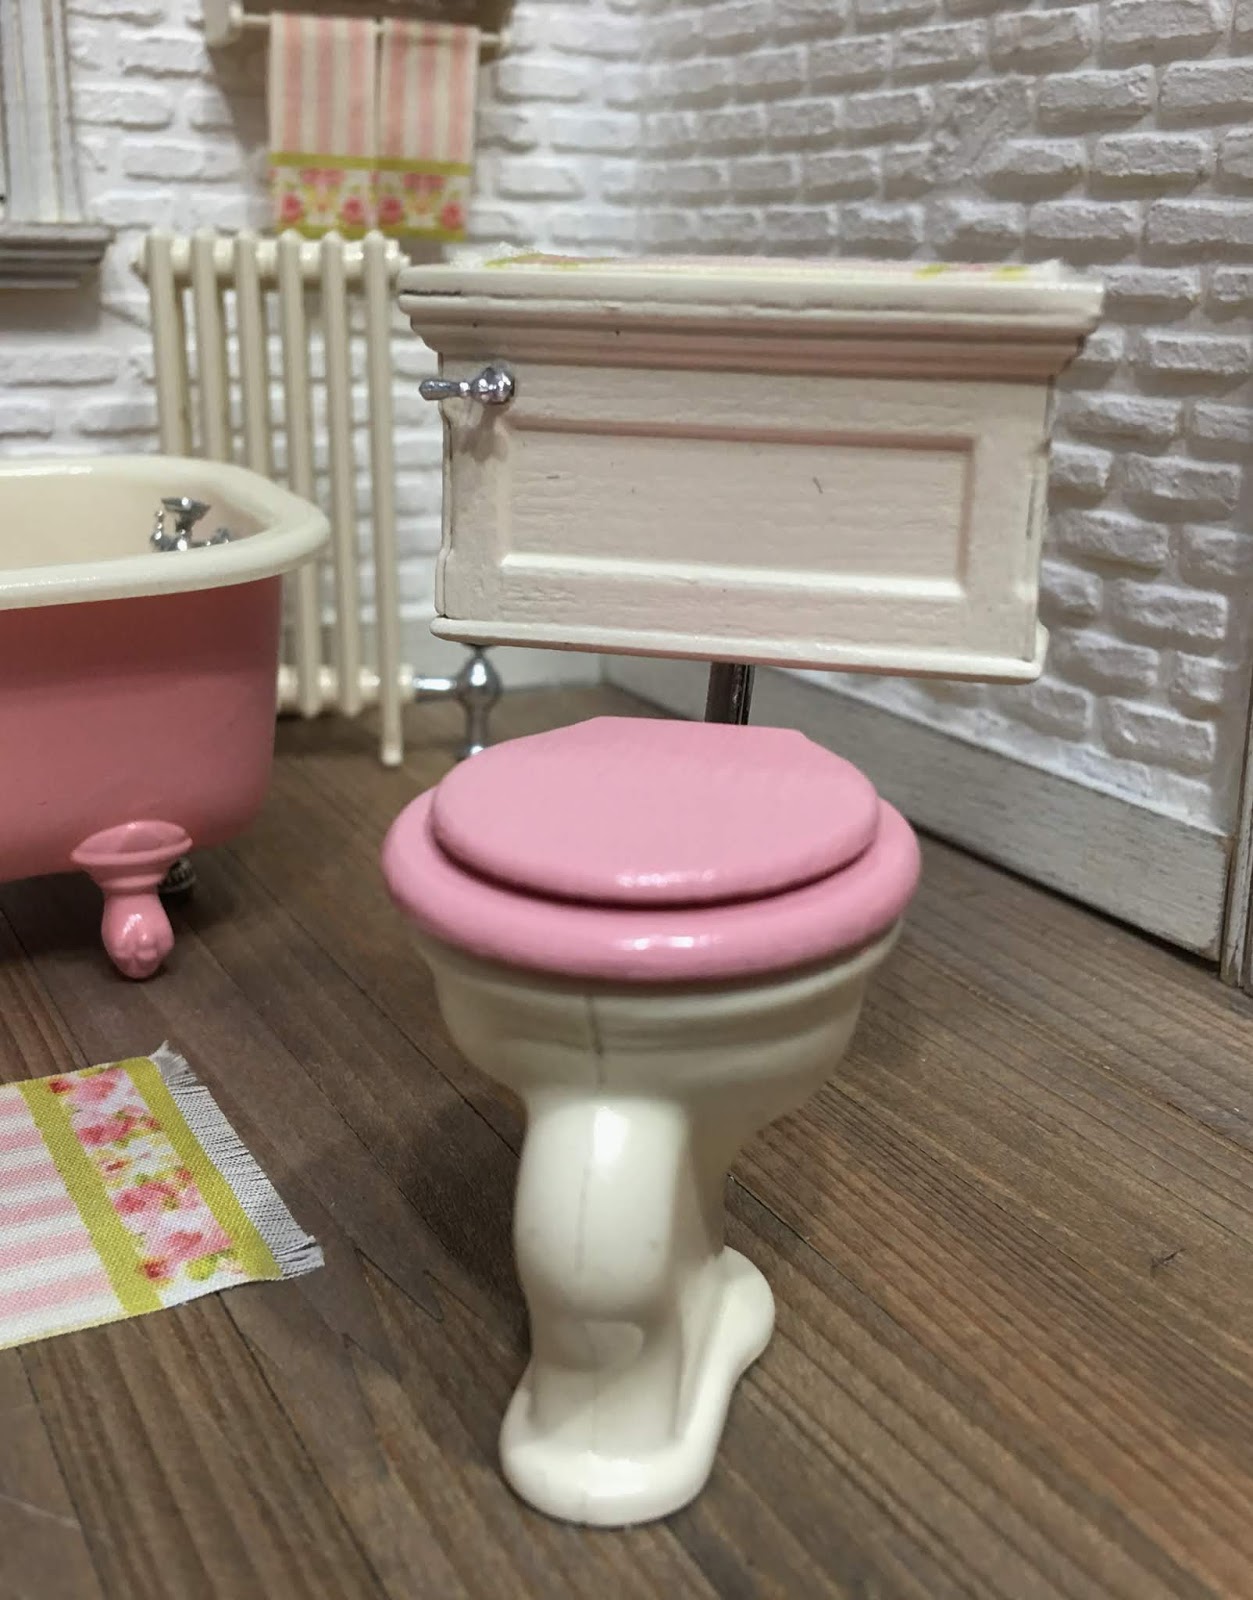
Here's the modified toilet. I used one of the sink taps cut down and inserted into a drilled hole in the tank for the flusher. I used different taps for the sink. The back is pretty ugly looking, but luckily, it's getting glued to the wall! I was also going to fill and sand the crack where the two halves of the toilet meet, but when I got out my Perfect Plastic Putty it had completely dried and solidified. Bummer, but oh well!


I kept procrastinating ordering the Chrysnbon bathroom accessory kit, which is just as well because all I really missed was the soap holder. So I made my own shabby version using wire form, silicon rubber and paint.


I cut out a 4 x 10 square section as that was the width of my bar of soap and about what I figured I'd need length wise.


I made several attempts to carefully trim away the mesh, but the welds were not very strong. I kept getting down to the last few trims and all my work would disintegrate. So, I pulled out the latex rubber and coated the wire.


Then I cut only the outer edges, leaving a 4 x 4 area at the bottom for the soap tray.


Then I bent the lip, the back, and curled the strap around the tub to get the shape I wanted.


Then I painted a couple coats of pink.


The method needs some practice, but it still looks very cute!


I wanted the sink and the mirror above it to be unique.  I added pink legs to the sink in addition to the pink braces that came with the kit. The mirror is a pot metal frame and I used the kit's chain from the flusher to hang it from a doorknob. I originally had a much more interesting doorknob hanger, but silly me forgot to measure the wall height, and it ended up being too long for the economical ceiling height of the bathroom. I just reassigned it as a towel holder.


I found some fabrics I liked online then combined them to make coordinating bath towels and rugs. Here's a photo of the print sheet, and I'll be happy to share a .pdf with you for the price of an email request. jodihippler (at) gmail (dot) com.


And though it is difficult to get photos inside the bathroom for various reasons, hopefully, I'll do a good enough job to give you the idea what you might see if you saw the cottage in person...


And now prepare yourself for some cuteness overload! A few months back, our dear blogger community member Megan of Megan's Tiny Treasures/CreativeMe asked me to get in touch with her. She wanted to send me one of her incredibly charming mouse teapots for the cottage! This is a very difficult proposition, you see, because she lives in South Africa where the postal service is notoriously unreliable. So, when her husband was heading on a trip to Germany, Megan worked furiously (in spite of her crazy work schedule) to create some handmade minis so they could be mailed from there! This was so lovely of Megan, and just wait 'till you see!!!


Mouse Teapots!!! Look how tiny, how perfect and amazingly detailed! The tail is the handle! The colors are splendid, and you are not seeing double - she sent me six marvelous mousies! She originally learned how to make them via a video tutorial by Christel Jensen and has been perfecting them over the years. She nailed them!


Buttons on cards!!! Yes, Megan even makes tiny buttons and sews them on artfully designed cards! She used to sell these among other things at shows, but sadly reports that interest in miniatures in South Africa has become almost non existent. I am sooo excited about using them on pillows and linens for the cottage!


Tiny, sweet little soaps with the word SOAP embossed on them! I apologize for getting the photo upside down, but they're adorable in any direction! Megan... How on earth did you make letters so small?!?


I know you see the paperclip, but you can not imagine how tiny, delicate thin and detailed these plates and strawberry teapot are! Fluby, I know that you are just now coveting my strawberry teapot, and I can't blame you! It's stupendous! Megan says she struggles with tiny painting. Um, yeah. She's amazing!


Megan has recently begun to cast resin houses, and has sent four of them to me! She paints every tiny detail, and I can tell you they are even lovelier in person! These are going to make such nice decor pieces in the cottage and future projects, and I am so honored that Megan has shared her incredible talents and generosity with me. ~Thank~You~Megan~!!! I will treasure them, and our friendship forever!

I thought I'd be finishing the kitchen first, but life is full of surprises. Some of them are even wonderful! I hope to be back really soon with photos of the new appliances at home in the kitchen. Until then, I hope all your surprises this week are good ones!

xo xo,
Jodi

Wednesday, December 26, 2018

Suddenly... Life Is Sweet Again!

Hello Dear Friends! I know it has been a while (not usual for me to stay away this long) and I hope I have not worried anyone! Heck, with all the holiday hoopla for most of you, you probably didn't even notice my absence! Either way my excuse is lame - too busy with big life responsibilities resulting in low energy/no mojo for mini life. I don't have anything really exciting to share yet mini wise, but I did work on a few minor things...


You may remember that the Storybook Cottage kit comes with some furnishings. I knew from the beginning I was going to use the daybed and have a little fun with it. I added some Dresden trims, some metal findings and am in the process of priming with gesso to get it ready for paint.

Photo from the trial fit in the bedroom months ago.
Embellishments added and a decorative back piece cut with the Cricut.
I cut a decorative back piece and faux drawer framing/side molding with the Cricut. Once it's painted I'll add drawer pulls, make the mattress and pillows then dress it all up.

I received a lovely gift from our generous and thoughtful friend Birgit! She sent a variety of beads and findings that get my creative juices flowing!


 She also sent four very special Schwibbogen (candle arches) which were so interesting to learn about! So many great Christmas traditions came from Germany! I still have the original Advent calendar roombox to make, so now it will include a four pane window so that each of these can be displayed! All of the things she sent to me will find their way into the design. Of course she sent marzipan, too, but Russ and I ate it all before I could get a picture! Yum! 😋 Thank you dear Birgit! Your package lifted my spirits like a big bear hug!


My birthday was made incredibly special by the people in my life. I got to spend the entire day with my amazing daughter Natasha who is now a grown and successful businesswoman. She took the entire day off just for me! We went to the local butcher to pick out the Christmas prime rib (which she cooked extraordinarily at her house, hosting Christmas for the first time), then had delicious Thai cuisine for lunch. We went to downtown Seattle to enjoy the Christmas lights and saw the movie A Star Is Born. Luckily, we are both criers when it comes to sappy movies! She also gave me a generous Amazon gift card to keep me in mini crafting supplies and a beautiful gold necklace that says "Momma".


My son, in spite of being sick with a nasty bug, came over to help me fix a section of fence that blew down in a freak wind storm. Russ was still working 80 miles away so Ande was a real hero! Then he brought me a box of yummy See's chocolates and a gift card for minis! I raised some incredible kids, and they make me feel so loved!

My wonderful parents spoiled me with a gorgeous flower delivery, a hilarious singing card informing me that 50 is the new 40 (to the tune Grandma Got Run Over By A Reindeer), and a very generous check with instructions to spend it completely frivolously! They are awesome, and because of them I am able to give the cottage kitchen appliances one more try!!!


I hope all of you enjoyed time with your favorite people, and were reminded how sweet life can suddenly turn again! 💗💗💗

Back (hopefully) next week with good mini progress!

xo xo,
Jodi

Friday, December 7, 2018

Decisions, Decoupage and Disasters

Last week I was having so much trouble deciding where to start with the Cottage's interior that I just kept busy making chairs and baskets filled with tea related goodies. There are so many little things I have planned and want to try that choosing a room to start with was difficult! In the end, I decided that I was most excited about the kitchen. So, that meant making up the kits to fill out the space.

I started with the center work table. Though it's a small kitchen, I knew it would provide an essential work and storage surface (and display area) and would justify taking up the valuable real estate. A long while ago I'd purchased an auxiliary table from MenutmonShop on Etsy. I'm glad I did because they are not selling currently, and it had the perfect dimensions for the space. I kept it very neutral, as the appliances you'll see later in the post were very colorful! Plus, I thought it would be better to see the things displayed there rather than the table itself. So I just stained the butcher block top and shelf, made the structure in worn warm white, then added lace trims to give it a feminine touch. I also added a pot metal towel bar, an essential kitchen element.


I had an Art Of Mini Stepping Stool Kit in my stash. It's so cute and just the perfect size for the small space next to the kitchen sink alcove. I made the bracing aged warm white again, and decoupaged the steps.

Original Kit Photo


For the wall space above the stool, I had a Vintage Wall Shelf Kit to customize for the kitchen. I've used this kit in several builds because I just love them. I painted mine in softened Cameo Blush and replaced the floral poster with a Tea Room image I found online. I also added a hook with plate to hang a future apron from. It looks really large in this photo!

Original Kit Photo


I also had Phoenix Models 1940's Metro "Speedway" Gas Cooker and Retro Fridge kits to paint and assemble. Here's where I'll give a bit of a product review as I talk about my experience with the kits. Know in advance that I am not trying to steer you away from doing them, but I did find them complicated, and wish I'd had a review to read with some tips before I chose them for my cottage.

Original Kit Photos

Just The Facts


  • They are made of what they call White Metal, so they are Very Heavy
  • The Gas Cooker measures 4-9/16" H x 2-1/8" W (with the gas pipe) x 2" D.
  • The Fridge measures 3-5/8" H x 2" W x 2-1/4" D with the handle.
  • They come completely unassembled and need to be washed, primed and painted in several colors depending on the finish you choose. There are A LOT of parts, especially the range.
  • They are historically accurate to the 1930's - 1940's.
  • They are great for small spaces.
  • They have lots of detail.

Things To Know

  • I found it a little complicated to have to figure out which was the inside, outside front and back. The instructions say the parts are marked, but they are not. Do A TON of dry fitting until you intimately know every part.
  • There are no assembly photos. The stove has an exploded diagram of the parts but it is difficult to see the individual pieces to discern positioning. The fridge instructions only show a finished photo. In it the freezer is installed incorrectly.
  • Tabs and slots don't always match up, requiring careful cutting and carving of the metal. Do this in dry fit Prior to painting. Be careful - some parts are soft and weak and prone to breaking.
  • You must prime and paint all the proper sides and then afterwords scrape away to provide a raw metal gluing surface. This may wreck your paint job if you're not careful.
  • After gluing, you may have to touch up joins. This can be difficult to mask and get spray paint only where you want it.
  • If you are not comfortable with several sessions of 5 minute epoxy, these are not the kits for you.
  • The oven racks are just barely wide enough so you have to bend out the last spokes on each side to keep them from falling.
I had a rough go in addition to the above mentioned things because I chose a Bad Paint. I specifically researched and ordered this paint because it was supposed to be The BEST. It also came in a multitude of colors.

Montana Black Spray Paint. Not At All What I Was Hoping For
 I am not sure If I just got a bad can, but after careful prep work and priming, the paint basically ruined my parts. This was the Disaster part of this post. My choices were to scrape and sand each piece and start over or to live with a bumpy surface. I chose to live with bumpy. Let me also just say that I have a ton of experience with spray painting, both in miniature and in real life projects. I know about shaking the can ten times longer than you think you need to, temperatures, spray patterns, pooling and all kinds of techniques. This was just bad paint.

Primed Pieces Look Great!

Bumpy Montana Black Spray Paint.

Close Up Of Surface.
It was really disappointing because I wanted a real enamel finish. But such is life and especially minis, so we move on and learn. Here's what they look like finished up. Notice that I replaced the plain stove back for tiles and omitted the plate rack and shelf. In the upper cabinets I built for the kitchen, I already incorporated a plate rack so it looked weird. Also, I left a lot of the parts bare metal and shined them up with steel wool. The kit instructions called for black paint, but that seemed too heavy in such a small kitchen. I may try to carefully scrape the rest of the paint off the hinge mechanisms on the fridge once I know the epoxy id fully cured.


And here's everything in the kitchen...


Now that I'd had a chance to play with different colors and fabrics for the dining room chairs, I made up a House Of Miniatures Hepplewhite Table & Chairs Kit / Chairs Only for myself. I painted mine in a color called Green Tea because I liked it in the room and the name seemed appropriate. 


I went to Kisspng to find the images to create the decoupaged top. These are what I used.


And here's the finished collage.


And here's the table and chairs finished and then in the room. I added lace edging for extra detail. I like the size for the space, I might make a round rug at some point with the same elements for the tabletop.


So that was it for the week, and now I can start thinking about whether I'll finish making all of the furnishings and such or just get to decorating the kitchen. My gut is telling me to get the major pieces done in each room and then I'll have an easier time knowing where to put what in terms of decor items.

Hope you're all not experiencing the same kinds of challenges as me this week, and that everything just comes together for you!

xo xo,
Jodi