
To refamiliarize you with the layout, here is a photo with the labeled rooms.

To give you an idea on size, the bathroom interior measurements are 8" x 10".

The Closet's floor space is 5-1/2" x 8". The door measures around 7" tall, so a standard dollhouse height. I'm actually using the kit's original front door, and you can see by comparing it to the bathroom doorway that it will be significantly less substantial.
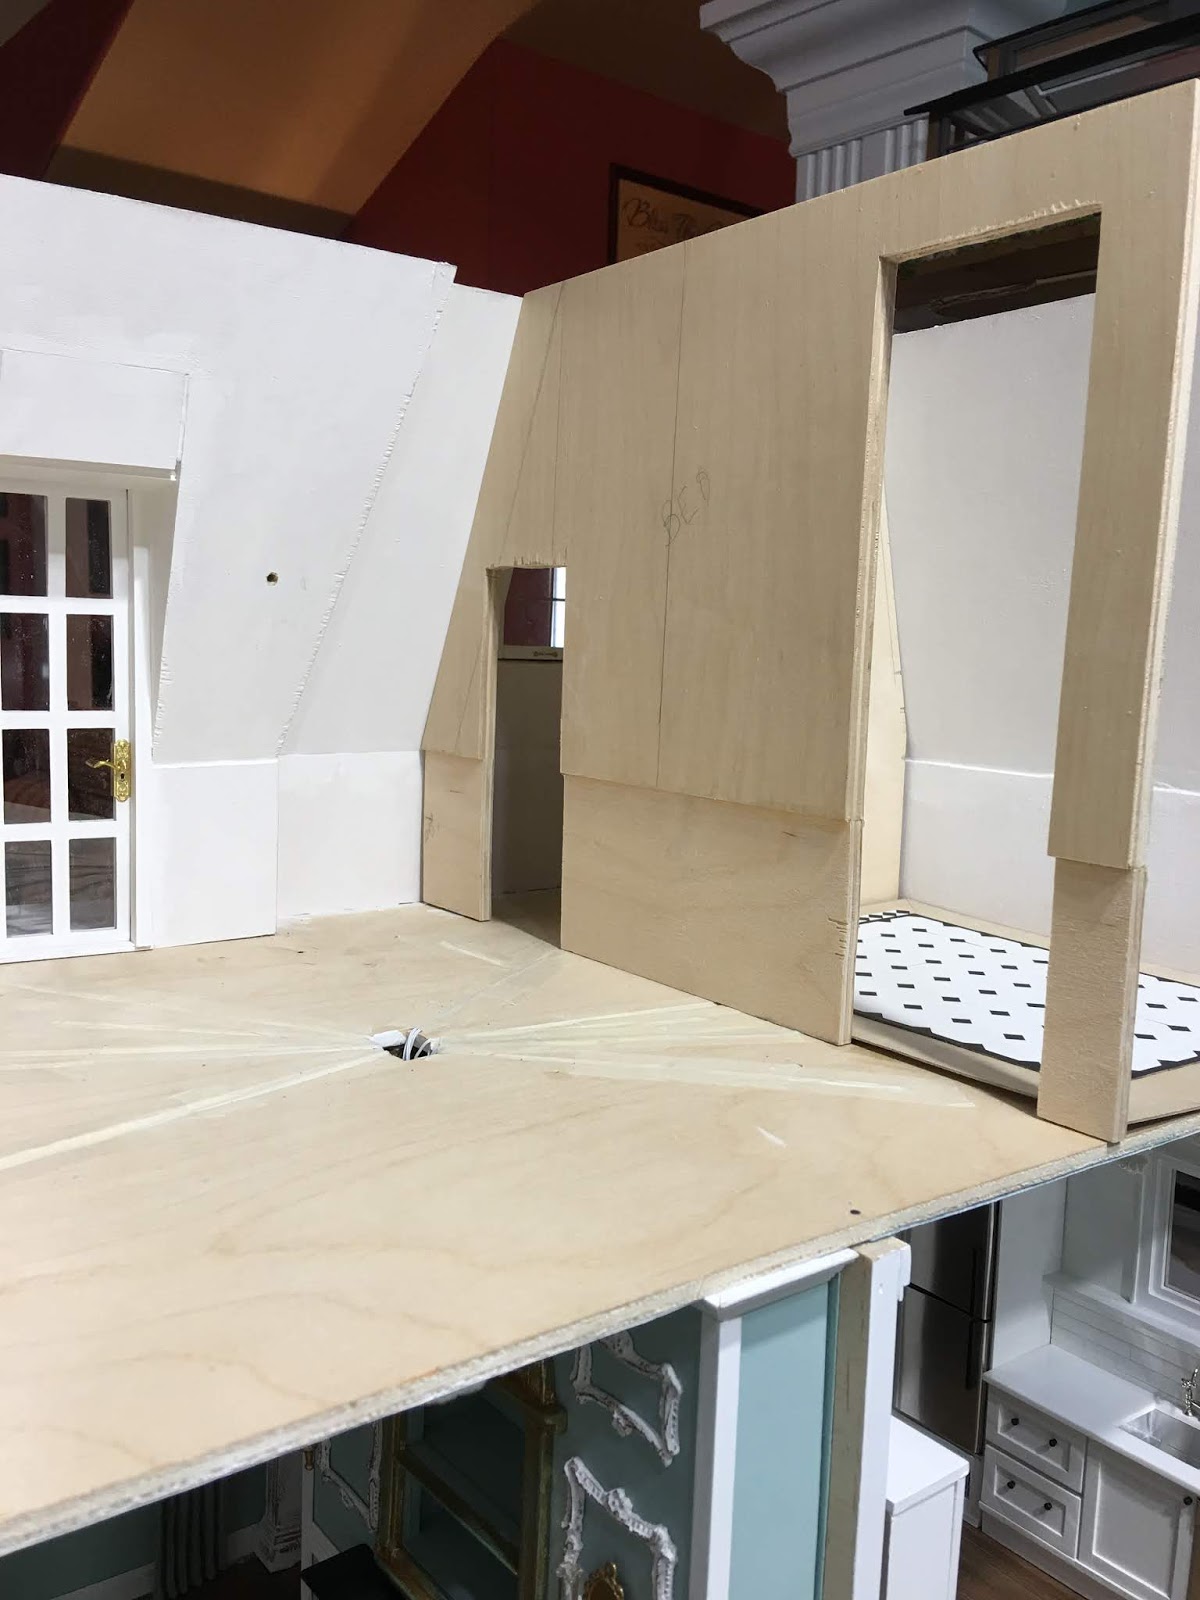
Here is the stairwell hall. The door leading from it into the bedroom will match identically to the bathroom door. The hall walking space is about 3-1/4" wide with the overall width of the room being 9-3/16" at the floor.

I had to get everything related to the closet figured out first since it will be in the back corner and will soon be inaccessible. The interior will only be visible through it's door, which I'll leave ajar. I am hoping that with a mirror on the closet door, as well as a floor mirror inside the closet, that through those reflections, you'll be able to see inside and get the feeling of a real closet with clothing, shoes, handbags, chair and hamper. Because you won't see much, I have just painted the interior walls, added wood flooring and baseboard.


Because of the limited wall space both inside and outside the closet, I've made the jambs up myself for a custom fit. After all of the walls and flooring have been permanently installed, I'll fix the closet door in place in the best position for viewing the inside via the mirrors. I am going to have to permanently attach everything inside the closet for lack of access after the walls and roof piece are permanently installed, so before long I'll have to make decisions on all of that


 |
| The door's not really that short - just had to leave room for the flooring! |


I had to make paper templates for all these funky angled mansard roof walls. Back in 2012, when I was first getting back into miniatures after my long hiatus, I learned how to do this from this video tutorial by Joann Swanson. That lady has been showing newbies How To for so many years and she is a true Giver and a Treasure! Thank You Joann!


I'll spend my mini time over the next week finishing up the wallpaper and wainscoting, hopefully the flooring, too.
Remember the really huge doorways? Well, there are no such doors that large on the market, so I decided to take a couple of the Houseworks, Victorian Glazed doors in my stash and make those work. First, I replaced the "glass" with 1/16" thick basswood panels to give me a solid door.

To add to the height of the door, I cut 1/4" thick plywood to add to the bottoms of the doors.

I had to add something to the bottom of the jambs and trims to make up for the new door height, so I made a little protruding pediment type thing at the bottoms. I also wanted to match what I'd done to the windows and doors downstairs so made a sort of door pelmet for the tops with resin architectural pieces. The final height of the doors with the pelmet are 10-1/2".

 |
| Dining Room Window |
 |
| Living Room Window |
 |
| Door and Sidelight Window |
Then, because the Houseworks doors do not come with interior molding, I had to make up my own to try and match for the other sides. Here are all of the parts that make up the two doors and their trims and decorations on all four sides.

I've got them all glued, painted, sanded, painted, sanded and waiting for their final coat so they'll be ready to install on the newly papered and trimmed walls. I hope when all is said and done they look grand and elegant in the rooms!

See you next week with hopefully, another happy chapter in the New Orleans saga!
xo xo,
Jodi


