Skeps, which are baskets placed open-end-down, have been used for about 2000 years. Initially they were made from wicker plastered with mud and dung but from the Middle Ages they were made of straw. In northern and western Europe, skeps were made of coils of grass or straw. In its simplest form, there is a single entrance at the bottom of the skep. Again, there is no internal structure provided for the bees and the colony must produce its own honeycomb, which is attached to the inside of the skep.
Here is a great 1:1 tutorial on how to make your own: How To Build A Bee Skep
Amazingly intricate and lovely!
On a side note, my dad and brother went to a class on bee keeping last spring. They had two hives going in my brother's yard for several months. The things I learned about bees from both of them is truly fascinating! Unfortunately, his first hive had mites and the second swarmed (vacated the hive to find one more suitable). I think he will try again this spring.
Anyway, I knew I was going to need a form in a sort of half egg or rounded pyramid shape. I began scavenging in all my little nooks and crannies and came up with a good candidate: the body from a small broken resin doll. The plan was to wrap the twine around the form and secure the shape with watered down Tacky Glue. I used my Dremel sanding bit to reshape it just a bit.
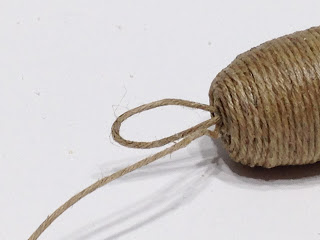
I began by taping the twine to the bottom of the form, then ran it vertically up to the top and taped it there, then back down to the bottom to begin wrapping.
I wrapped several rows, but stopped there to paint on some of the glue. I didn't want it to start unraveling as the curve in the form began to taper. I let it dry for about 30 minutes or so, then continued all of the rows to the top before applying glue. I left the string long to use in a later step.
While that dried, I began working on the tray for the bottom. This is the part of the structure that is removable to access the honey. I had a Woodsie circle that was the perfect size. I sanded, painted (FolkArt Honeycomb, appropriately) and drilled two holes in the bottom for stringing the twine.
Once the skep had dried, I needed to carefully remove it from the form. My clay tool has very thin metal and worked perfectly to pry it loose.
Once it was free of the form I coated the inside with a heavy coat of glue.
Once that was dry, I began to attach the tray to the bottom. I strung a nice long piece of twine in the bottom left hole, then brought it out through the top of the skep. I made a loop that was long enough for the skep to hang from. I then threaded the twine back down through the tray's right hole and made another knot.
To secure the tray and make sure it can't be pulled down any farther than the loop, I secured it using the string leftover from wrapping the twine. I trimmed it down and glued it onto the inside of the skep.
I trimmed the excess twine from under the tray, cut an access door in the front and viola - a 1/12th scale working bee skep! Hooray!
Now all I needed were bees! Okay - let's give that a try! I started with some natural pipe cleaners (yellow ones would work beautifully, but these are what I had), a yellow Sharpie, a black Sharpie, some black waxed hemp twine and a mini leaf punch.
I colored the pipe cleaner yellow first, then went back and added black lines. The execution would have worked better if I had done 2 things: 1. Used a black Sharpie with a finer tip. 2. Let the ink dry thoroughly before I handled them.
I cut them into about 3/8" pieces and got a little creeped out! Don't they look like dead bees just laying there!
The waxed hemp twine has four layers of smaller string twisted together. I untwisted them and cut them into about 1-1/2" lengths. I used the leaf punch on parchment paper for the wings.
I tied the waxed hemp about 2/3 up the bodies and left the strings long. The idea was to use them to attach the wings, one on each string, then wrap the string around again and tie another knot for the antennae. Unfortunately, the wings just looked too big and not translucent enough, so I scrapped that idea. Our little bees will have tiny, imaginary wings unless I can come up with a better solution. Using the waxed hemp for the antennae worked great, though!
And here is one of the finished bees hanging out on the skep. I put several more around the house on flowers and such, too. They are large enough to see, and perfect for a fantasy build like this one!
Can you spot another one?
Now for the birds... Well, their houses anyway. I will need to order some birdies!
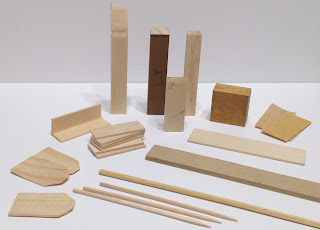
I wanted to add some cutsie bird houses, so I broke out my scrap bags. It only took a couple minutes to sort through and grab what I'd need and to configure five of them! I cut the roofs at different angles for variety.
I'm not the world's most steady handed painter, so I decided to paint all of the components before I assembled them.
It wasn't long before they turned into this...
They were cute and all, but still not quite there... How about some decoupaged flowers, and a couple cute buckets?
Now we were getting somewhere!
Not bad for only doing some research, sorting through scraps and a weekend's worth of work!
Have a great week everyone! See you next fall! :O)
Jodi
P.S. - There were so many photos that I left them smaller this time. You can always click on them to see enlarged slides.


