A couple of weeks ago I was told that the "take over your whole life" part of my job was likely starting a week early. Now the news is that it might be another week. It sure is difficult to make plans when you're in "wait mode". So, what better to do than a series of little projects on the
HBS Creatin' Contest build!
It seems to me that little pigs would have lots of indoor activities at their disposal. You never know when a bad wolf might be lurking outside. So, having books to read and games to play would be essential!
I have a few of those cute but not always in scale cabinets that Michael's sells. They are always good for quick projects, like a bookshelf. Here is what I started with.
About 30 to 45 seconds in the microwave will usually loosen the glue up enough that you can pull parts off. TWO IMPORTANT CAUTIONS:
1. PULL OUT ALL METAL DOOR PINS BEFORE YOU ZAP IT! THERE ARE USUALLY TWO FOR EACH DOOR - TOP AND BOTTOM.
2. HANDLE WITH A POT HOLDER WHEN PULLING OUT OF THE MICROWAVE AND AS YOU ARE PULLING OFF THE PIECES! THEY ARE ~H~O~T~!!!
These are the parts I pulled off to use in another project someday...
These are the parts I will use. I had to add my own bottom shelf piece from my scrap bin because the original bottom was an inside fit and did not want to come off without splitting. This sometimes happens. Sometimes you will even have to make a small repair to splintered off pieces after you pull the doors off. A little wood glue and some sanding does the trick.
I taped off the top of the shelf and painted the body in the same Georgia Clay that I've used for much of the furniture in this build, then stained the top and shelves in the same Chrysnbon Fruitwood stain that I seem to have oodles of packages of. After it dried, I put two coats of ultra matte sealer on and let that dry thoroughly.
Now, to fill the shelves... I ordered a sheet of the
vintage cut & glue game boxes from HBS. It was my first time using them, and they are really cute! Patience while cutting them out, and then letting the glue dry thoroughly before handling them is the trick. The mini clamps are also a must have. I suppose you could use paper clips in a pinch. I also went over the edges with a sharpie where necessary.
I saw
Marilyn's video about a kit she purchased to make loads of books. I decided to give it a shot using my own blocks of wood and my own printed covers. Some of the books were double thick by gluing two pieces together, and some were just a single piece of wood. Once I had them measured and cut for the shelf, I painted the edges with a Folkart paint called Linen.
To make the covers, I just measured how long and high they needed to be as follows:
Front 3/4" + Spine 3/8" + Back 3/4" + a smidge more to fold the front edges under = 2"
Height 7/8"
I converted the measurements to decimals using this handy
Fraction to Decimal chart. This meant I needed them to be:
Front .75" + Spine .375" + Back .75" + a smidge more to fold the front edges under = 2.0"
Height .896"
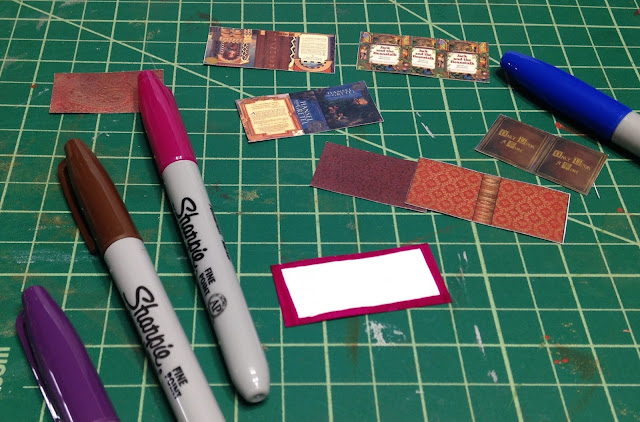
In my drawing program, I made a box for the front, spine and back at the height I needed. Then I grabbed nice book jackets off the interwebs and resized them to fit into the boxes. In some cases I had to cut up the images, regroup and reconfigure them.
Then I printed them out on matte photo paper and gave them a coat of matte Mod Podge.
Once dry, I cut them out and colored the edges and a bit of the inner cover with coordinating sharpies. I used Mod Podge to adhere them to the wood blocks.
Once the shelf was dry and the books and games were completed I could load them up! I even had a special little piggy bank to add to the shelf.
A fun, easy and quick project to fill the time until there is no time. For minis. that is. Now let's see what else I can bang out before the chaos begins!
Back soon, I hope!
Jodi


