Search My Blog!

Use the Search box below to find keywords that you're looking for quickly and easily!

Search Feature

Friday, January 22, 2016

Update on the "Bad Idea" Fixes...

The roof panels are not finished yet... In fact, there is a LOT more to do on them! I have been working on them every moment that I can spare. The hubs and I are going on a little weekend adventure over to Olympic National Forest, so while spackle is drying, I thought I'd give you a little update...

First I tried to sand down the texture. It was fairly successful, and I thought I'd be able to live with the results. This was great because I really did not want to have to make new panels and deal with getting the skylights perfectly square. I am still working on those jigsaw skills. I also did not want to wait for new panels to arrive. That also felt like cheating, so I was determined to find a solution. In the photo, you can see the panel that's been sanded, and the one that hasn't. It took the top texture layer down, but it's still too prominent.


Because I used two kits, I had two sets of roof panels. Just like the floor, I had to turn them into one large main roof panel, and one small bump-out roof panel. I  added brace beams for additional strength to the seams. I glued and clamped the panels together and let them sit overnight. The photo below shows a dry fit after the roof panels have been joined together.


Then I added all of the fascia trim and let that sit. While those were drying, I started to make all of the exterior skylight frames. I ordered a 16 oz jar of Apple Barrel black acrylic paint to ensure that I wouldn't run out again! I threw some paintable caulk  in with the order, too, figuring I'd definitely be needing it for the finishing. I love Amazon. My package will be here when I return from the weekend trip.


After sanding the fascia and touching it up with spackle, I got an idea. What if I filled in some of the roof texture with the spackle? That and a flat coat of black paint might just do the trick! Currently, the spackle is drying. I won't get to learn whether this new idea was a good or bad one until I've sanded and painted. All in all, I'm just happy that I still have ideas. I'm also grateful for the intestinal fortitude to take a risk and go with them. As frustrating as it is, sometimes, the mistakes are where I learn the most and come away with a little more skill.


In other news...

Sometimes reading the Greenleaf Forum or other mini blogs gets me into trouble. I see something that looks like so much fun to do that I start to plan for it. Oh boy. Here we go again... At least this project is going to take up much less room. I'd like to give Debora all the blame credit. More to come on this...


Under the heading "Today's Adorable Pet Photo"...


Woodson and Rusty are best buddys, and I couldn't have asked for more! Thank you universe!

Tuesday, January 19, 2016

Contemplating "Bad Idea" Fixes...

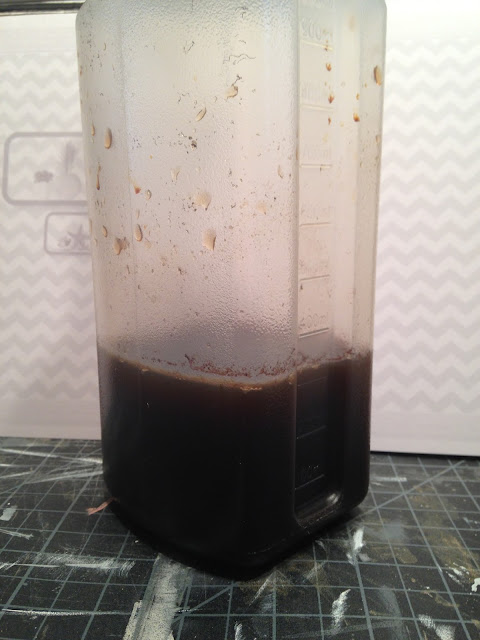
When last I posted about Alki Point, I had pondered making stain for the outside siding. I put some Apple Cider Vinegar and a piece of Steel Wool into a plastic bottle and planned to let it steep until the weekend. Well, that project got a bit derailed. You see, while "waiting for stain to develop", I started working on the roof pieces. This has lead me right down a rabbit hole, and I can't seem to gauge how long I'll be trapped here.

I began with a little remodeling. The starting pieces are the Dollhouse Skylight Roof kit that was available as an add on to the original Asahi Tea House. There were 24 pains in the roof piece to begin with, but I wanted to continue the linear look of the front windows. I carefully cut out the unwanted mullions, sanded and primed the panels.

I plan to have some recessed LED lights in the ceiling, so I drilled the holes for those.

Because there is so much skylight, there is very little roof area left. I looked at many roofing options, but in the end, I decided I wanted something like a hot mop type of roof but with an asphalt texture. I painted a base coat of black.

Then, in a leftover plastic container, I mixed some pretty course sand with more black paint. I applied it pretty liberally, and after the first piece was finished I decided that I didn't really like the way it looked. Too thick and uneven.


 Then I added a lot more black paint so that the paint to sand ratio was about 2/3 paint to 1/3 sand. This worked much better, but I am still not satisfied with the texture.

I brushed on a heavy handed layer of black paint only. This helped a little, but I still don't like it. Now I am out (I think) of black acrylic paint.


Options are:

  1. Apply a coat of dollhouse stucco to help fill in and even out the texture.
  2. Apply a coat of black latex satin that I have stashed away for furniture touch ups (I have several pieces of black furniture). Hope that adding more paint will help even out the surface a bit.
  3. Spray paint it in a lighter color.
  4. Live with the results (never gonna happen). Come to terns with my terrible idea.
  5. Order new skylight kits and start over. In other words, give up trying to fix it.

I don't give up very easily. Some call this stubborn, some call this persevering. Right now, though, I just need to back away and contemplate a while...

Any tips, ideas or sage advise is most welcome and appreciated!

BTW... The stain is doing great! No scum, no explosions, just a dark rust color and no sign there was ever a steel wool pad inside. If you do this, REMEMBER TO LEAVE THE LID OFF! Hope to get back to this experiment soon!


Sunday, January 17, 2016

A Glimpse Into A Future Dream...


With Alki Point getting nearer to completion, naturally I have been dreaming and planning the next project! You know how this madness goes... I have really enjoyed working with these Greenleaf kits (which were two Asahi Tea Houses built opening to opening), so for my next project, I will be doing another tab and slot kit!

Ideally, I wanted to do a small project where I could focus on making most of the details myself. I truly enjoy that part, and I love sharing what I am learning with other DIY type miniaturists, too. We learn so much through sharing each other's experience! I originally began looking at the Primrose, thinking that I'd combine two of the kits again. Sadly, they were out of stock and after contacting Greenleaf, I learned they weren't going to have them back in stock for at least a couple of months.

I began looking at other options, and was listing the pros and cons of both The Sugarplum and The Storybrook Cottage. Both are small, which is great because all of the projects I finish have to have a place to reside in my house. What's the point if you can't enjoy the finished ones, right? Either of these will fit nicely on one of the built in shelves here in my craft room/office (a.k.a. my formal dining and living rooms).

As far as style goes, both are really adorable, and I can do a million things with either. They are so easy to bash and remodel! The cost for each of them is totally affordable (under $50), so either one was an option. It seems silly, but what it finally came down to was the windows. Yep, it was really all about the windows.

You see, I have been collecting castings from Jim Coates. I fell in love with some of his frames, so much so that I want to make windows out of them. One frame for the inside, one for the outside and plexi in between. The windows in The Storybrook Cottage are so adorable on their own, that I wouldn't want to replace them. I am thinking a future gingerbread cottage with that kit. I don't think I ever mentioned that I once collected all things gingerbread. My kitchen had a gingerbread theme for years. Mostly though, it is Christmas decor, which will be magical if ever I have any grandkids.

Anyway, because of the windows, I decided on The Sugarplum. The idea in my head is a soap shop, with lots of good smelling things, handmade pottery, linens, candles - a little bit of everything. In fact, that is probably what I will name the shop - A Little Bit Of Everything. It's most likely going to be a departure from the modern style of Alki Point. A little shabby with touches of things from times past. That's the vision in my head, but we'll see where it leads us...


Some of the things I'd like to explore and share on the blog during the project are:
  • Making Miniature Candles
  • Making Various Miniature Shop Displays
  • Making Miniature Silicone Molds For Bottles and Jars
  • Casting Miniatures With Resin
  • Making A Miniature Electrified Teacup Chandelier
  • Making Miniature Signs & Labels With Water Slide Decals And Label Paper
  • Making Flowers & Plants With Paper Punches And Various Papers
  • Making And Remodeling Scale Furniture
  • Ageing And Distressing Finishes
  • Bashing House Of Miniatures And Realife Miniatures Kits
  • Making Copper Wire Plate Racks With A Soldering Iron
I hope you'll look forward to and enjoy exploring these topics with me. I also hope that you'll find it interesting and worthwhile! Maybe you want to make one of your own and we can colaberate! How fun would that be!

Alas, there is still a project to finish up first. I think my daughter has her eye on this one! Now back to work on Alki Point!