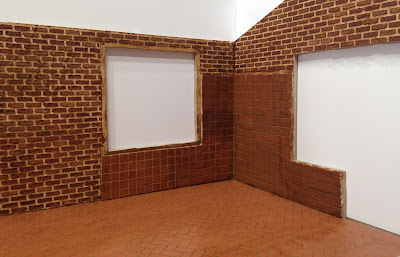
In keeping with the rustic feel of the Duplex Room Box, I decided on a brick wall treatment for the second shop space. I like the quick results I get with the Magic Systems sticker and mortar kits, so that's what I used.
I want the look of painted brick, so my "grout" and bricks will be warm white. Normally, the under color will end up being your "grout" color so most people use gray or white on the walls and get the kit with the red mortar powder. I got the kit with the white mortar so it would be easier to paint over.
It's kind of fun putting the sticker stencil on. I pre-peel the brick waste cut outs from the backing paper. I've learned from experience that if you don't, they sometimes stick to the stencil while you're peeling and it causes moments of panic that just aren't necessary. Better to mindlessly remove them while Netflix is on.
I actually forgot to take photos of peeling off the sticker - bummer because it's a fun and gloppy mess to look at! Then, I forgot to take photos before I painted the bricks. :o/
I end up with some rough edges on my bricks from when I peel the sticker stencil away. I solve most of this by letting the bricks get almost dry, then just gently rubbing my thumb and finger over them. It works great! I did manage to touch a couple of spots before they had set and kind of messed up some bricks. Notice the lower back corner area on the photo below. Oops!
I thought it would be fun to experiment with some different products for the wood floor (I am using the same Houseworks wood floors I used in the first shop). I took a scrap piece and tested the following products:
- Minwax Stain Marker, Provance
- Ranger Alcohol Ink, Pebble
- Ranger Oxide Re-Inker, Vintage Photo
- Ranger Oxide Re-Inker, Walnut Stain
- Ranger Distress Stain, Hickory Smoke
- India Ink & Isopropol Alcohol
The alcohol ink was really interesting! I love how it colors the wood and am definitely going to do more experimenting with it. I think it might be great on wood furniture. Getting color without adding layers of paint could be so good!
The re-inkers were interesting, and while I like the rich colors, it may be better suited as a wall finish. It stayed a little greasy feeling, too.
The Distress Stain was my favorite of the bunch. What you are seeing is from just one coat. It really brings out nice highlights in the wood, and the color could complement a number of color schemes in a room.
A close second was the India Ink and alcohol mixture. The model railroad website where I read an article on it said to use 1 to 2 teaspoons per pint of alcohol. I didn't want to experiment with that much, so I added about 1/3 a teaspoon to about 1/3 of a 16 oz bottle of 99% alcohol. The first coat barely did anything but wet the wood floor. So, I added the other 2/3 teaspoon and put on one more coat. I think this could be really interesting. The ink tends to pool a bit together on the wood, which really leaves a nice aged patina. I think with a couple more coats this could be a fantastic way to get gorgeous weathered boards!
So I decided to use the Distress Stain. It dispenses itself through a sponge on the top of the bottle. Think Bingo dobber. It kind of snagged here and there on the wood floor, even though I had it sanded smooth to the touch before starting. I don't see why you couldn't apply with a paintbrush, but I didn't try. I really love the way it came out!
Then I added the baseboards, crown molding, window and door (hinged in the same manner as the first room).
I may add a bit of ageing to the bricks, but for the most part it is done! Now I get to start making stuff to go inside! I have so many kits that I really want to do, so many things that I really want to try! I think that's going to be the focus for the end of 2017 and into 2018.
And maybe still, before Christmas, I can post some photos of Ellie and Jim enjoying the season in the Sweet Christmas Cottage!
Peace and love to each of you!
xo xo,
Jodi


