Search My Blog!

Use the Search box below to find keywords that you're looking for quickly and easily!

Search Feature

Showing posts with label Shabby Chic Soap Shop. Show all posts

Thursday, November 3, 2016

The End... Oh! And A New Beginning!

First, for the happy ending...
Bob, Joe and Sam are so happy to inhabit their new home!
I promised myself that I was going to GET MY LIST DONE TODAY! Well... You know how that goes. While you have the stuff out to finish up the last details you suddenly realize that a space needs this or you need to rearrange that. Instead of crossing off, you're adding to...

Front edge landscaping is finished!
But the good news is that I am (probably) finished except for final touch ups, adding the felt bottom, and setting up for contest photos! I decided to wait a couple weeks on the photo shoot just in case of any 3:00 AM epiphanies! I am bound to run across something I forgot.

Wolf Stew is just about ready to eat!
I know that all of you are probably tired of seeing any more of this project, so I promise these will be the last photos I share until after the contest deadline. Then I'll share the photo shoot photos and we'll put this one to bed!

Joe loves his well appointed and organized kitchen!
That cookbook sure came in handy!
Sam appreciates the nicely set table!
Bob is laughing at how ironic it is that "Hungry Like The Wolf" is playing on the radio right now!
Sam says come on in and grab a bowl!
But first check out my flowers! It's a cutting garden!
And now our little village saving heroes in their close ups:

Bob the brick house builder extraordinaire!
Then...
Joe - the culinarily creative!
Last but not least...
Sam, our clever cultivator!
Thank you all so much for sharing this incredibly fun process with me, and for all of your encouraging and lovely comments! 

And now for a new (or renewed) beginning...

This darling little gal has been sitting on the shelf behind my worktable, patiently awaiting for it to be her turn again. She was so gracious when I told her that she would be on hold while I participated in this year's Creatin' Contest. But now, she's back on the table!

Just look at her smile!
I had not forgotten her at all! In fact, over the last few weeks I've had my visions renewed of what she is to become and it is lovely! A frilly, girly, smelling fabulous and chic-ly shabby favorite soap shop!


Her bodice and roof are getting a makeover! The garden I am preparing for will be spectacular!


The interior will be a wonder for the eyes and heaven for the nose! Soap, lotion, shampoo, conditioner, body scrub, drawer sachets, candles, potpourri, and wonderful cards and gifts!


I'll be learning new skills and techniques in mold making & casting, polymer clay, sewing, fabric printing and making plain and shabby items chic!

I hope you'll come along and share the journey! I think it's going to be super fun!

Jodi

Monday, October 3, 2016

Speaking of Lists...


It seems that a lot of us participating in this year's HBS Creatin' Contest are beginning to realize that the December 16th entry deadline is coming up rather quickly! Several of us have been posting and chatting about our To Do lists. In my case, it seems that as soon as I check something off, I realize I need to add several more things. Talk about lighting a fire under your butt!

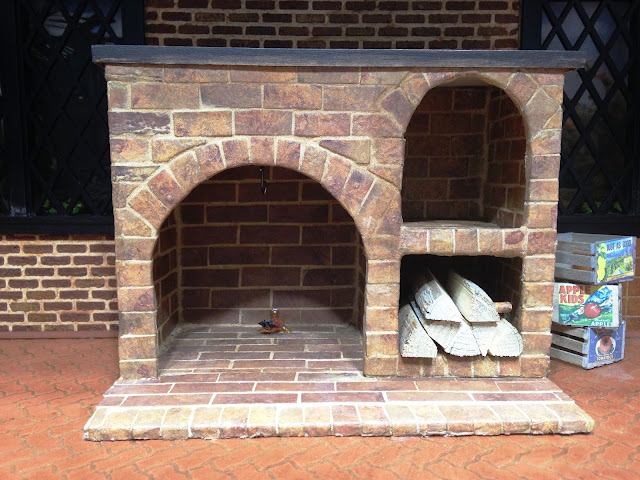
The highest priority item on my list was addressing the fireplace's flame lighting. It was the age old story of how everything was working just perfectly until I lost access to the connections, and then it just stopped working. It took me a good while to sit and think about a Plan B. But I finally just got out all the parts and made myself sit there until I came up with a solution.


The first thing was to remove the grate with logs from the fireplace. I had to cut the original wires in order to free it. Then I removed the non working bulbs and saved them for another project some day. Rather than trying to connect the new lights to the 12 volt system, my only option seemed to be running them using a 9 volt battery system.


I debated for a long time about having access to the switch while still camouflaging the battery and wires. In the end, I remembered Brae's hidden battery in her firewood box and that gave me an idea. If I loosened the firewood from the fireplace cubby and made it so that it could slide in and out that would solve all my issues.


I inserted the new lights into the fire grate, drilled a hole into the side wall of the fireplace, strung the light wires through, met them up with the switch wires in the firewood cubby, attached all wires together then and heat shrink tubed them securely. Now I only needed to come up with the camouflaged log system.


I grabbed some quick wood scrap and Woodsies and came up with a sort of log/battery box toboggan. When it's inserted into the cubby, you (almost) can't see a thing!


To celebrate after the resolved lighting issue, I decided it was time to mount the head of that Big Old Bad Woolf! It will serve as a reminder that no matter how big the bullies are in your life, just look them right in the eye and you'll persevere in the end!


Now that one important item was finally crossed off the list, it was time to move onto some of the fun details for the project! The oldest piggy, Bob, knew that it would be important and inspirational to chronicle the events that took place with The Big Bad Wolf. He's been typing up a novel about it since very near the beginning. He used to have his typewriter sitting on the kitchen table, but now that his brothers were sharing the space he needed a dedicated writing desk. I took one of the HOM kits in my stash and gave it some new legs that would fit better into our cartoony scene, For the seating, I added a bigger seat, padding and fabric to a little milking stool.


It was also important for Bob to have everyday supplies like pencils, paper pad, stamps, envelopes, tape, twine and a ruler. I'll have to hunt for some scissors to add in the drawer soon.


Here's the extra large but somehow perfect typewriter with the last page of the story being written. I think Bob's publisher is going to be pleased!


I'll leave you with a few up to date progress shots. There are still many items on my list that I'd like to include on the project. We'll see how many I end up with time for.


I am always looking to the next mini projects in the queue. It's embarrassing to admit, but in my daily gratitude conversations with the universe, I often express just how lovely my life is, and that when it's my time to leave this Earth I will do so with no regrets. I always include an asterisk at the end of the conversation, though, asking if I can please stay until such and such mini projects are finished. I bet I get some head shaking with that request. What can I say - I really love miniatures.

I'd love some wisdom and feedback on a particular decision that I am struggling to make. After the contest build is completed, do I start on the Beachside Bungalow, or finish the Shabby Chic Soap Shop first? I am leaning toward finishing the soap shop. What do you all think???

Thanks for your two cents...

Jodi


Monday, July 25, 2016

Confessions of a Mad Miniaturist Plus Some Exciting News!

Before I share the exciting news, I feel that I owe respect to honesty and therefore, need to first make a confession. You see, I seem to be suffering from (que dramatic music)... Project completion impotency! To prove my point, I will list off for you the projects that are started, some pretty far along, and yet not fully satisfied. Ahem...

1. Real Good Toys Barn Bash - trimming out the back opening, attaching it to a foundation, roofing and landscaping are all that she needs to be completed. Why have I stalled? Because I am a fickle be-otch and began fantasizing about Alki Point. There she sits, dusty and disheveled. If you listen closely, you can hear her say "cheater"!


2. Alki Point - She is done! Finito! Terminus! Only, she needs to have her power strip tidied up and concealed. Then she needs to have her glamour shots taken at the real Alki Beach. Why is this not done, since February you ask? Because. I got busy with (and excited over) the Shabby Chic Soap Shop. Plus, driving to Alki from Spanaway means traffic. Lots of it. I. Hate. Traffic! Oh, and see that building next to her on the right - that's next on my list.


3. Starbucks - this is the first in the set of three Street Of Shops. I stopped work on her because I wanted the brick facade to be continuous, and therefore would need to complete the other two in the set first. Yeah... That was like three years ago... I just need to finish it by itself and be done. She's all finished inside. I even built on a replica bathroom which is also finished inside. If/when I ever get to the next two shops, I'll improvise on brick continuity.


4. The Shabby Chic Soap Shop - I got stuck and frustrated trying to make the chandelier, which turned out to be way too chunky and completely horrible looking. Then I stalled out on whether or not to drop $60 on a real battery operated chandelier (even though I have wired wall sconces) and just forget trying to make one. Then I decided maybe it didn't need to be electrified at all. Then I felt lazy about not doing the wiring. Then I walked by it one day (it currently sits on the shelf so I'd have room to work on the Creatin' Contest build) and HATED the outside color scheme including the shingles!!! Now I've decided it all has to be repainted. As soon as I figure out what and how to do it.


And of course on top of all those, I am currently working on the Creatin' Contest build. See that list there? There's sooooo much left to do on this project! You'd think all of this wanton mini lust and the associated guilt would be enough to make me just stop and FINISH WHAT I STARTED!


Nope. I can't...

I have a serious addiction! It is a disease, you know. I can't be blamed for that. Can I? I'm not trying to hide anything. The blog name says it all...

Ugh... Now that I've admitted all of my shame, I'm a little hesitant to share my good news. Maybe you'll all be really mad at me. Maybe you will all want to come to my house and take these poor unloved projects away from me. Maybe you'll all think I'm a really bad person. :O(

But wait! YOU guys are my peeps! We are all completely and madly codependent! We support and enable each other all the time! You! You glorious comrades totally get it! You probably have a dozen or so mini skeletons on your shelves or hidden in closets, as well. In fact, you have probably purchased something in the last couple weeks that you totally did not need but wanted really, really bad!

Phew! Thanks for being in this with me! I love you guys!

Okay - so finally out with the good news!

A few posts ago I mentioned that Hobby Lobby had the RGT Beachside Bungalow kit for $119, then had the 40% coupon. I got it for half the regular price, so there was no way I was letting that opportunity pass me by.


I told myself that I was not even going to open the kit until I at least had the contest build completed. Then one day I was sitting at the computer, minding my own business when the kit's finishing page just pops up on the screen! I didn't think there would be any harm in reading it, right? But it got me so excited! It has already finished wood floors! I wondered what they looked like. I opened the box. I looked at the pictures online. I wondered if I could swap the stairs to the other side of the house. I drew out the dimensions and made a first floor layout in my design program. That got me to thinking about the kitchen. That got me looking for cabinet kits. That got me looking over at Elf Miniatures to see what they had available and what the pricing was like. That got me talking to Elizabeth (I love her!) and totally coming up with an affordable and awesome kitchen plan!

The Wall Of Cabinets Layout


The Island Layout


I was shocked at how quickly Elizabeth got back to me. She asked me so many important questions and clarified every detail to be sure I would get exactly what I wanted. She offered options to me that weren't even listed on the web site, and ended up saving me even more money so that I could afford the fridge cabinet enclosure. Then, to put the cherry on top, she said they would go out airmail from the UK on Wednesday!!! What?!?


I just don't deserve so much happiness, but I am so grateful for it! My "Notes From The Universe" this morning said:

"The secret behind miracles is that the person performing them begins without any knowledge of exactly how they will succeed... yet still they begin.

When you move, I move -
The Universe"

Thanks for sticking through all my rambling to the end! I'll post photos of the new loot as soon as it arrives!

As for when the project will actually start - that remains to be seen...

Tuesday, May 17, 2016

Easy Teacup Chandelier - Take 2 and 3!

While work continues on the roofing and the exterior trim of the Shabby Chic Soap Shop I received my new Du Bro tubing bender. I had to try it out, so this lead me down another rabbit hole...

If you'll recall from my Easy Teacup Chandelier post, I had an epic failure at my attempt to bend 1/8" copper tubing with the K&S Tubing Bender kit. It has been pointed out to me by kindred souls over at the Greenleaf forums that it was probably just user error, because they have no problem using them. I was using copper tubing, and they were using brass, so that was probably what accounted for the diverse results.

The Du-bro bender included four 3" pieces of 1/8" brass tubing. It bent like a dream! No crimping, no breaking. Here you can see all four pieces perfectly bent into beautiful J's!


Okay, so it works perfectly on brass but how about copper?


Not so much. It actually crimps and breaks the metal. Now I am sure that if I insert a piece of solid wire into the tubing and heat it up a bit before bending (as was suggested to me on the forum) I may have better results. Another challenge for another time perhaps... For now, we'll stick to the very accommodating brass rod.

But on to my progress on the chandelier...

I needed a central brace - something a little decorative. Hoarders everywhere will rejoice when I show you some really old stock I had saved for "just in case"... Veranda Posts!


I got out the trusty old bead container and started to create something of a shabby chandelier using these and other "parts".


These two bead caps glued together will serve as the base of the center wooden dowel.


I am using a combination of E6000 and The Ultimate Glue to see what sticks, pun intended (snicker)...

These will be the parts that support the saucer and attach them to the brass J's. The toothpicks are simply an attempt to keep things lined up and uncrooked:


Here is the dowel being glued into the bottom bead caps. I was very generous with the Ultimate glue here. It will dry clear, and the whole assembly will be painted white, so a little messy was okay.


The J's will have to be attached to the top of the chandelier somehow. A large bead cap seemed like just the thing - only, I needed to make the holes larger so that the 1/8" rod would fit into them. I just used the Dremel with the drill attachment to open them up a bit. You can see how one of the four has been enlarged.


Next, I needed to assemble the candle bulb, cup, saucer and support bead caps to the J's. This meant fishing the candle wires through each component. I found that a little persistence, going slowly, being willing to back the wire out a bit then push forward with gentle pressure helped to coax the wires to manage the curve and pop out blissfully from the end.


Closer up...


Now to add the top to the dowel with the base. I decided maybe screwing it in might be better than just glue. Drilled the pilot hole, widened the hole in the bead cap, then screwed it down... The screw sticking out the top will serve as a spacer - you'll see what I mean in a later step...


Okay - time to add the arms - in this model there will only be four. The photo below gives you a rough idea, though a messy one, of what I'm trying to accomplish...


Getting there is a fiddly and messy business. Hopefully, once completed and painted shabby white, it will add to the flavor of the look for the shop that I am trying to achieve. If not, I have plenty more brass, plenty of beads, plenty of veranda posts and plenty of will to try, try again... The teacup chandelier experiments will continue...

Meanwhile, check out what materials and details I've revealed to use in the HBS Creatin' Contest 2016 page. Kit bash and layout are coming in early June if all goes well!

*** UPDATE ***

Here is the chandelier after I glued it:


Sloppy, huh?

Here it is after I painted it:


Sloppy, huh?

Um... Yeah... It still needs work so I decided to just start all over again... See my little brass rods all cut to the perfect length and everything? Then I tried to bend them...


Then I learned something new - after the new brass tube (that the hubs so nicely picked up for me from the hobby store) bent and broke just like the copper tube! Apparently, you need to do something called ANNEALED to the metal.

Yep - I read all about it. Apparently, if you are trying to harden the brass, say if you are making bullets, you heat the brass with a torch until it is cherry red and immediately knock it into water to cool it quickly. If you want it soft, you heat it to cherry red with a torch and then let it cool slowly, like let it air cool. Then it is supposed to submit to being bent into a nice looking "J" with no crimps and no breaking. So, to sum up this post, this is an ongoing experiment, and I will post again about my annealing experience and let you know if I actually made a purdy chandelier...