

Supplies:
 Tissue Box Pattern
Cardstock
Scrapbook Paper
Gluestick
Zipseal Bag
Tissue
Tools:
Paper Punch
Ruler
Xacto Knife
Tweezers
Tiny Clamps or Paperclips
Stylus
Scissors
Tissue Box Pattern - Resize in your editing program so that each of the four center boxes measures 1/2” x 1/2”.

1. Print pattern onto cardstock. I used 80# cardstock and printed many on one page.

2. Cut patterns out. Add numbers and letters to each flap and section as shown.

3. Glue the pattern to the Wrong Side of the scrapbook paper, lining up the bottom of the box pattern to the edge of the scrapbook paper . NOTE: If you want to center the pattern, make a mark on the scrapbook paper to line it up with. Press firmly to remove any gaps or air pockets. Let dry.


4. Cut pattern now that it has been laminated to the scrapbook paper.

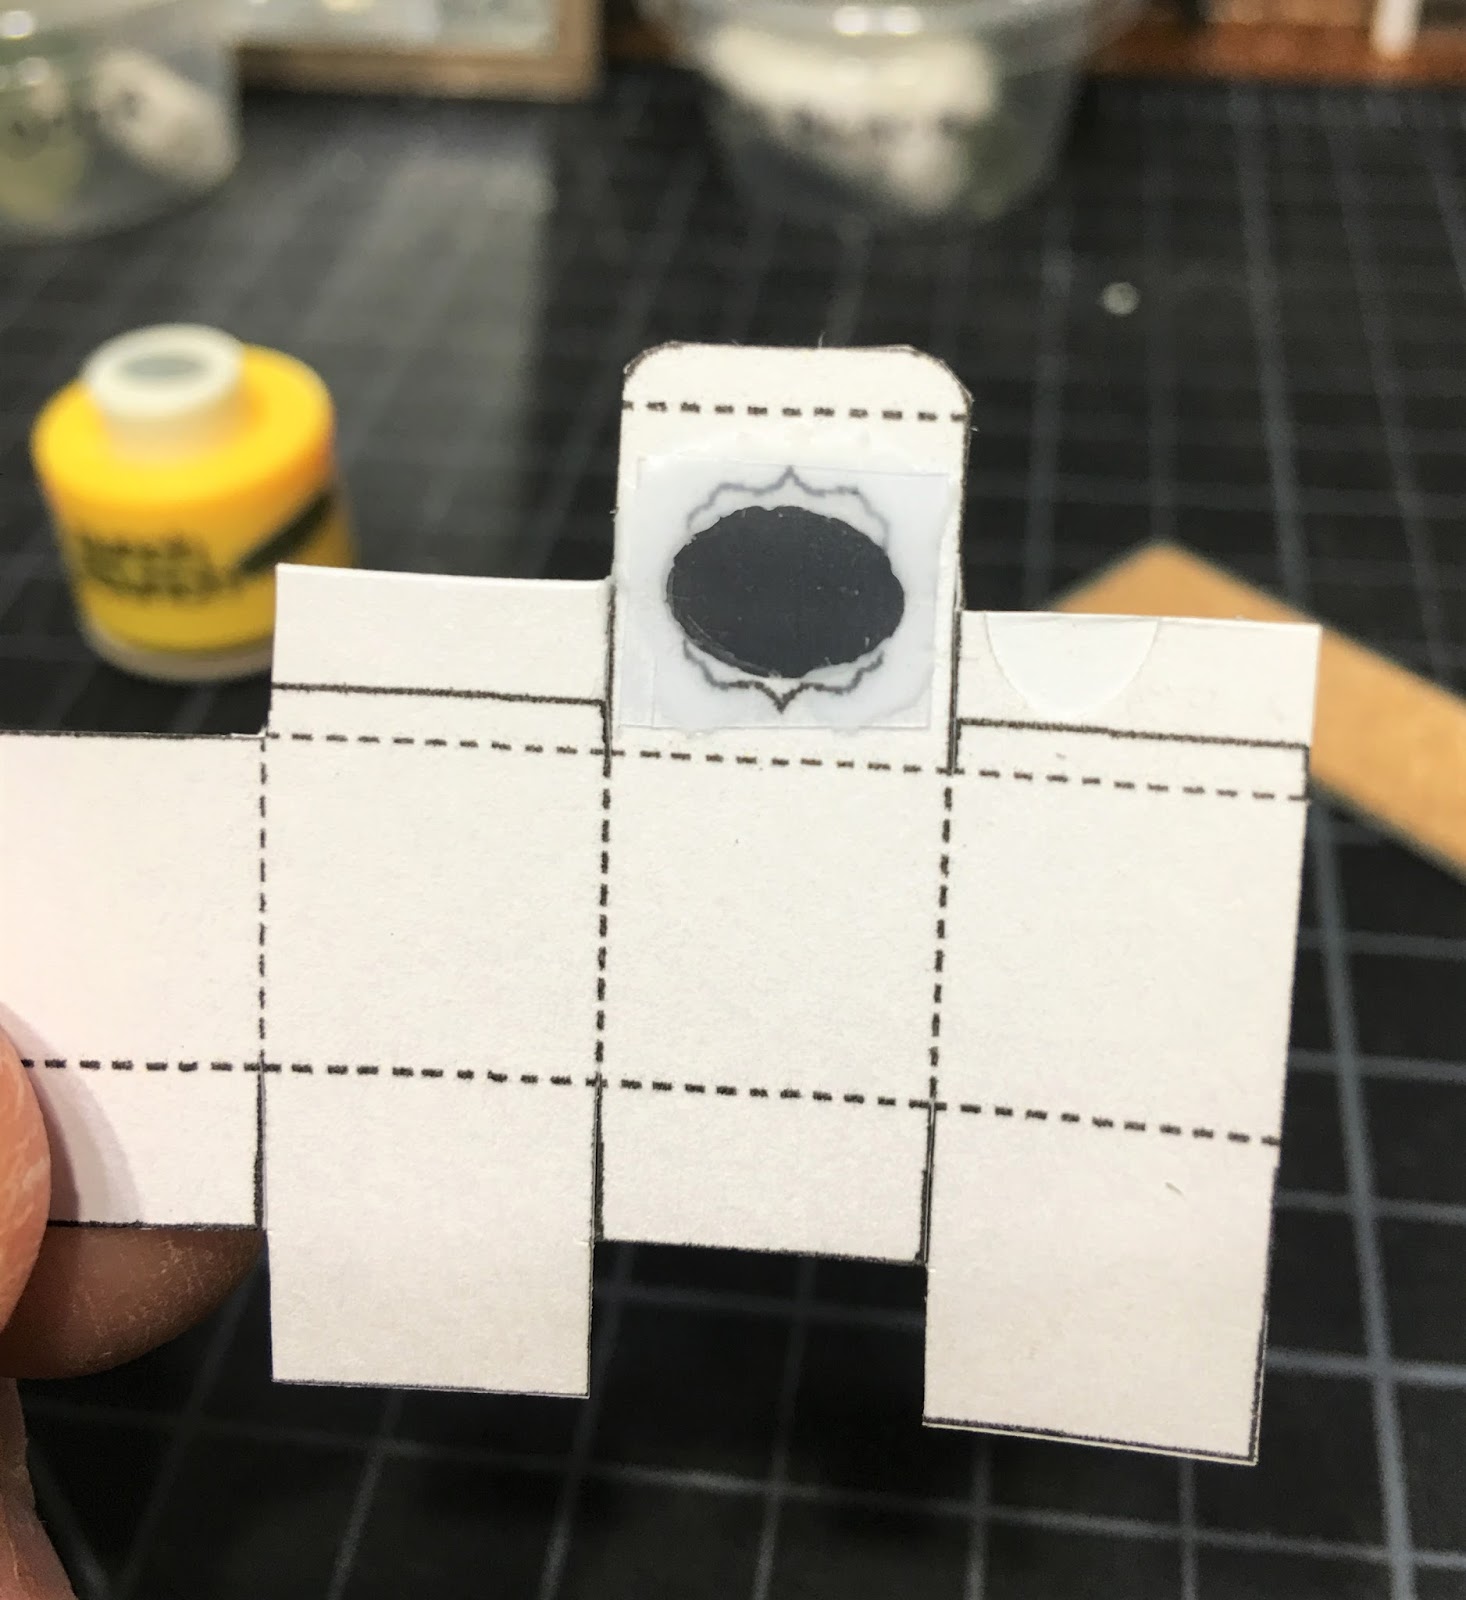
5. Center the tissue opening in your punch, then punch. You can use any shape or size of punch you have, as long as it leaves enough of an edge for gluing.

6. Cut 1/2” x 1/2” square from your zipseal bag. Apply glue to all edges around the tissue opening. Center plastic over opening and press to seal all the edges. Clean up any glue that may have seeped out the top side with a toothpick. Let dry. Note: Tacky glue and zipseal plastic do not stick to one another. Use a glue stick.

7. Cut a 1/4” slit lengthwise into the center of the plastic. This is where the tissue will feed out from.

8. Using your stylus and ruler as a straight edge, score all of the dotted lines, then practice folding them into place.

9. Glue flap 1 to flap 2. Clip to hold. Let dry.

10. Spread glue to the patterned side of flap 3. Glue to the inside of box D, leaving flap 4 outside. Let dry.

11. Glue flap 4 and flap 5, pressing down to form a tight seal and level sitting surface. Let Dry.

12. Cut a 1-1/2” x 1-1/2” square of tissue. Fold accordion style.

13. Push tweezers through the top side of the plastic “window”, Then pull tissue about half way through the opening.


14. With your scissors, cut about half of flap 6 and flap 7.

15. Apply glue to patterned side of flap 6, 7 and 8. Fold 6 and 7 down, then tuck in flap 8. Press for several seconds to get good adhesion to each surface. Let dry.
16. Using scissors, cut tissue to desired length then fluff out to fill opening.

Have fun and leave any improvements or ideas in the comments!
These look great! Thanks for the tutorial and pattern!
ReplyDeleteThank you for the nice comment Patti! :o)
DeleteTotally Brilliant work Jodi! You've done such a good job of making all of these tissue boxes (with tissues) and to me they look Perfect!
ReplyDeleteThanks Elizabeth! I recommend making several at once, because practice really does help!
Deleteall your minis are very nice.
ReplyDeleteI hope I can develop myself and make nice minis.
Thank you for the tutorial.
Your dioramas are already beautiful and so detailed! You take marvelous photographs, too!
DeleteI´m going to try this.Thank you Jodi, it´s brilliant!
ReplyDeleteThanks Alex! I hope you'll post photos when you make it. It was a fun project, and it seems most everyone will have all the supplies and tools on hand.
DeleteWhat size is your punch?
ReplyDeleteIt's a Pumch Bunch Mini and measures about 3/8" x 1/4".
DeleteThank you so much for the tutorial! I created a template for my Silhouette Cameo using yours as a guide & they cut out beautifully! I used printed cardstock, so I didn't have to glue another paper onto it. I still had to make a few cuts with my Xacto knife, but not many. I couldn't get the plastic to stay in place (probably just being impatient), so mine are missing the plastic window, but they're still so adorable! Thank you again!
ReplyDeleteThanks so much! I am so happy to hear that you had success with the pattern and with the Silhouette Cameo! I am sorry that you had issues with the plastic - it's always hard to know the right adhesive to use when sticking one material to another. When that happens to me, I see if I can sandwich the plastic in between the box lid and a small cutout square of cardboard on the inside of the lid. Also this site may come in handy for you in the future so here goes: https://www.thistothat.com/
DeleteThanks so much for your comment, and have fun with your projects!