The word for the week boys and girls is TRIM. ~T~R~I~M~ TRIMmmmmmmmm...
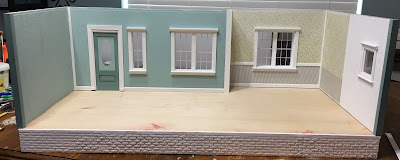
Got the window trim for the first floor installed. I'm kind of liking this Batrie style construction (a.k.a. layer cake) because you can finish stuff off as you go along, and don't really have to contort yourself to reach into the rooms to add wallpaper, trims etc... I studied some window trim photos online, looked at my stash of trims, then made something up as I went along. The funny thing is, in the end, the window coverings will hide a good bit of the effort!
Do the thresholds on mini doors kind of bug you? They don't really look like our real ones, and if the flooring is consistent throughout the house they just seem kind of unnecessary. Except of course if your doors happen to swing using a top and bottom pin rather than actual hinges. If you want them to be operational, you have to make them hinged or figure out how to install a pin up through the flooring below the door. For my front door, I did a little experimenting to see if I could actually get rid of the bulky threshold. I ended up gluing it shut permanently, which is A-OK by me.
This is an old Hofco door I acquired on eBay eons ago. The front door that came with the kit really looked like an interior door. It certainly was not worthy of a kit named the New Orleans. One of the
To correct the shortness, I added a piece of wood the thickness of the door and the height I needed to make it meet the floor.
Once I painted it and added additional trim pieces to the door, it looked like it had always been that tall! (note that the baseboard trim could now be installed.
I still have to install the outside door trim, but I'll wait until I do the porch flooring. That way, I can slide the flooring under instead of having to cut the flooring to go around. Smart cookie or just
I got as much of the baseboard and chair rail trim installed as I could before actually gluing the walls together. The kit is unique in that it has routed corner moldings which actually join the walls together. The result is corner molding on the interior wherever the walls meet. This makes installing the trim a little tricky. It's great in some aspects because you don't have to miter the trim for the corners on the chair rail or baseboards. But - when it comes to thicker trims like the crown molding, you have to engineer it a bit. More on that in a minute...
So, I stopped there with the trims and moved my attention to erecting the walls and getting them glued and nailed onto the foundation. After all, you can't really miter crown molding for walls that are not even attached together yet.
I thought maybe it might be better to add the flooring before I glued the walls down. Less tracing and maybe accidentally cutting something too short... I had four sheets of Houseworks Walnut flooring saved for this project, and it's a good thing I did. I have a lot of wood veneer sheets, but not many of the same variety. So, small flooring jobs are great, but with this much floor space, I am glad I had them in the stash. Note to self: This is why it is GOOD to stock up when supplies go on SALE!
I ran all of the flooring the same direction as the foundation joists, which in real life is a big no no. But hey - that's why we love minis, right? My house, my rules! This was a lot easier for installation because I did not have to create staggered boards at the seams - a real pain in the @$$ job that sometimes does not go so well. I also had to strain my varnish using a coffee filter. Does anyone else get dried specs like I do? Even in fresh bottles?
I tried the ultra matte finish the first time and it was really blah, so after a sanding I applied a satin. Yes, after straining that one, too! After it was good and dry, I glued and nailed the walls to the foundation. I put the ceiling/second floor on with weights to help everything seat flat. Kind of neat to see how it will look with the next floor on!
Now it was back to trim work. I had to add strips of trim to fill the space between the corner moldings. That way, I could add the crown molding just like any other job.
Until I install the two interior dividing walls, I still can only get so far with the crown moldings.
They are glued together, finally, but I am still in the spackle/sanding cycle for a few more days. It's the drying time that really slows you down.
Meanwhile, I am working on the plans for the new fireplace wall, and will hopefully start on those this coming week.
This weekend my folks are having a huge garage sale. I'll be trying to convince complete strangers that they really need to buy stuff. The more they buy, the less my parents have to take with them to AZ!
Hope you have a wonderful and productive weekend!
xoxo
Jodi


