Search My Blog!

Use the Search box below to find keywords that you're looking for quickly and easily!

Search Feature

Thursday, July 21, 2022

Always Checking... Always Fixing...

Since our last meeting, my work on the Willowcrest has continued with pretty much the same "figure it out as I go" process. Not necessarily always in the "right" order, but when you're not sure what to do next, my modus operandi is just do something... I needed to know where to make the stairwell opening in the third floor, but had to see how the kit's third floor walls were supposed to go together so that my opening did not interfere with it. And, I had to consider my own third floor layout so that the staircase opening would not create any other unforeseen problems there, as well. It was as good a place as any to start.

There was some prep work to do to the floor both before and after I cut the stairwell opening. The original layout of the kit has the third floor stair opening toward the back opening of the house. They leave the die stamped opening piece in the floor so that if you should decide not to have a staircase to the third floor, you can leave it in and put flooring over it. The plywood was very dry and brittle, and the piece had started to delaminate, so I added wood glue in all of the seams to secure and strengthen it. Then I cut the new stairwell opening with the jig saw.

Third floor dry fit with new stairwell opening. The masking
tape marks the kit's original stairwell opening.

I made the stairwell opening wider to allow light to penetrate,
to add viewing interest and to help it feel roomier.

Where you see the slots are where the kit's mansard
walls will go, reducing the usable floor space a bit.

Below is my working 3rd floor layout. Half of the kit's front window will let light in and allow a view into the staircase. The other half of the window will have a built in window seat in the bedroom. There will be a dividing wall in the center of the window between the arches. I love an old house with funky features, and this will be one! I know it's hard to envision now, but stay tuned...

Red walls are the kit's, green walls are what I'll
add and the yellow is the front window.

With the opening cut, I was able to do a dry fit to see if it all looked good. The dry fit allowed me to mark the ceiling so I could design and install the ceiling paper for the hallway. 

View with the ceiling.

Marking angled walls onto the ceiling.

To make the ceiling template, I measured the key points I had marked on the ceiling during the dry fit and then transferred the measurements to graph paper. 


Then I recreated it in my graphics program. I cropped, cut and pasted sections from the Grand Hotel paper pack I'd scanned into my PC until I liked the design, then printed it onto matte photo paper. This time I sealed it with matte spray sealer instead of Mod Podge. It was a much better choice and didn't smear the ink at all.

The transferred template is overlaid onto the ceiling
paper design, though it's really tough to see here.

Template and design printed then cut out.

Test fit looks good. Just needs trim, a ceiling rose and a fixture, someday...

I also had to make a template of the second floor hallway's odd shaped floor. It was a tricky one with all of the angles and stair parts to go around. It's great to be able to cut a removable floor template so I can lay the flooring outside of the house. So much easier on the eyes and back! 

Using kraft card scraps to make the template.

I transferred the template onto nice kraft card.

Floor template and walnut and cherry strip wood.

For the flooring in the second floor hallway, I decided to use up some of the leftover 1/16" x 1/4" walnut and cherry I had from doing the herringbone floor in Natasha's Kitchen. This time, though, I wanted to do a simple parquet pattern. Some label this "mosaic" and some "standard block". Really, it is just three alternating boards going one direction, then the opposite three turned 90 degrees. Each board length should be multiplied by the measurement of all three widths, in my case, 3 x 1/4" = 3/4". I laid my floor diagonally.


There was a lot going on in that hallway, so dry fitting and adjusting was a must. I floored over the openings for the railing and the attic stair banister so I could mark the exact position/depth in dry fit. It was a real custom job!

Does it fit with the first floor staircase in place?
Not quite. Mark and trim a little.

How about now? Still not there. Mark and trim a little more...

One last time...

Looking really good! Did I mention I'd installed the window frame?

In fact, to get 'er done, it required a little remodeling. The bathroom wall was cut at the floor with a hack saw, and the right bedroom/left bathroom door frames were carefully loosened from the floor to allow them to move out of the way...


The bathroom wall was cut at the floor.

And scooted out of the way for fitting/installation.
Shhhh. Don't tell! When I'm finished with the house
the new owners will never know!

Once the fittings were done and the floor a perfect fit, I could sand, sand, sand, stain, wait, clearcoat, wait, sand, clearcoat, wait, sand, clearcoat, wait, install. I know! The floor is supposed to look like it belongs in a 150 year old house, but I can't help myself. We'll just pretend that the floor has been refinished at some point.

After stain application.

After several coats of satin polycrylic, sanding between.

Here I have installed it and am beginning to fill in gaps with wood glue. I'll get "completed" photos after I finish installing all the trim.


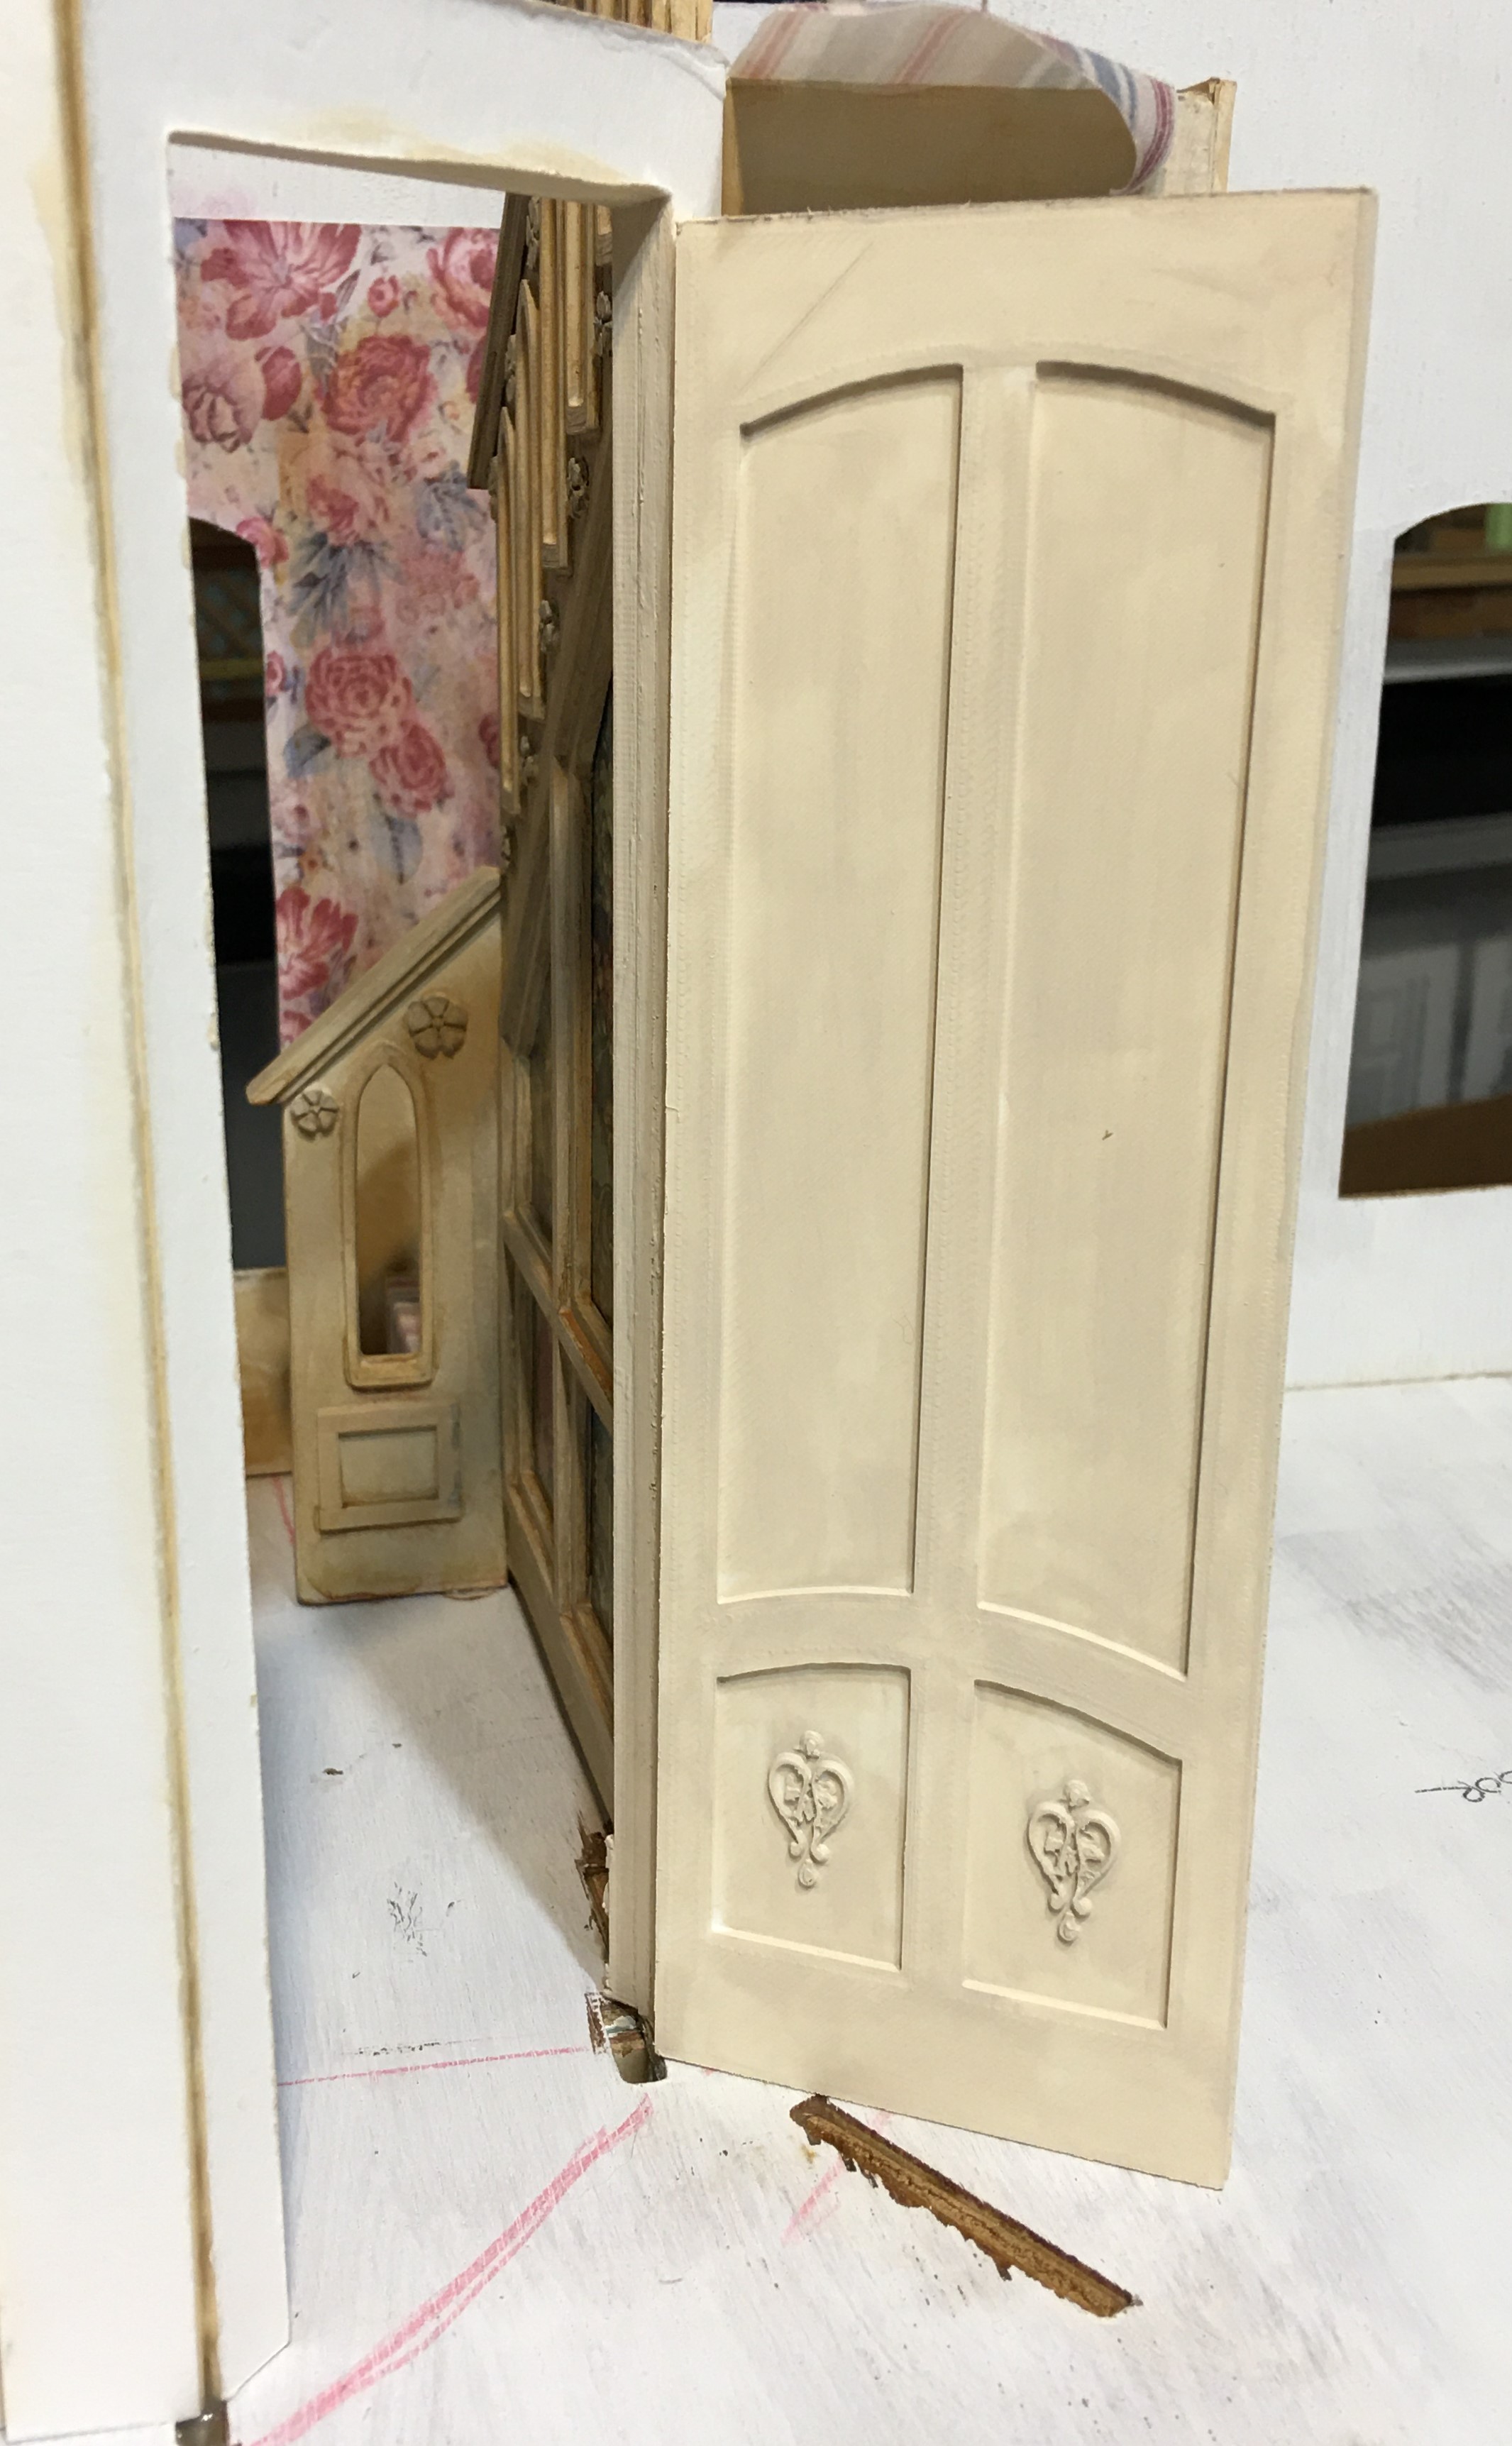
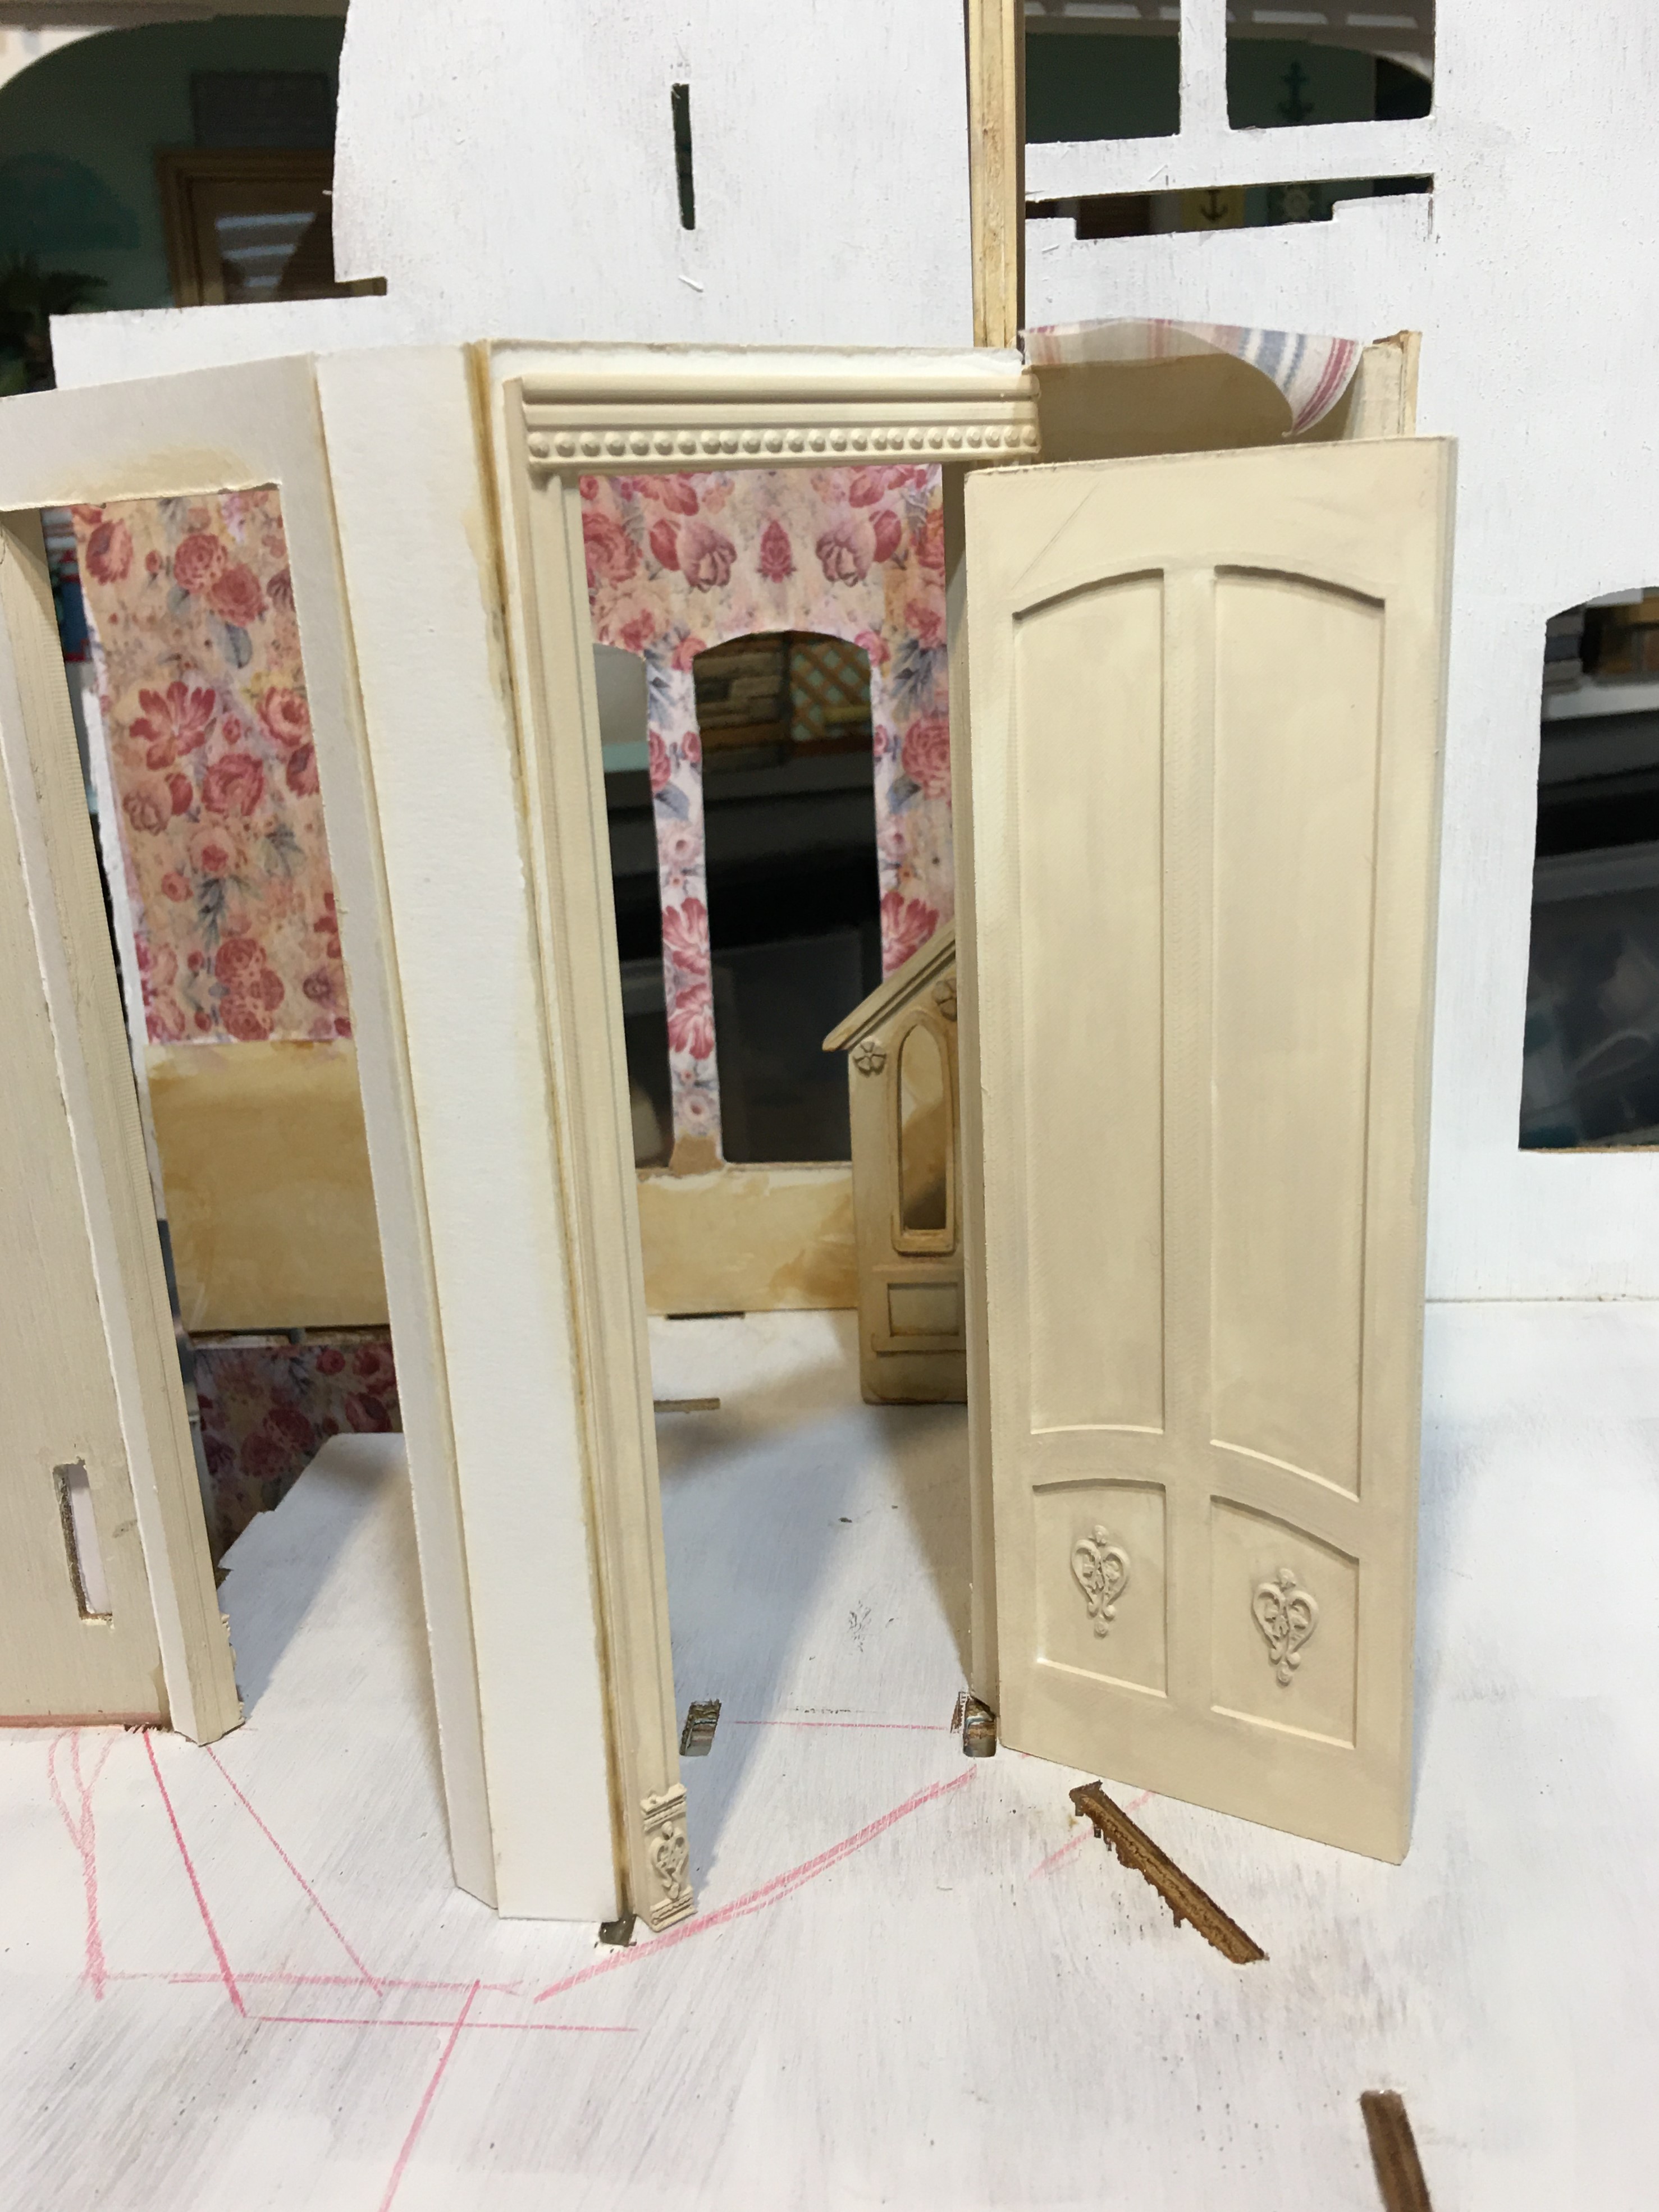
Before/after/in-between all of the above, I painted and aged the window and door frames for the first and second floor entry/hall. Most of these had to be installed before I could trim out the wainscoting. I used about four base coats of beige and then applied dirty water washes to bring out the detail and add a century of grease/smoke/furniture polish.

Entry-kitchen arch trim, bedroom and bathroom door/frame,
entry/living room arch frame, front door interior frame
and stairwell window frame.

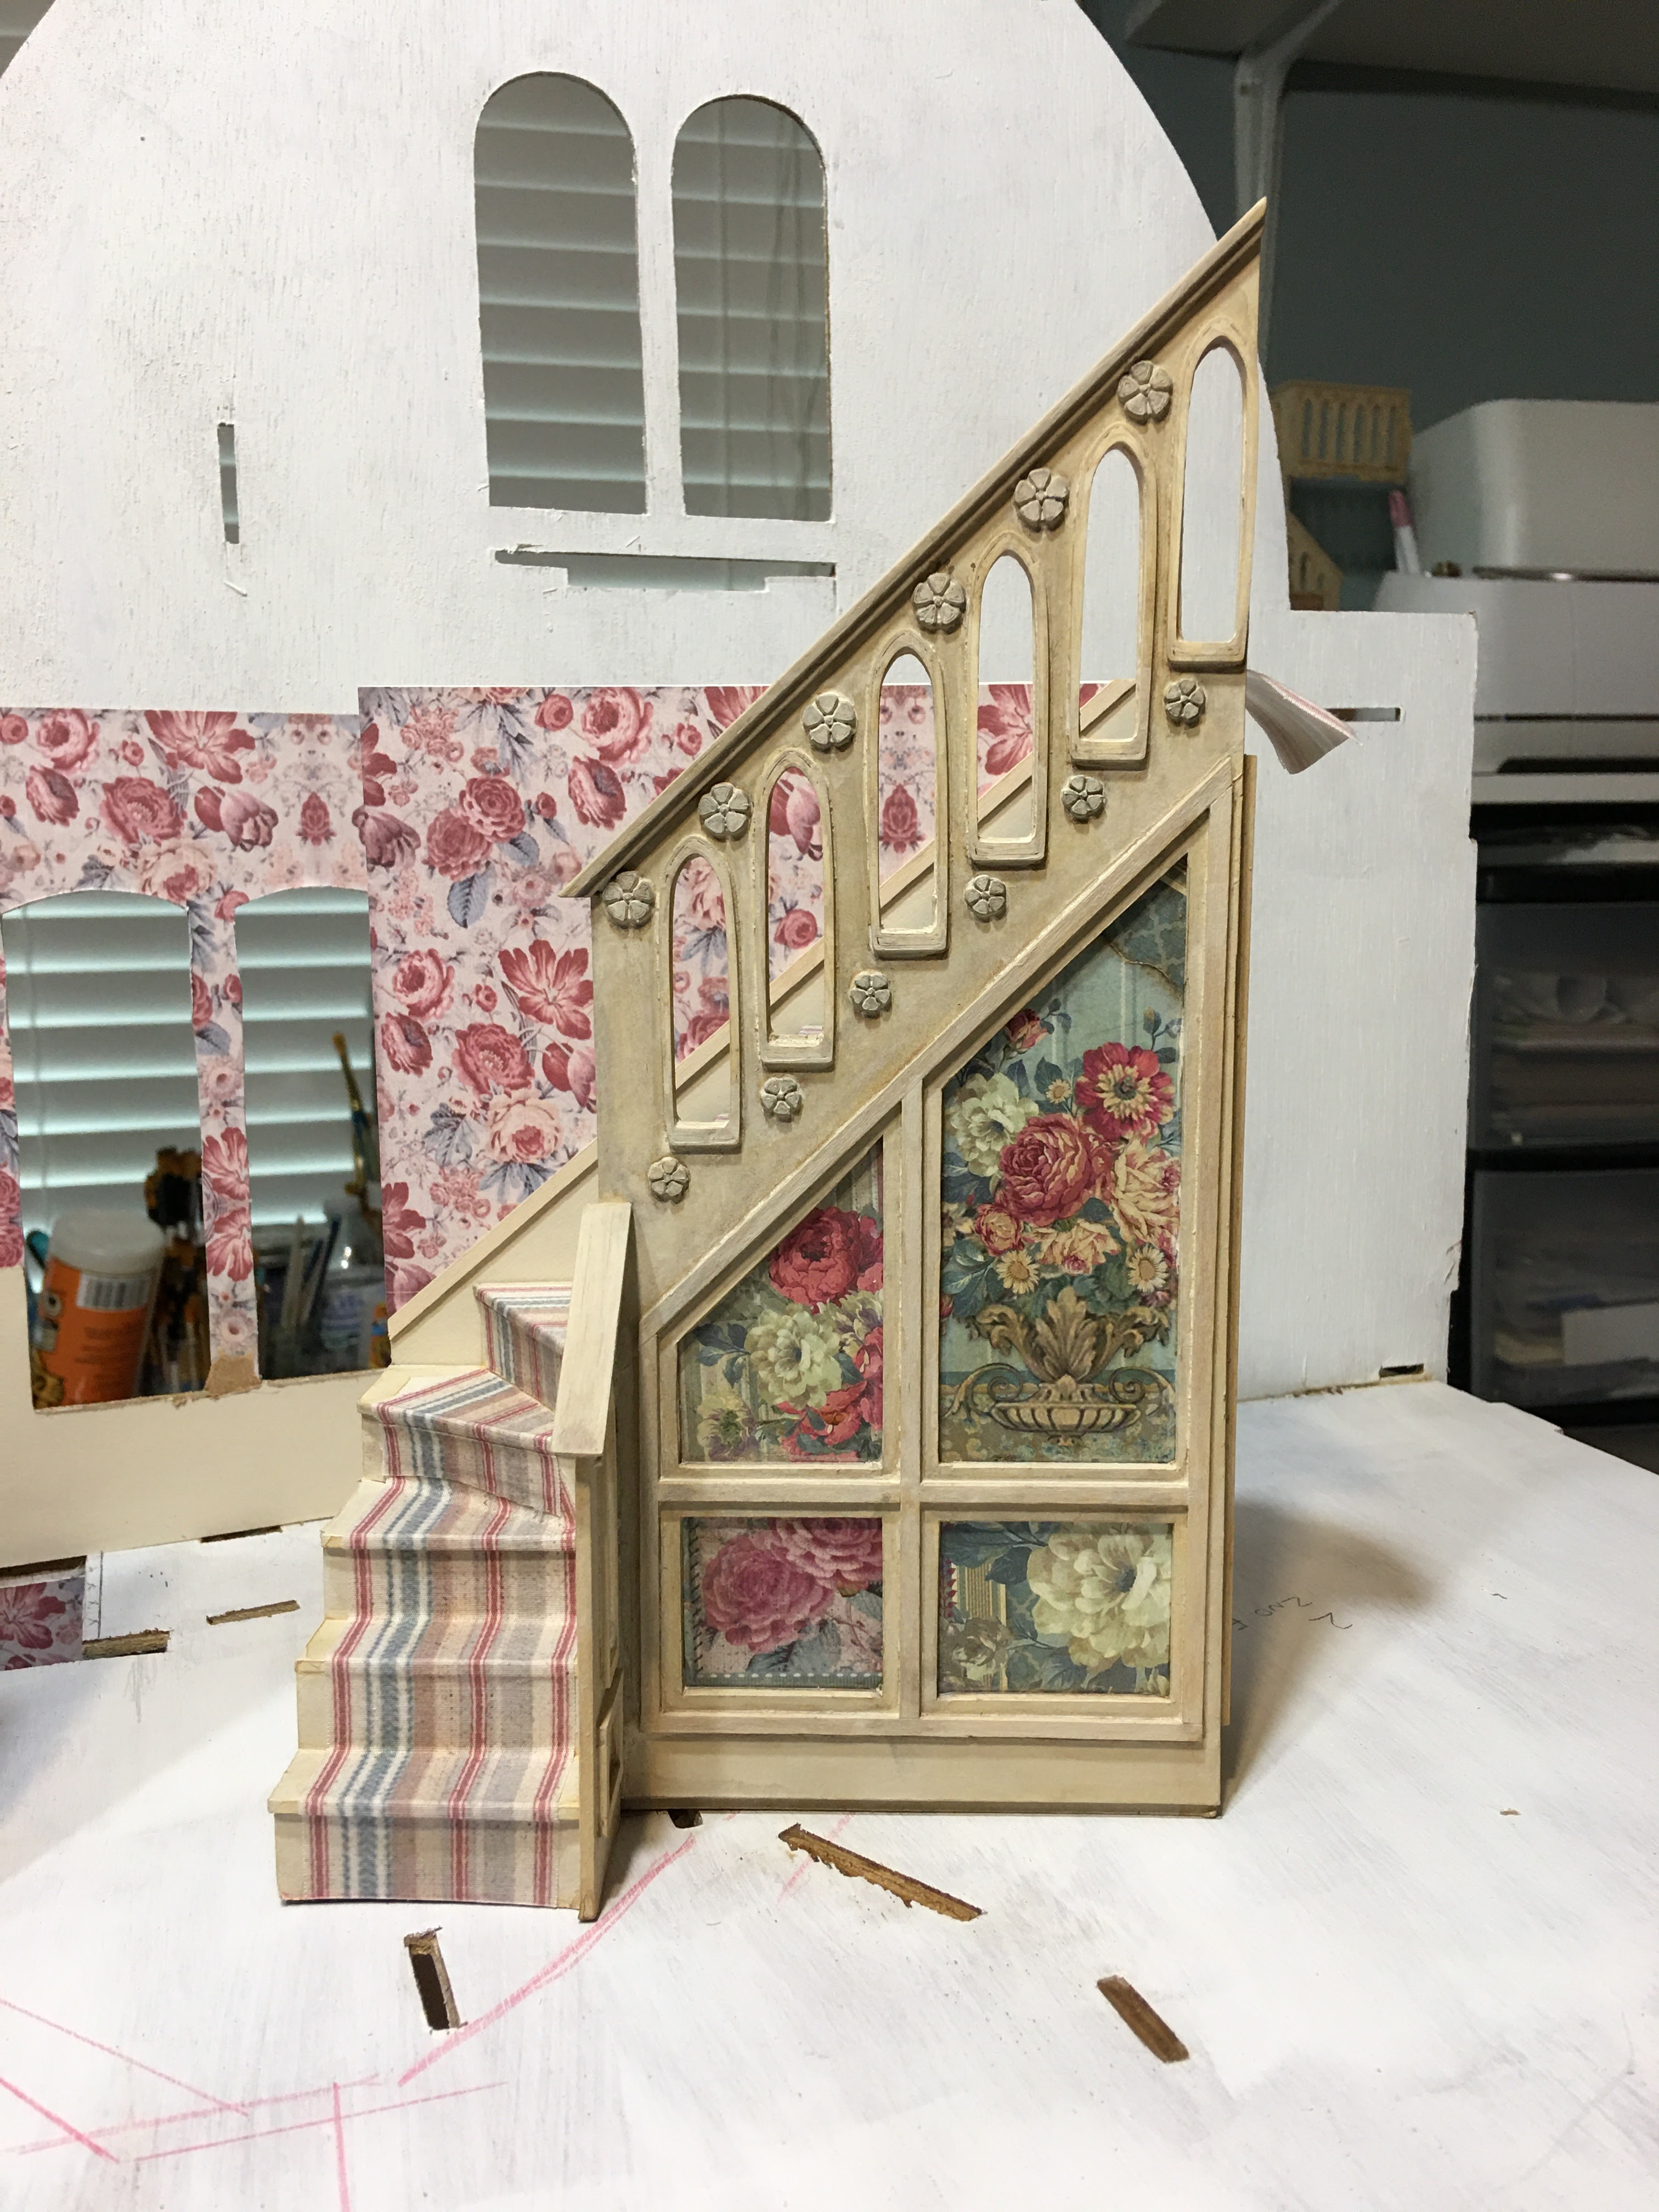
The first floor staircase got its stringer, trim, "carving" and grime.


I got the entry doorway frames installed, as well as some crown molding and wainscot trim. The chandelier is installed, too, though I may add more "hidden" supplemental lighting soon. 

I had to carve the arch into my crown molding in order to fit
because the living room arch is so tall.

I went over the brass light fixture with gold paint pen to give it age and tone it down.

I made cornice blocks for the corners because the entry has limited
places to reach your hands in, let alone see very well. 


With the entry light on. It is only run by a 9 volt battery to test it, so it will be a little brighter when connected to the transformer. I will likely add a lamp on a table to the room later on.


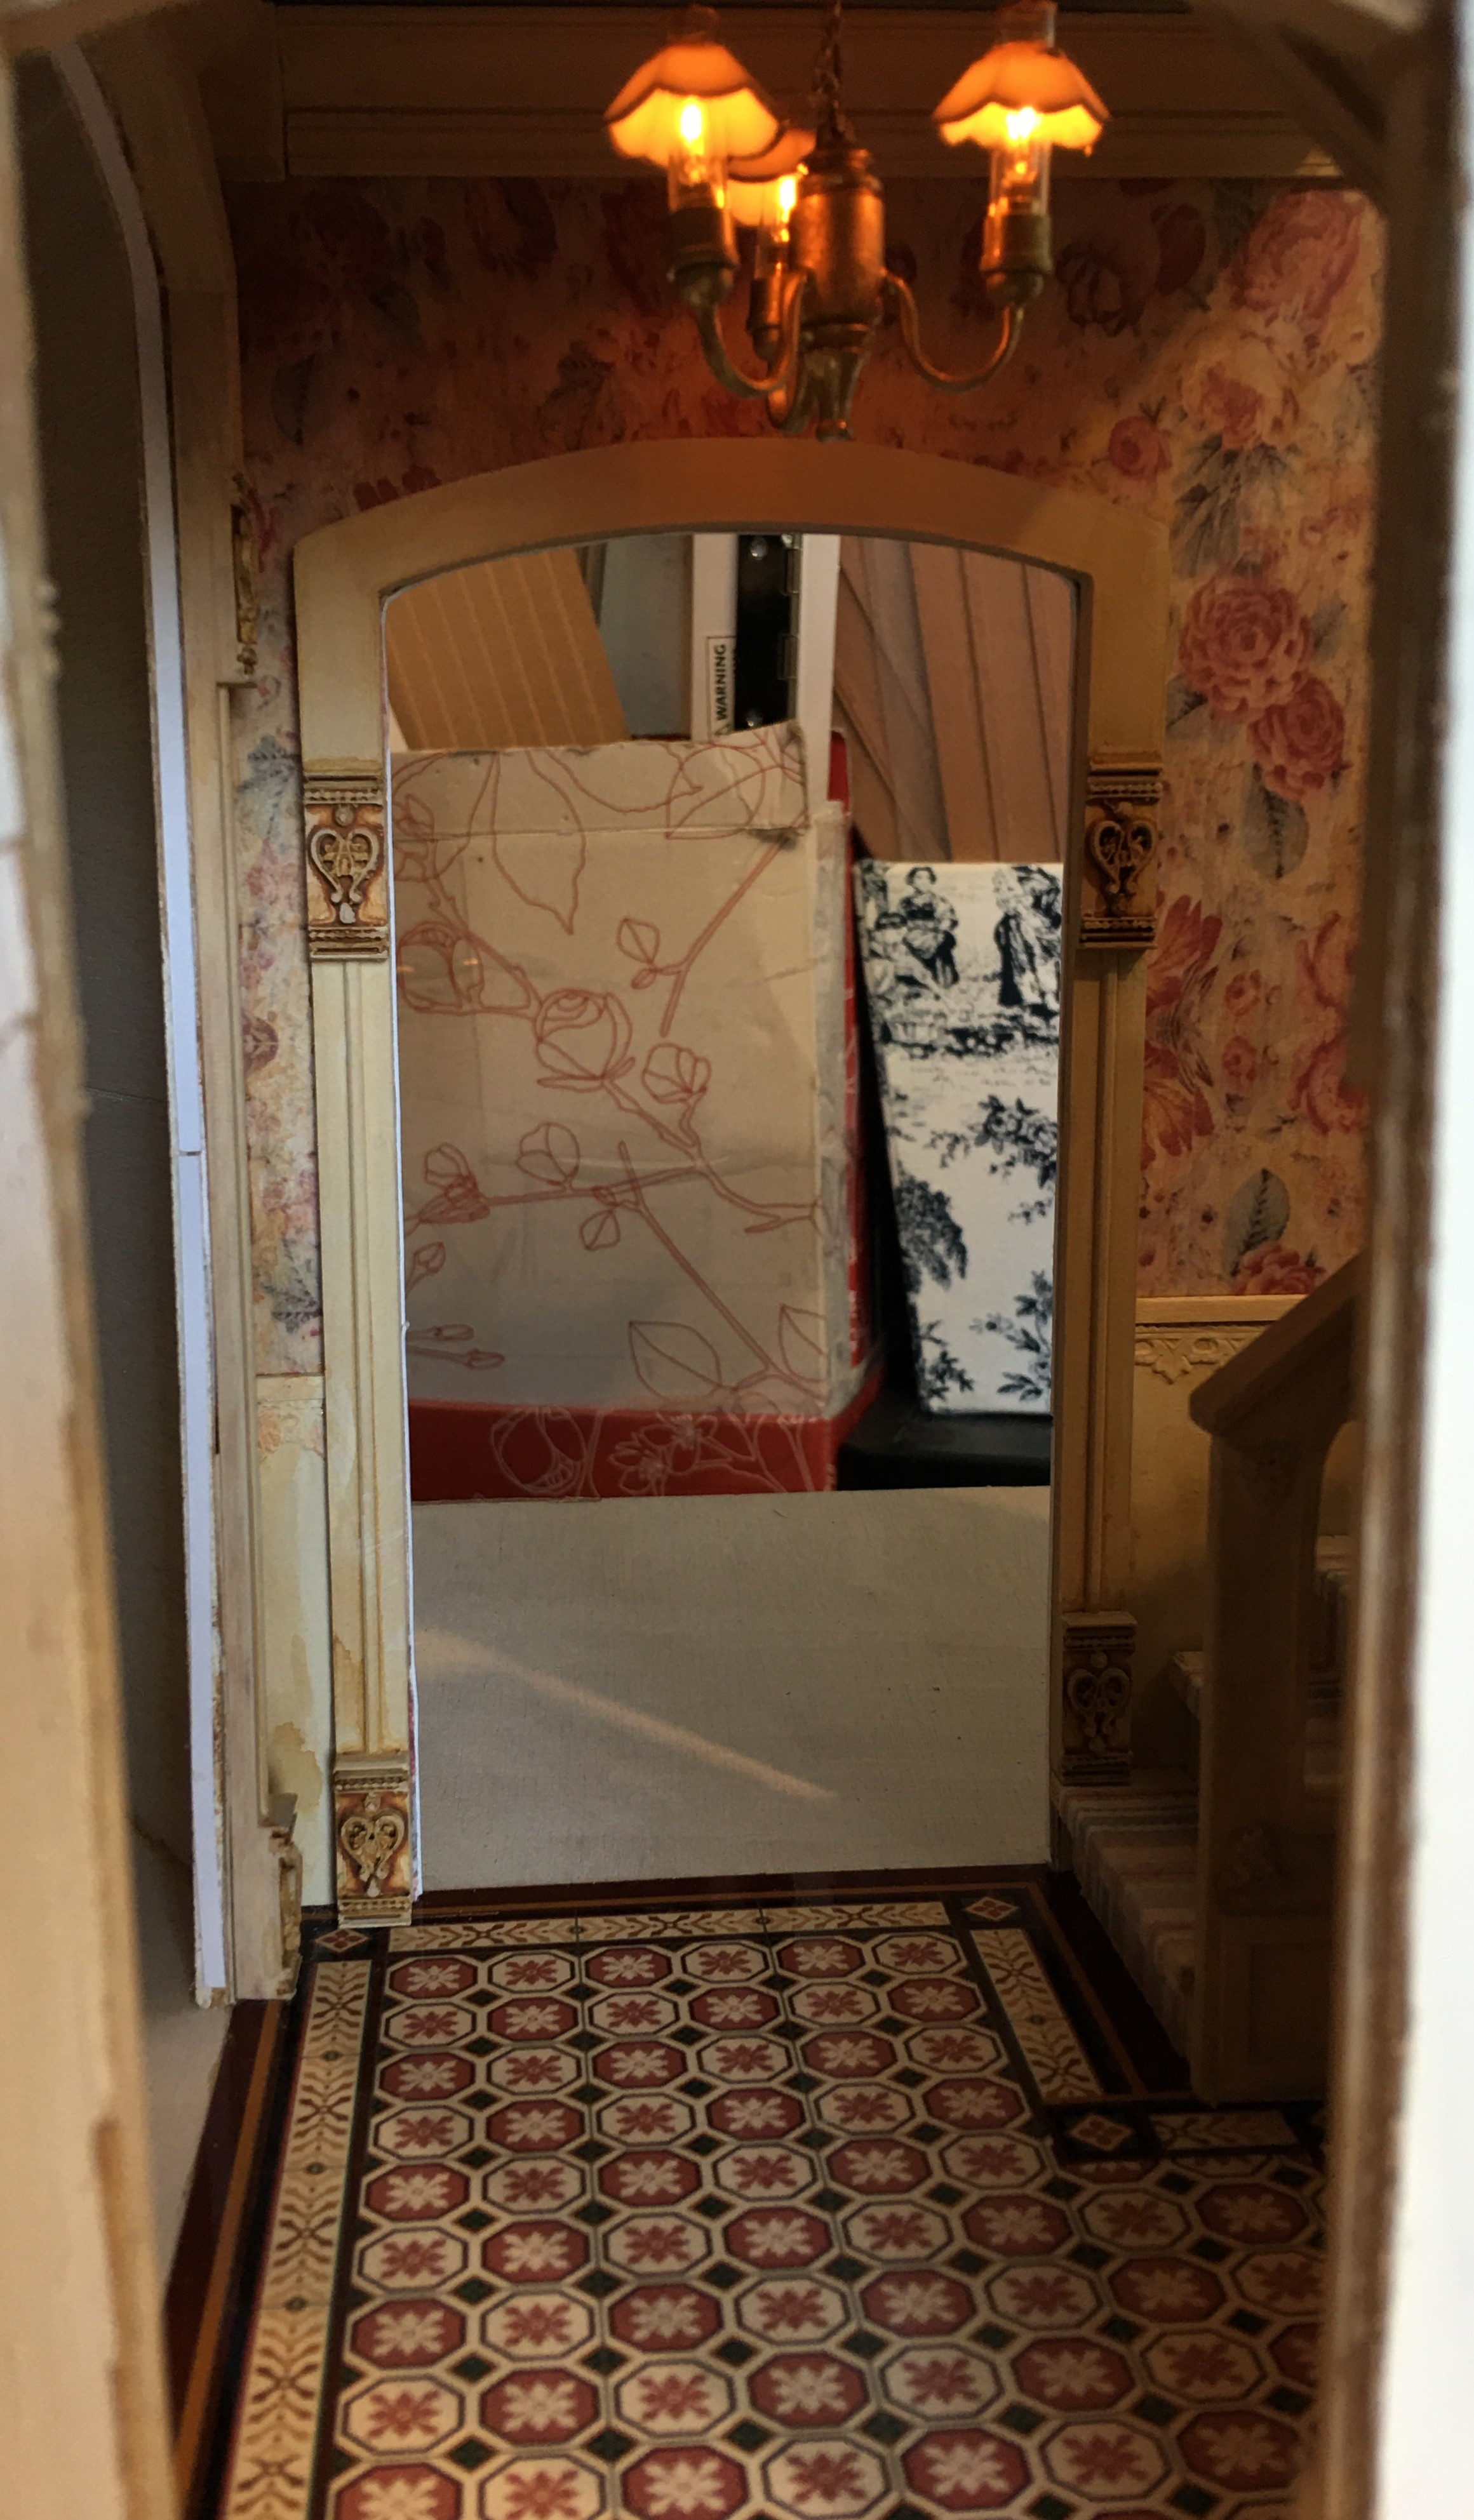
Looking in from the front door.

View from kitchen door.

There is still more trim work to do, too, after the staircase is installed. For now, I check the fit again and again from every angle... Fixing what I see...


View from living room.


Slow and cautious with many "think breaks" is the name of this Willowcrest game. If I forget just one thing, I will make a great deal of trouble for myself. Though the repetition gets a little tedious, at times, I'll keep checking and fixing with each new step. Hopefully, in next week's post, the entry and second floor hallway will be officially completed and I can begin planning which room is next!

xo xo,

Jodi

Tuesday, July 5, 2022

Disorganized Progress

If I'm trying to describe my mini work atmosphere over the last week or so, I'd be using words like chaotic, scattered, disorganized, interrupted and uncharacteristically unsystematic. I mean, just as I would think I found my path and a direction to dedicate myself to, I'd remember some other important tasks that needed doing first. Trying to communicate my process and photos into a linear and understandable timeline will be challenging, but here goes...

The "progress" part.

I started off with the best intentions to get the staircases completely finished. I replicated the arch cutout in the stairway railings in Tinkercad, along with some fancy "carvings" so I could add a bit of dimensional detail. I got them printed and applied to the staircase railings.


3D printed details added to stair parts.

Second floor staircase railings.

I kept going with the stairs, adding trim and wallpaper, painting, aging, and dry fitting a bunch of times to help the fit or mark for ceiling paper and flooring. I also scanned one of the papers from the Grand Hotel paper pack, a stripe, printed it onto cotton, then made runners for the stairs. A stripe on turning staircases was probably a more challenging pattern than a floral would have been, but I think it came out fine. It has the same colors as the wallpaper, and I love it when florals/patterns/stripes/gingham match in a room.

Entry stairs.

Dry fitting to find and eliminate gaps.

Second floor staircase with embellishments and trim added,
painted, aged, carpeted and in place.

Both staircases in their places.

View of the landing.

It seemed like a good time to install the wallpaper to the entry/second floor hall. The sister paper to the stripe in the Grand Hotel pack was a floral that I really loved, but the scale was just way too large. I decided to scan it, reduce it, mirror it and print it onto matte photo paper.

Original papers in 12" x 12" dimensions.

Despite trying many settings and color adjustments on my printer, I just could not capture the worn/aged patina of the original. So, to make lemonade, I installed it, sealed it with Mod Podge Paper (which still blead the ink if I wasn't super gentle and tried not to go over the same spot twice) and then applied a brownish/yellow age wash. You can see in the photo below the paper between the window openings is not aged and the paper around it has been. I really liked the effect - it's totally in keeping with the time worn look I have envisioned for this project.

Wallpaper and wainscoting with age wash applied. Ageing always looks terrible
at first, but the trick is to keep going. Suddenly, it looks perfect and you look
like an expert instead of a really dumb crafter. 😊

To finish off the second floor staircase so that I could install it, I had to create the separation wall to the bedroom, paper it, add the stair stringer and trim and attach it. 


Bedroom wall attached, wallpapered and stair stringer/trim added to wall.

Then the bedroom side needed trims, painting and aging. I left room at the top and bottom for later baseboard and crown moldings.

Trims added to bedroom side of wall.

Painted and aged. Space left for baseboard and crown molding.

Russ lent me some long bar clamps so that I could get the staircase glued in and have the front wall and floor at perfect 90 degree angles. Sorry, there aren't any photos - I was pretty scattered!

Getting the staircase glued in was an essential step in creating the new walls and doorways to the bathroom/bedroom. I also had to install the wall separating the entry from the kitchen first. 

Front, first floor, center wall, foundations and entry/kitchen/bathroom
wall have been glued together. No more rickety-ness!

Second floor staircase has been glued to front wall and second floor.

Hooray for Russ' clamps! No gaps!

With the staircase installed, I could get accurate angles and measurements to create the new walls/doorways for the bathroom/bedroom. After looking at the kit's original plywood wall with tabs and doors cut into it, I decided it would be easier/cleaner to cut the new walls from illustration art boards. When doubled, they are just about exactly as thick as the kit's plywood.

Kit's original bedroom wall compared with doubled art board.

Once I knew what widths the doors would be, I cut the walls for the doorways. Once they were cut, and I knew how wide the doors and the frames had to be, I could create them in Tinkercad. But what style? I did some poking around to look at second empire interior doors. There were lots of styles to choose from, but I really liked this Divided Arch door from an This Old House article talking about choosing the right doors for your historical home. This door echoes the long, tall arched windows in the kit without having to be curved itself and therefore hard to hinge. Of course, I added extra details in keeping with the rest of the features in this house.


Divided arch door style typical of second empire homes.

My rendered interpretation of the double arched door.

I printed an inside and outside frame for each of the doorways. I also printed the doors in an inside and outside half so that the door is flat on the print bed. It is easier and cleaner to glue the sides together than to add support for the recesses and then clean it up after the print. I used the frames as the pattern to cut the door openings in the new walls.


You can see this was before the stairs were attached or trim added to the stairwell/bedroom wall.

Dry fit with exterior door frames attached to angled door walls.

When the exterior door frames were glued to the angled walls and the openings cut, I was able to glue them into the house. The bedroom's angled door wall was attached to the stairway wall, the bathroom's to the kit's entry/kitchen/bathroom dividing wall. This totally changed the angles the doors had to be placed at, so a new separating wall and dividing wall had to be cut. Once these were all tied together, they were stable and strong.

New configuration has less of an angle but leaves more room in the rooms.

Angled door walls attached, a coat of paint and trim added between.

View of second floor hallway through bedroom door.

View from both doorways. I won't install dividing wall until I have done the flooring.
More room for hands this way.

Here is what the doors look like printed and with a coat of paint. To hinge them, I will use pins: the top pin will be recessed into the door and into the wall, covered and secured by the interior door frame. The bottom hinge will be placed in a recess drilled into the floor. But I must complete the flooring first, so it might be a few steps down the road.

Door will swing in this way.

Door with doorframe.

My next steps will likely be to get all the wainscoting and trims installed in the entry and upstairs hall. Once that is finished, I can install the first floor's stairs and it's exterior wall. It's going to be a custom, piece by piece operation, and who knows what I'll remember that I forgot. I did get the entry's flooring, ceiling and ceiling rose installed. With a little luck, it might just be ornate enough for second empire in my next post.

Patterns from the paper pack created the ceiling paper collage.

3D printed ceiling rose. I don't think this ceiling will ever be seen
once the wall goes up. But we'll know it's there.

Lighting for this project is going to be another challenge. I will have to not only use up the 12 volt dollhouse lights that I have in my dwindling stash (and try to make them look second empire), but also come up with a few 3D printed fixtures to supplement. Test designs and prints to commence, soon. Looks like more disorganized progress is in my future, but what a fun adventure this is turning out to be!

Tally Ho!

xo xo,

Jodi

P.S. If anyone should need the Willowcrest instructions, just click the link for a .pdf which you can save to your computer.