Search My Blog!

Use the Search box below to find keywords that you're looking for quickly and easily!

Search Feature

Showing posts with label Product Reviews. Show all posts

Saturday, December 30, 2023

The LEGO UP! House

Hello my friends! It has been much too long since my last post and I have missed connecting and being inspired by all the creative things you've been up to. I am going to keep this post positive so we'll move right on in to my newest creative pursuit. For the 'why' of the absence, I'll leave that at the end. If you don't like sad news, just ignore it.

My son Ande and I have always enjoyed seeing Disney and Pixar films together. Since the first Toy Story movie, it has kind of been our thing. Since he is a fully grown up thirty-something-man, our opportunities to see new movies together face significant challenges. But we still try to fold watching them into our family gatherings. We both hope that one day he will have a little one to share them with.

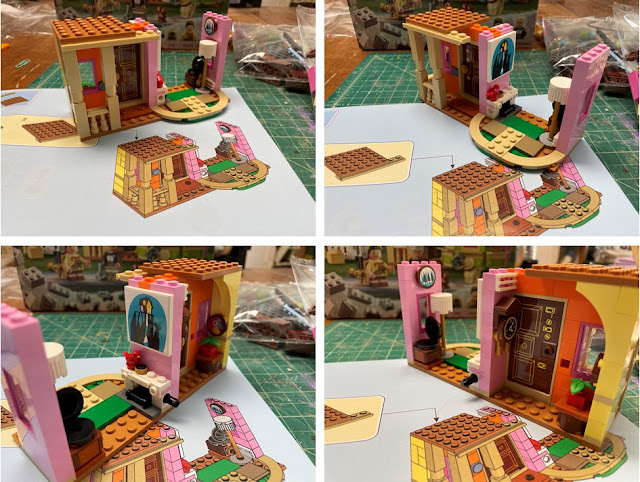
This year for Christmas, knowing that I had limited time, Ande and his fiancé Alexis (Lex) bought me the LEGO UP! movie house. It is absolutely adorable, so I couldn't resist getting started on it right away! What a joy it was to assemble! It kept my mind occupied and when it did wander, it wandered to happy times.


Russ has assembled many LEGO sets in the last few years, mostly Star Wars space ships. Each time I dust them I worry that they will fall to the ground, pieces exploding everywhere. Yikes! So I decided to glue mine together as I assembled. I read so many differing and conflicting recommendations for adhesives, but finally decided on Testors Liquid Plastic Cement. I would not recommend it as after letting the first pieces sit for a day or so, they came right apart. Next time, when I have more time, I will order Le Glue and give that a try. Luckily, my kit only included four bags and roughly 500 pieces. One of Russ' had 8000!!!


First came Russell, the boy scout who was working on his last badge: Helping the Elderly. His figure is adorable and so detailed - right down to his backpack loaded with camping equipment.


The rest of bag 1 consisted of mostly the first floor of the house. It was great to see so many of the references from the movie included in the details. Like the compass, the front door with all the locks Carl installed to keep the changing world away and the giant painting of Paradise Falls above the fireplace. I wish they'd had a way to incorporate Ellie's chair alongside Carl's like in the movie. Seeing her empty seat next to Carl's in the movie conveyed his loneliness for her in such an impactful way.


Bag 2 started off with Carl. One side of his LEGO face is smiling, and the other sports his all too familiar frown. I chose to display the smile, of course! I love that LEGO included his walker. And what a great head of hair he has for an old guy! I think this may all be 1/4" scale, as Carl and Russell are both about 1-1/2" tall.


By the end of bag 2 we see the bay windows and the second story taking shape.


Bag 3 starts off with Doug the faithful dog. The kit also includes his irresistible distraction, Squirrel (you'll see him later).


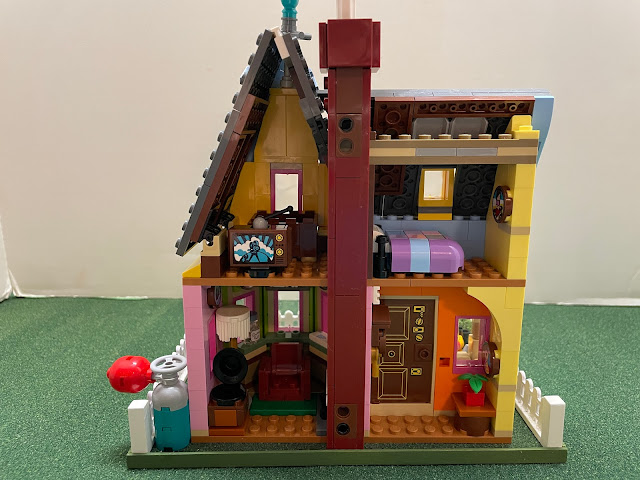
By the end of bag 3 we have a roof, the chimney, Carl's bed and TV and even Ellie and Carl's Adventure Book stored in an old crate!


The final bag was all about the balloons and display details. The kit provided a wedge for two fence pieces, a helium tank, the mailbox and Squirrel. 


It was cute but I thought the house deserved an actual display base so I set to work making one. I created the base using two pieces of 4-3/4" x 7" art board laminated together. I added a piece of model railroad grass to the top and lined the edges of the board with 1/8" x 1/4" basswood painted green to match the grass.


I wanted to keep the integrity of the LEGO set while honoring the original house and yard in the movie. So in Design Space I replicated the LEGO fence in the kit but also kept the gate design from the movie animation. 

Movie Screenshot


Lego fence, my fence and gate pieces.


I used Kraft cardboard for the fences and gate so I made several layers to laminate together. I made the gate wide so that I could trim to fit once the fences were in place.


The LEGO fences had bottom boards that lifted them off the ground, so I made basswood frames to tuck my fence board pieces into.


The movie house had decorative round finials on each gate post. I had some in my stash and made them sturdy by using a toothpick "biscuit" to join all the pieces.


Here are the fence sections installed on the display base. The gate functions with three kraft card hinges, glue welded, painted then Mod Podged for a secure bond.


Of course I had to take the opportunity to add some fun detail. I deconstructed the LEGO fence display piece and included some of the pieces on the display board. The helium tank will now sit next to the house. The mailbox has been installed (with toothpick) next to the gate (like in the movie house) and has a few blades of long grass, missed by the mower, protruding from the base. I installed two Squeeze Me bushes to the front corners of the yard. They are mounted on kraft card circles dusted with potting soil and secured with hairspray. And a couple art board pavers have been added. Squirrel has a permanent place on the fence post, affixed with a toothpick, and will drive Doug to distraction whenever he goes out for "business", lol!


And here's the display complete with the LEGO UP! house and all the characters that come with it. I hope to add a dust cover, one day.


And here's another peek inside...


What a fun distraction and a beautiful reminder of life's wonderful things! Thanks Ande and Lex! 💗

I hope to be back as soon as I can and to catch up on everyone's blog posts as I find the time.

Give all your loved ones some extra love today.

xo xo,

Jodi

Last July my mom began to experience significant back pain. She really dislikes going to doctors so decided to try and manage it on her own. I sent CBDs, some with THC and some without to try and give her some relief until the pain subsided or she agreed to see a doctor. The THC ones were great because she could finally get some sleep. Fast forward to November and her back pain still shadowed her days. I flew down with my daughter and mom finally saw a doctor. That doctor referred her to a urologist and a couple weeks later she got an explanation for her symptoms: cancer. Since then my family and I have moved into a new and sobering reality. Since then Mom has had more challenges, no real answers, no real plan and an unexpected hospital stay after an alarming complication. Back and forth my brother and I go to Arizona, to support, spend time, encourage and love my parents through this process. We are all praying for a better picture and a plan after her surgery on January 19th. The first surgery was postponed for a month in the hope of getting mom strong enough to have it. A blood transfusion helped her to feel much stronger so she may have one more before the surgery. If there is a bit of good news it is that her back pain has mysteriously disappeared. Minis, though an invaluable source of calm and joy for me, have obviously taken a back seat. I'll do what I can when I can and post as it is possible. Small and portable projects might be the answer in the near future. Your prayers and good thoughts for our family are so appreciated!

Thursday, February 16, 2023

How In The World Do You Make A Fairytale Treehouse?

Oh, I hope you aren't looking to me for the answer, because I don't even know what I'm doing... yet! I have this idea of the finished look in mind, but I'll be darned if I know what steps to take to get there! And then, to make it even more challenging, my lizard brain keeps trying to set me to task on all the "usual" dollhouse building processes. Like starting to cover every wall in wallpaper. No!!! Completely wallpapered walls is not the kind of fairytale treehouse my heart is dreaming of! And when you top that off by going rogue on the dollhouse kit instructions, then you have really made a job for yourself. My "no plan" plan might be way more trouble than I anticipated...

Alice's Bed Cubby Pop Out

So, I started with the things I DID KNOW that I wanted. The girls' cubbies needed to be very fairytale princess, but unique, per their request. Their color choices were primarily purple and green. Pink, they said, is apparently "So Cinderella", and "So Predictable". Okay, no pink. Too bad. I LOVE pink!

The girls picked this paper pack and asked if I could incorporate lots of it in the treehouse without making it look too much like a dollhouse. Uh, I can try...The hues in the paper pack became the color palette for the pop outs. It's just coincidence that the pad is named Alice...

They did say I could include all the frilly details I could come up with, so I dug through my drawers for things like Dresden appliques, tin flowers and leaves, metal "nail heads", beads and pearls and fretwork metal pieces. I painted all the appliques so the detail would remain a bit more textural and subtle.


The inside of Alice's cubby got a two wallpaper detail with bright trim work. She is very excited thinking about how her bed full of pillows is going to look!


Goldie's pop out has a bit less frill because the kit's window was already nicely detailed. Since I turned it into a pop out from the original flat wall window, I had to create the inside trim. It still needs a little work but I'll wait for ideas to hit me.


These are the papers Goldie picked for her cubby...

Later, when the dirty water washes come along to tone down the brightness, I am pretty sure the look will be more "deep woods princess" than "Little Tyke Princess".

A while back Emily shared her experiment using Sakura Glaze pens for mini stained glass windows. They turned out great and it looked fun to try. I just love the acetate window designs that came with the Linfield kit, and they have great potential for a really pretty stained glass look. To start small and slow, I used the clear glaze pen and with a little practice, the windows could become stunning. I started with the SAKURA Glaze 3D Ink Pen - Jewels pack and am awaiting delivery of the Sakura Glaze 3D Ink Pen - Brights pack. I'll let you know how it goes.


Since the kitchen pop out was not part of the original kit, I had to make the window myself. Luckily, there was a section big enough from the kit's acetate sheet to cut it from. I used the white colored glaze pen to try and mimic the kit's acetate windows. The lines are much thicker, but in this fantasy theme, I am happy enough with the result. Here it is in the painted and detailed pop out window. Getting the "glaze" to go where you want it to go is a bit tricky at first, but soon, you get the hang of it.


And here is the right wall with two of the pop outs ready for installation. First, though, this wall will be getting one more feature - a door opening into the third floor/attic space. It is only going to be big enough for the smallest of tree dwelling forest creatures. More on that later...


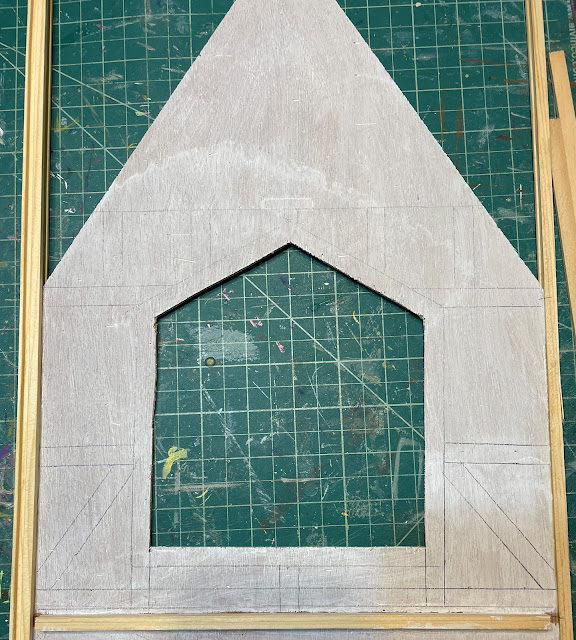
And more decisions need to be made about just how to make a fairytale treehouse. Some wall doodling is helpful in visualizing just what might look right...

Can you see the faint pencil lines?

A closer look.

I think I have a direction, and after I prepare the house for a weekend full of gathering family, I'll get to play with it some more! All your creative suggestions will be most welcome and any I think I can achieve, incorporated!

Have a great weekend!

xo xo,

Jodi

Thursday, September 10, 2020

Getting Back Up Again

Hello Everyone! Though I have only been away for six weeks, it feels like I have missed out on so many amazing mini things in the community! I apologize for not leaving comments on blog posts, and for not posting my own. It might take me a few weeks to catch up, but I am looking forward to the effort...

In the past five years or so, especially since I began to share my mini adventures on a blog, there hasn't been too many weeks when I haven't been excited about or looking forward to some kind of mini challenge. A couple vacations or helping my folks move to Arizona aside, I have been all minis all the time. It felt weird not going in to my craft room (a.k.a. dining room), and in fact, I actually found myself pretty much avoiding it. More on that later. I don't have a whole lot of progress to share this time, but in the interest of giving everyone a little something to distract from the craziness in the world (particularly here in the US), I will share what I have managed to do.


First I need to share a little bright spot. I made a fabulous (and rare since Covid) purchase from Gergana Trichkova, the artisan behind CrochetCanto on Etsy. I had been searching for a tiny clown doll for Vera. The real life Vera was a collector of clown figures of all kinds from every place she visited around the world. Each time I would visit she would show me a new one on display and tell me the story behind it. She was in her 70's in the 70's so she had thousands!  It made her so happy to share her passion, so I knew that my Vera would need to have at least one clown in her cottage to honor those memories. In my searching, I saw a leprechaun doll in Gergana's shop. It was created with micro crochet and was so unique and adorable! I wrote to Gergana asking if she would accept a commission for a clown doll with similar style and size, but with a blue and yellow theme. She happily and enthusiastically agreed and a week later sent me photos for approval!


I could not be more thrilled with the workmanship and detailing, and by golly she even gave him a wee balloon! I also ordered a handbag and a delicate pot of daisies - they, too, are a wonder!

It is such a blessing to be able to collect these precious, handmade things from artisans around the world! This time from the talented hands of Gergana in Bulgaria! The shipping process was worry free, too - she provided tracking so that I could follow the package all the way to my door! Gergana even made opening everything feel like a thoughtful gift! Excellent packaging!


I can't wait to display all of them in Vera's cottage!

Now on to my meager progress for Vera and Virgil's cottages... I decided to use up of some of my stash of furniture kits. I really love using the Maker to make furniture, but also feel guilty for having all these kits and not using them. I reasoned that if I use the kits that I have stashed, then I'll have space for more furniture making supplies in the future.
And... I really just enjoy a good mini kit, too!


I started with the hutch and tables/dining chairs for each cottage. For Virgil, I used HOM kits, except for the table which was an old Magic_N_Miniature kit I picked up on impulse on eBay. What amazing wood this kit had! I had to stain the top!


For Vera, I used a Chrysnbon table and chair kit and a barewood hutch that I had left over from the Sweet Christmas Cottage kitchen. I softened it in the micro so that I could pull it apart for sanding and finishing. There was a lot of excess glue, and being able to sand each piece individually makes for a much funner and better job! I also found a nice piece of artwork that I could resize and cut with the Maker to decoupage onto the sides. That project was super fun!


I still have to paint the table and chairs but I can't decide on the color yet. Maybe, once I make Vera's sofa with it's aqua blue polka dot material, I'll have an easier time choosing...

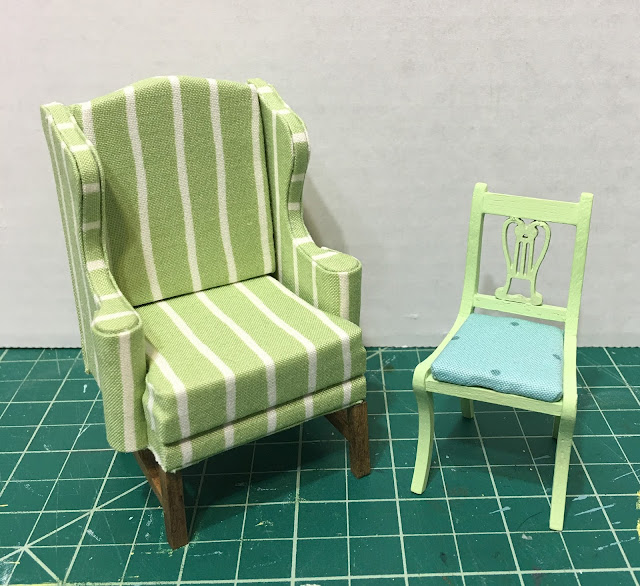
I used HOM wing chair kits for Virgil's living room and, unlike when I made them for the Sweet Christmas Cottage, didn't make any changes to the original design. The only challenge I gave myself was using striped material. I had to go very slowly and make sure I had the right pieces matching at every point. Phew!

When it came time to add the bottom assemblies to the wing chairs, they seemed to be a little too tall for the scale of the cottage. Even compared to the dining chairs (which are HOM kits, too), they seemed imposing. A little off scale is okay because it only adds to the whimsical feel of the cottage. But it seemed if I could reduce their height they might look better.


I combined three shapes in Tinkercad to make new, lower legs for the chairs and for the sofa. Then I made a recess in them to hold a toothpick which would then be used to anchor them into the chairs. This idea came from making the Kris Compass sofa kit for the New Orleans dollhouse. It worked well and it only took an hour and fifteen minutes to print twelve of them on the 3D printer.


Some finishing required.


These will make quite a difference in height and I'll share how they came out in my next post.


I can't really explain what kept me away, and in truth, writing this post was a monumental effort in self discipline. I knew it would be good for me to get back on the horse. All I can point to is that after a rapid battle with lymphoma, my beloved beagle Georgie passed in July. That was the start to a time when I just felt really, really sad. The only joy I could find during this time was to spend loads of time with my beloved min pin boy puppies, Rusty and Woodson. We have had a few adventures in the forest and at the beach, and I am so grateful for the healing power of their love. 💗 We all miss Georgie every day.

Here's Georgie the day we brought her home...


 and snuggling her big sister Gracie, who passed in 2013, on the sofa.


It seems as though this year has brought so much loss for everyone around the world. We are all learning to cope with a whole new way of life. And for many of us, that means moving forward without some of the ones we love. Here in the US, we are learning to cope with new levels of shock and horror at human behavior every day. We are learning to live in instability and violence, something many of our friends in other countries have managed through for years. I guess it's no wonder that sometimes all of it makes us sad, and finding joy in spite of it is a battle we must fight each day. To all of you struggling out there with any and every thing, I offer my hugs and prayers.

xo xo,
Jodi