Yes, it truly has been five years and a couple of months since I started on these sister flower shops! But all good things come in due time. I have learned to trust that there is a plan beyond my understanding, and when I let things happen naturally, everything turns out for the best. This is very comforting since I have several unfinished projects waiting their turn, especially since I'm prone to chastising myself from time to time about them. Eventually, inspiration will come again and each dream will enjoy it's time in the sun. Now, if I can only remember my own advice! What follows is a long post, so grab a snack, lol!

Each shop had it's storefront wall yet to be finished, and so, needed windows and awnings. Like with the windows in Pound Cake, the bakery (yet another unfinished project), I employed my Cricut to make vinyl window clings displaying each shop's name and address numbers. The numbers represent mine and Bonnie's birth month and day.

And here they are on the windows. I wish in hindsight that I'd had gold vinyl for Bonnie's shop name, but I only had a very limited choice of colors on hand.


The windows are 1/16th Lexan - the same as I always use because it is inexpensive, strong and I have great success in cutting it. The inside walls are not very pretty, but making it so would be a waste of material and effort. I hope they won't be a distraction if seen from the mirror above the fireplaces! Quick Grab Tacky Glue works very well to adhere the Lexan.


For the shopfront awnings, I used my Cricut again. I cut a layer from thick craft card in white, and then a top and bottom layer for each shop in a striped scrapbook paper. I then sandwiched the card in between the scrapbook paper using Paper Mod Podge as the adhesive. Because they tend to want to curl, I placed them under waxed paper and a pile of heavy books overnight.


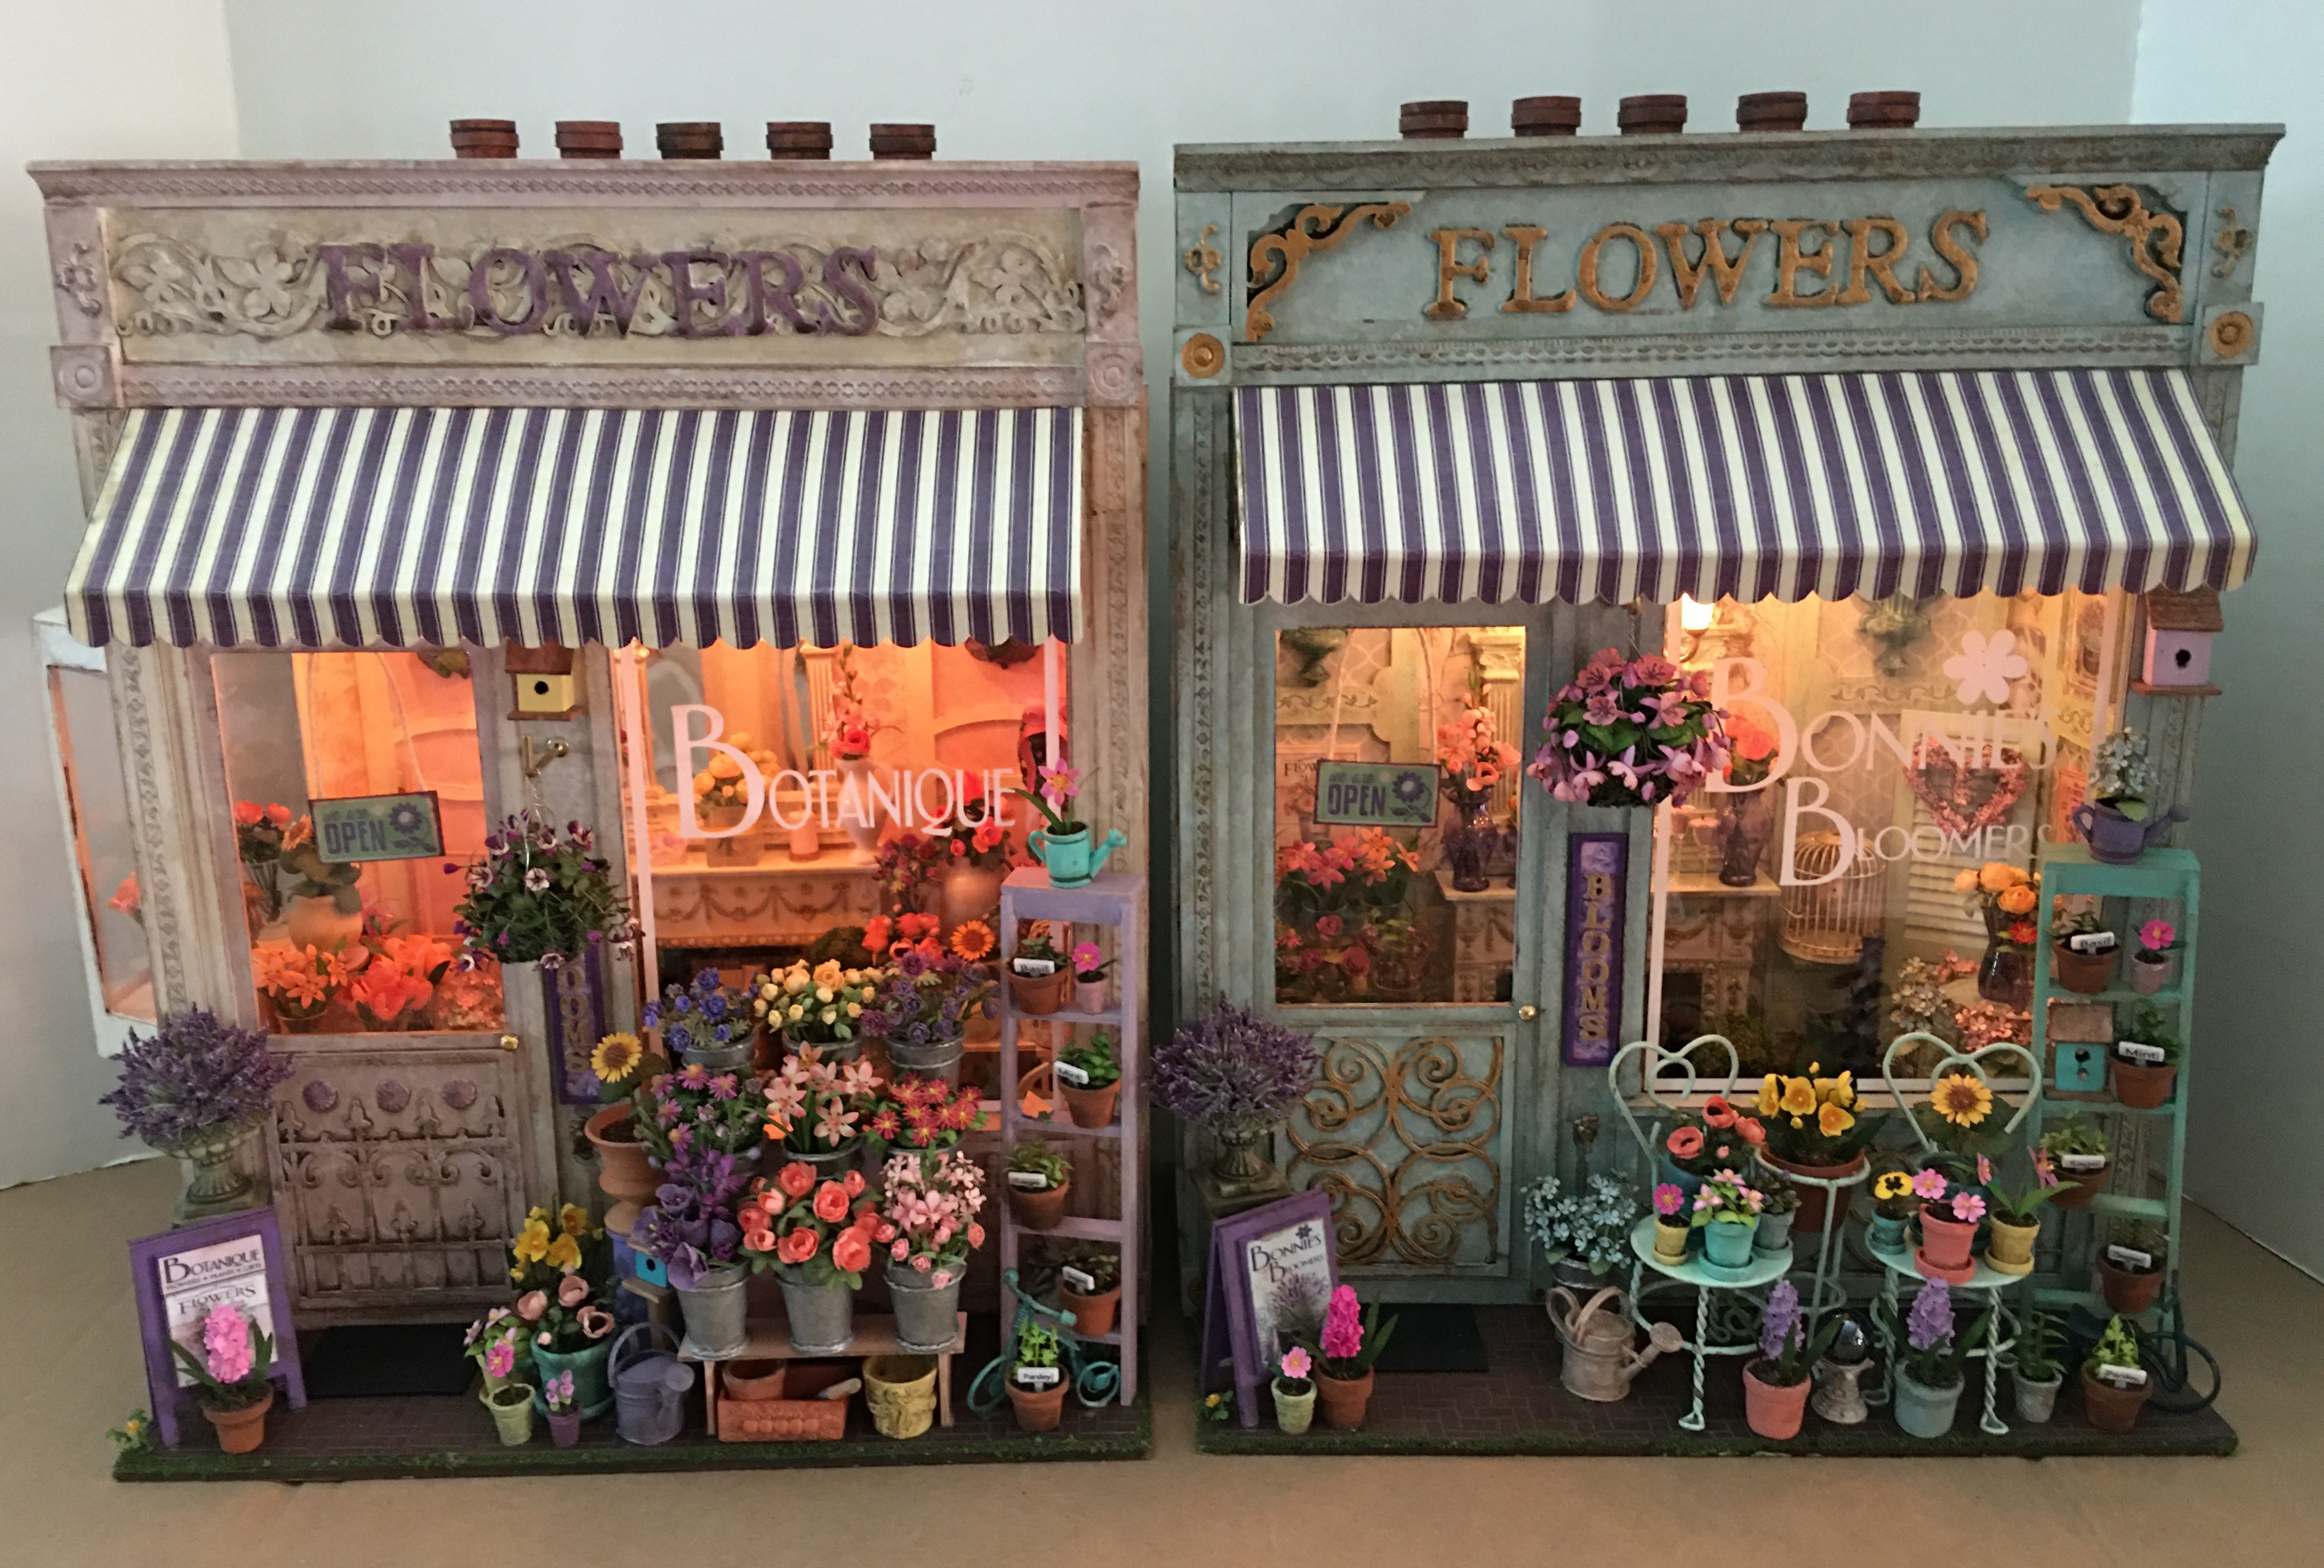
To attach the awnings, I used a metal ruler and ran a bone folder along a 1/4" strip to create a gluing edge at the back of the awning. This made a 90 degree gluing tab. I also folded the front scallop over about 1/2", also using the ruler and bone folder. Here are both shopfronts side by side. Can you believe that just seven weeks ago I didn't know which drawer I'd put the front pieces in?

On Autumn's Pantry, I did not have to use braces because the awnings were so small. Here, because the awnings had to span such a long width, I wanted the extra surety of braces. I created the braces in two ways. For Bonnie's shop, I had a couple Alessio decorative braces left over, By removing some of the protruding parts and adding a piece of strip wood, they became the perfect fit and angle.


For my shop, I did not have any suitable braces on hand, so I decided to make them. I took measurements of the angle I wanted for my awning and created a triangle in Tinkercad. I removed the center, then overlaid a fleur de lis into the opening. When I started to prepare the 3D printer to print them, I realized, because of the red filament that was loaded, that the last time I used it was at Christmas to design and print fishing floaters for my dad! Boy time flies! The kids even got me the Qidi X Max 3D printer for my birthday, and I have not even had the time to take it out of the box yet! I am going to have to rectify that situation as soon as these flower shops are completed!
Uh hummm... Back to the braces... Here's the rendering in Tinkercad.

And here they are printed. They measure 1-3/8" x 1-11/16" x 2-3/16". The height or thickness is 1/8".

These braces worked great but they were a little too clean. Another use for the dirty water wash!


Using the paint/glaze/water/sponge method, I made the top look like stone. I used mortar mixed with paint for the lower part to look like stucco wall. After a few dirty washes and some moss treatment, they looked as old as the shop itself!

For the chimney pots, I had the Cricut cut strips of paper in 1/4" and 1/8" thicknesses, then used those to wrap the dowels in various places. I painted them and dirtied them up, as well.

And here are the chimney pots on top of the shops. I think this turned out to be the perfect solution! They will just lift off to allow access to the switch.


Now, it was finally time to attach the shopfronts to the room boxes! I wanted the possibility to "break in" in the future if need be to reaffix any loose items, but I also wanted the wall to stay put. So I used Tacky glue in strategic places, knowing I could easily loosen the "spot welds" in the future with a blow dryer. Once they'd had the chance to be clamped overnight, I finally got to enjoy the cherry on top of these shops - installing the sidewalk displays!

Bonnie's Bloomers... My gift to Bonnie will be her first mini anything ever, but I hope it won't be her last! She has enjoyed too many real life renovations to her homes over the years, and she has had her fill. Maybe this will inspire her to take on her first mini house project! Here are a few photos from different angles.


What is this?!? These little dandelions will sprout up anywhere!!!

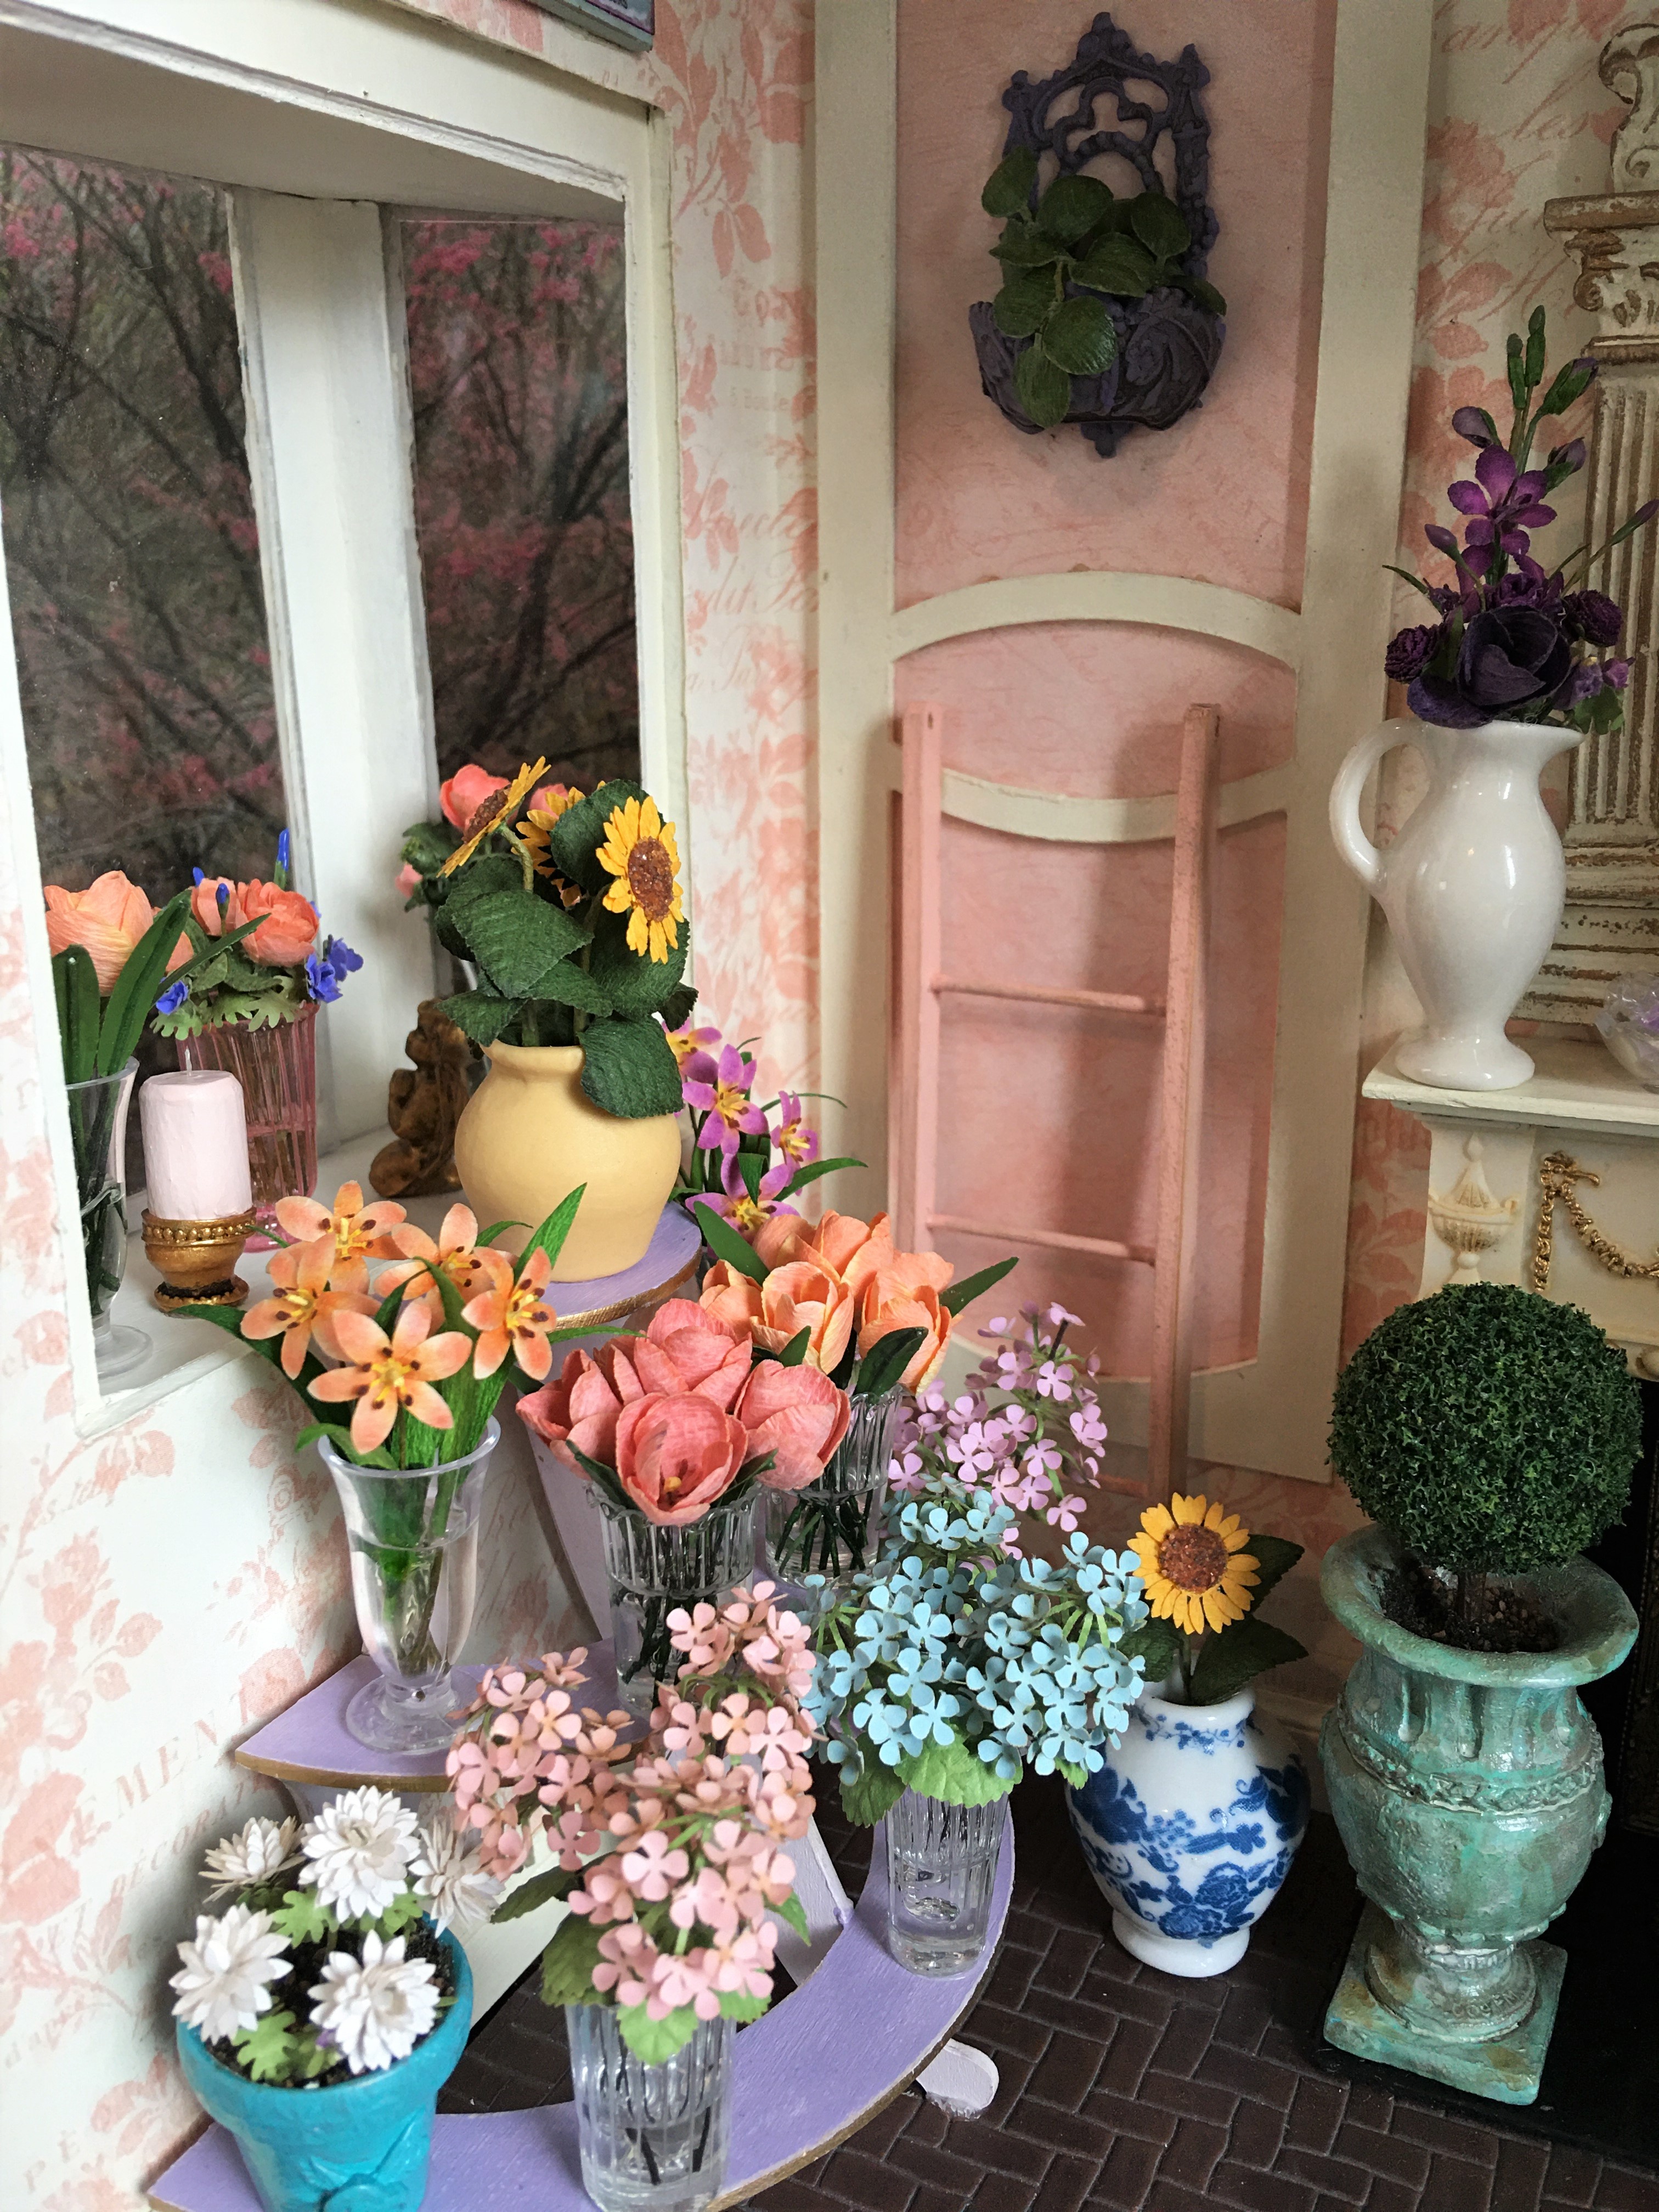
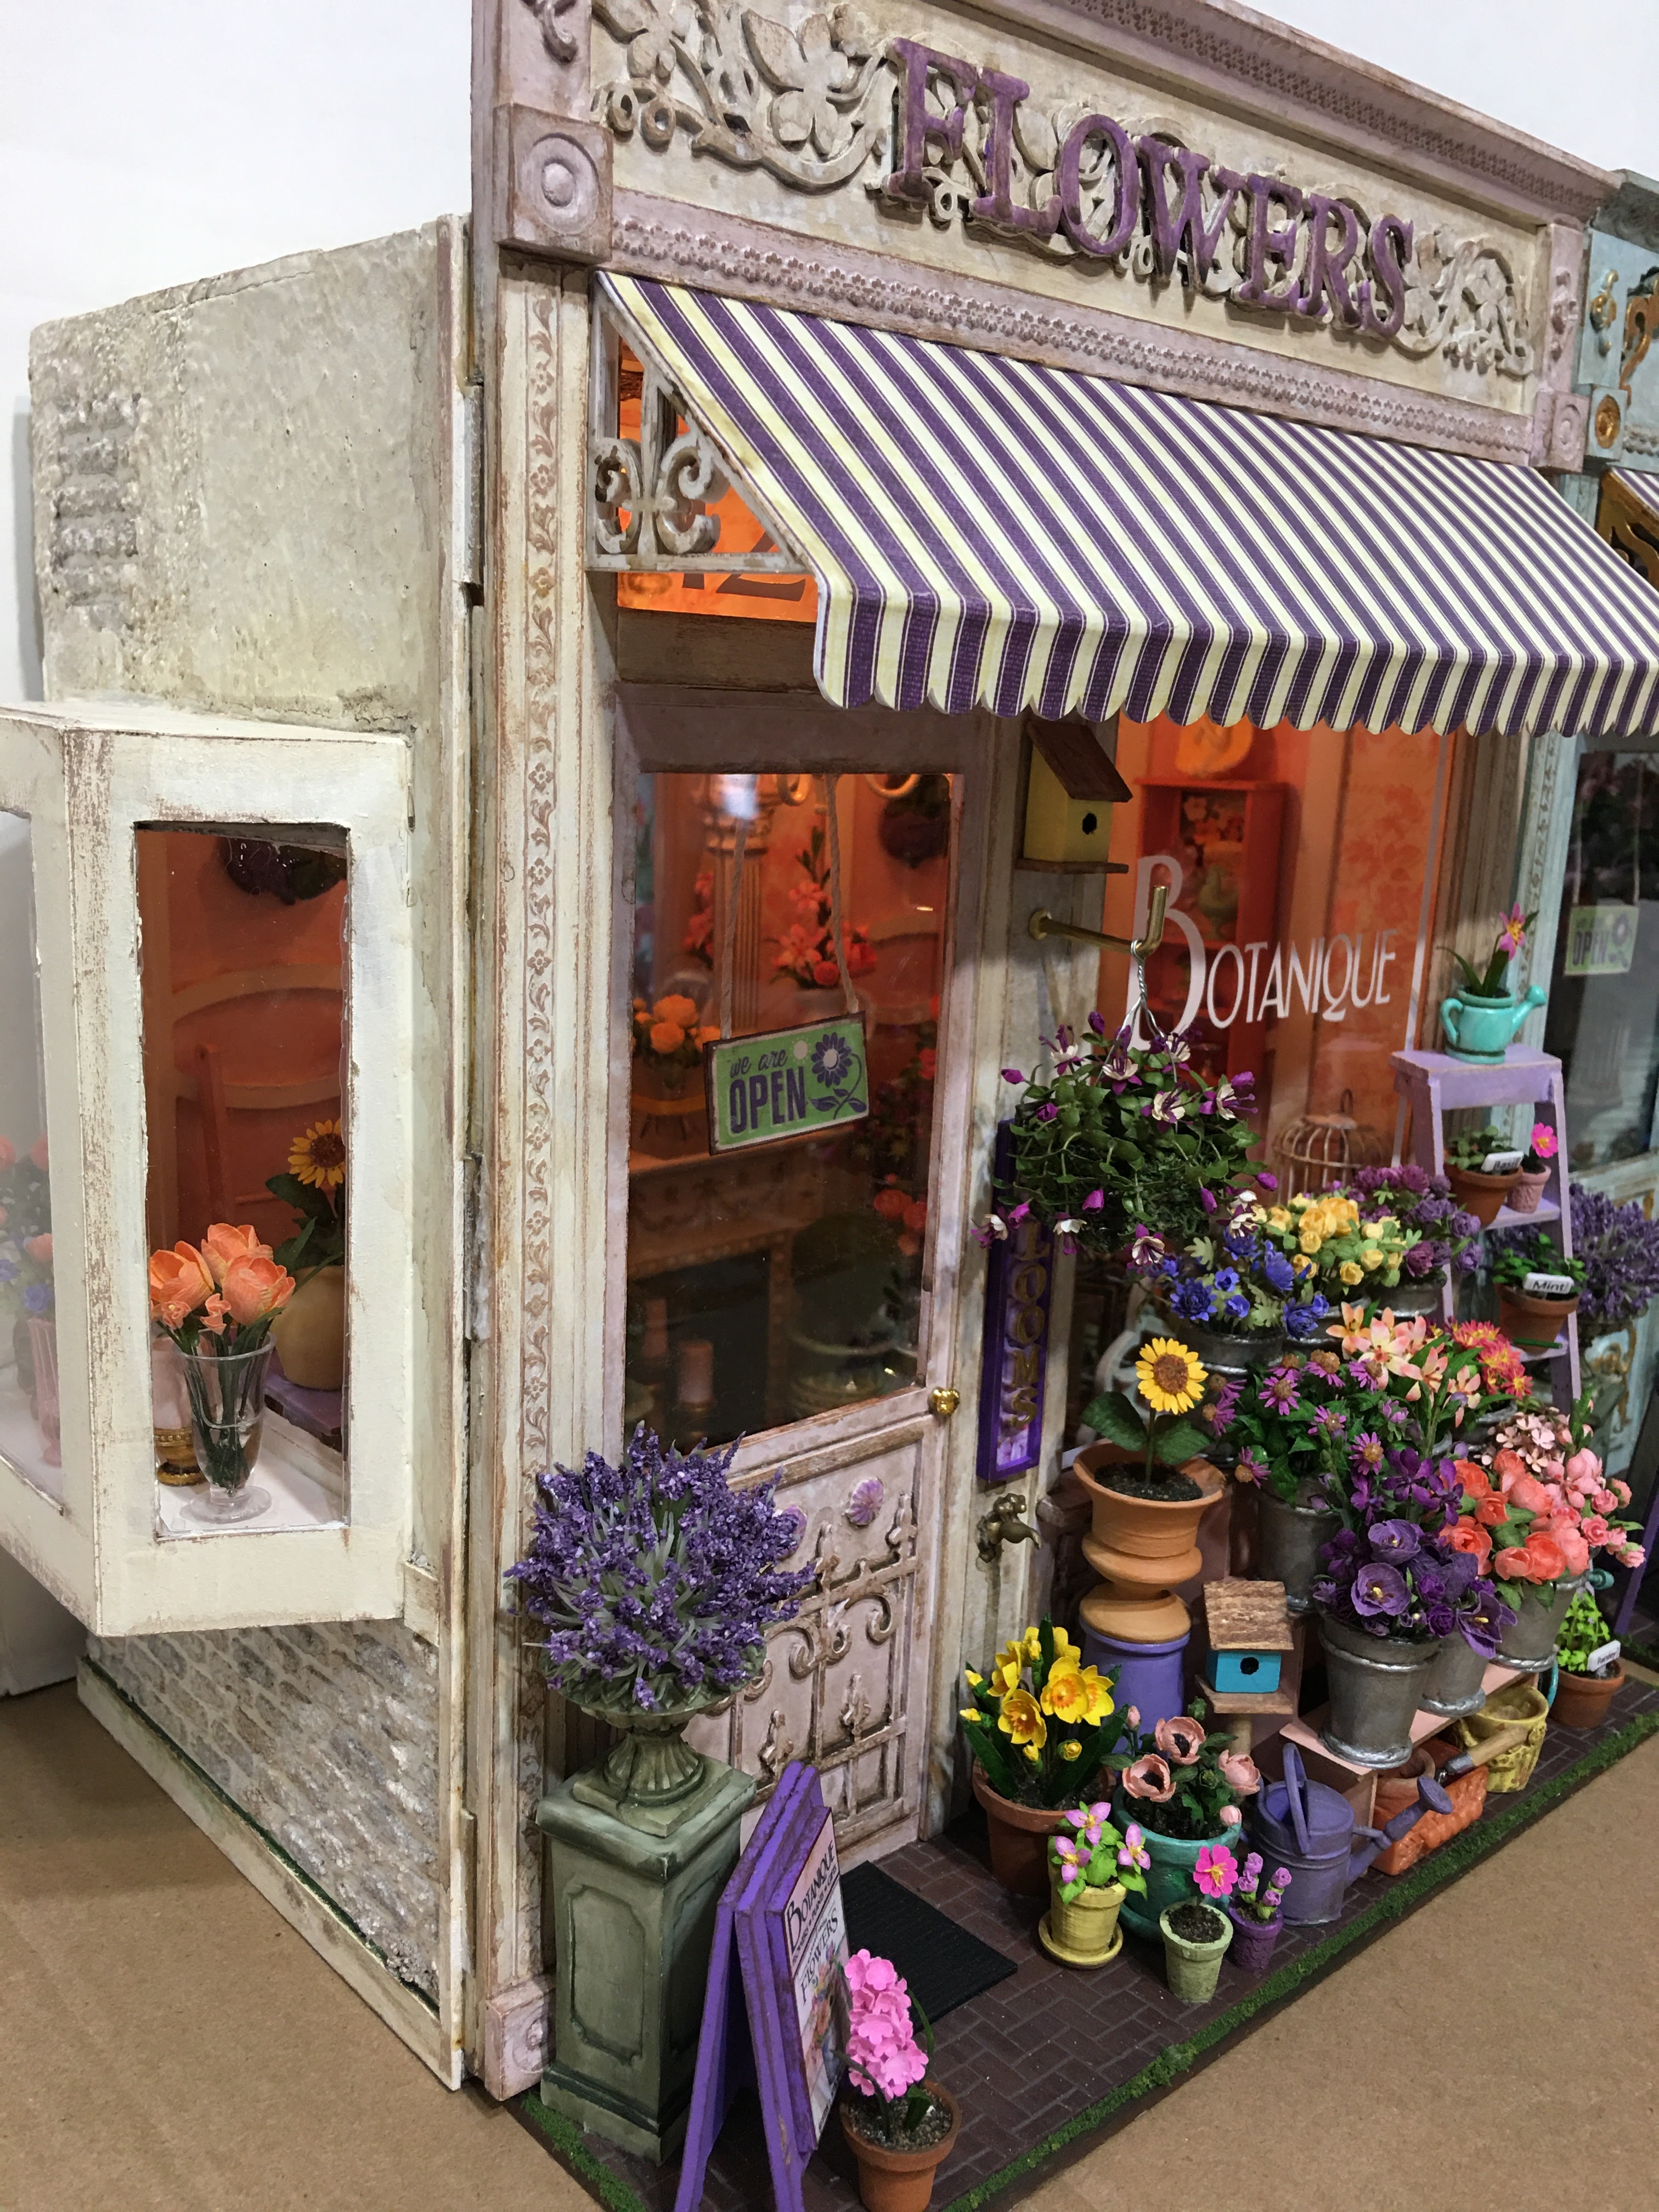
And Botanique... A combination of botany, bouquet, antique and boutique. A dream that was many years in the making, but finally realized! I think this one is going to live in grandma's hutch. I know she would be tickled by it, especially because it has a rooster and a hen inside - something I make sure to include in every project because that's what she collected throughout her life. It's just a little way to honor her and let her know I will always be a better person because of her love.


Hey look! There's a sister dandelion at the sister flower shop, too!

And now, after five long years with many distractions, I can call these flower shops a finished dream!


A few twilight photos to leave you with...


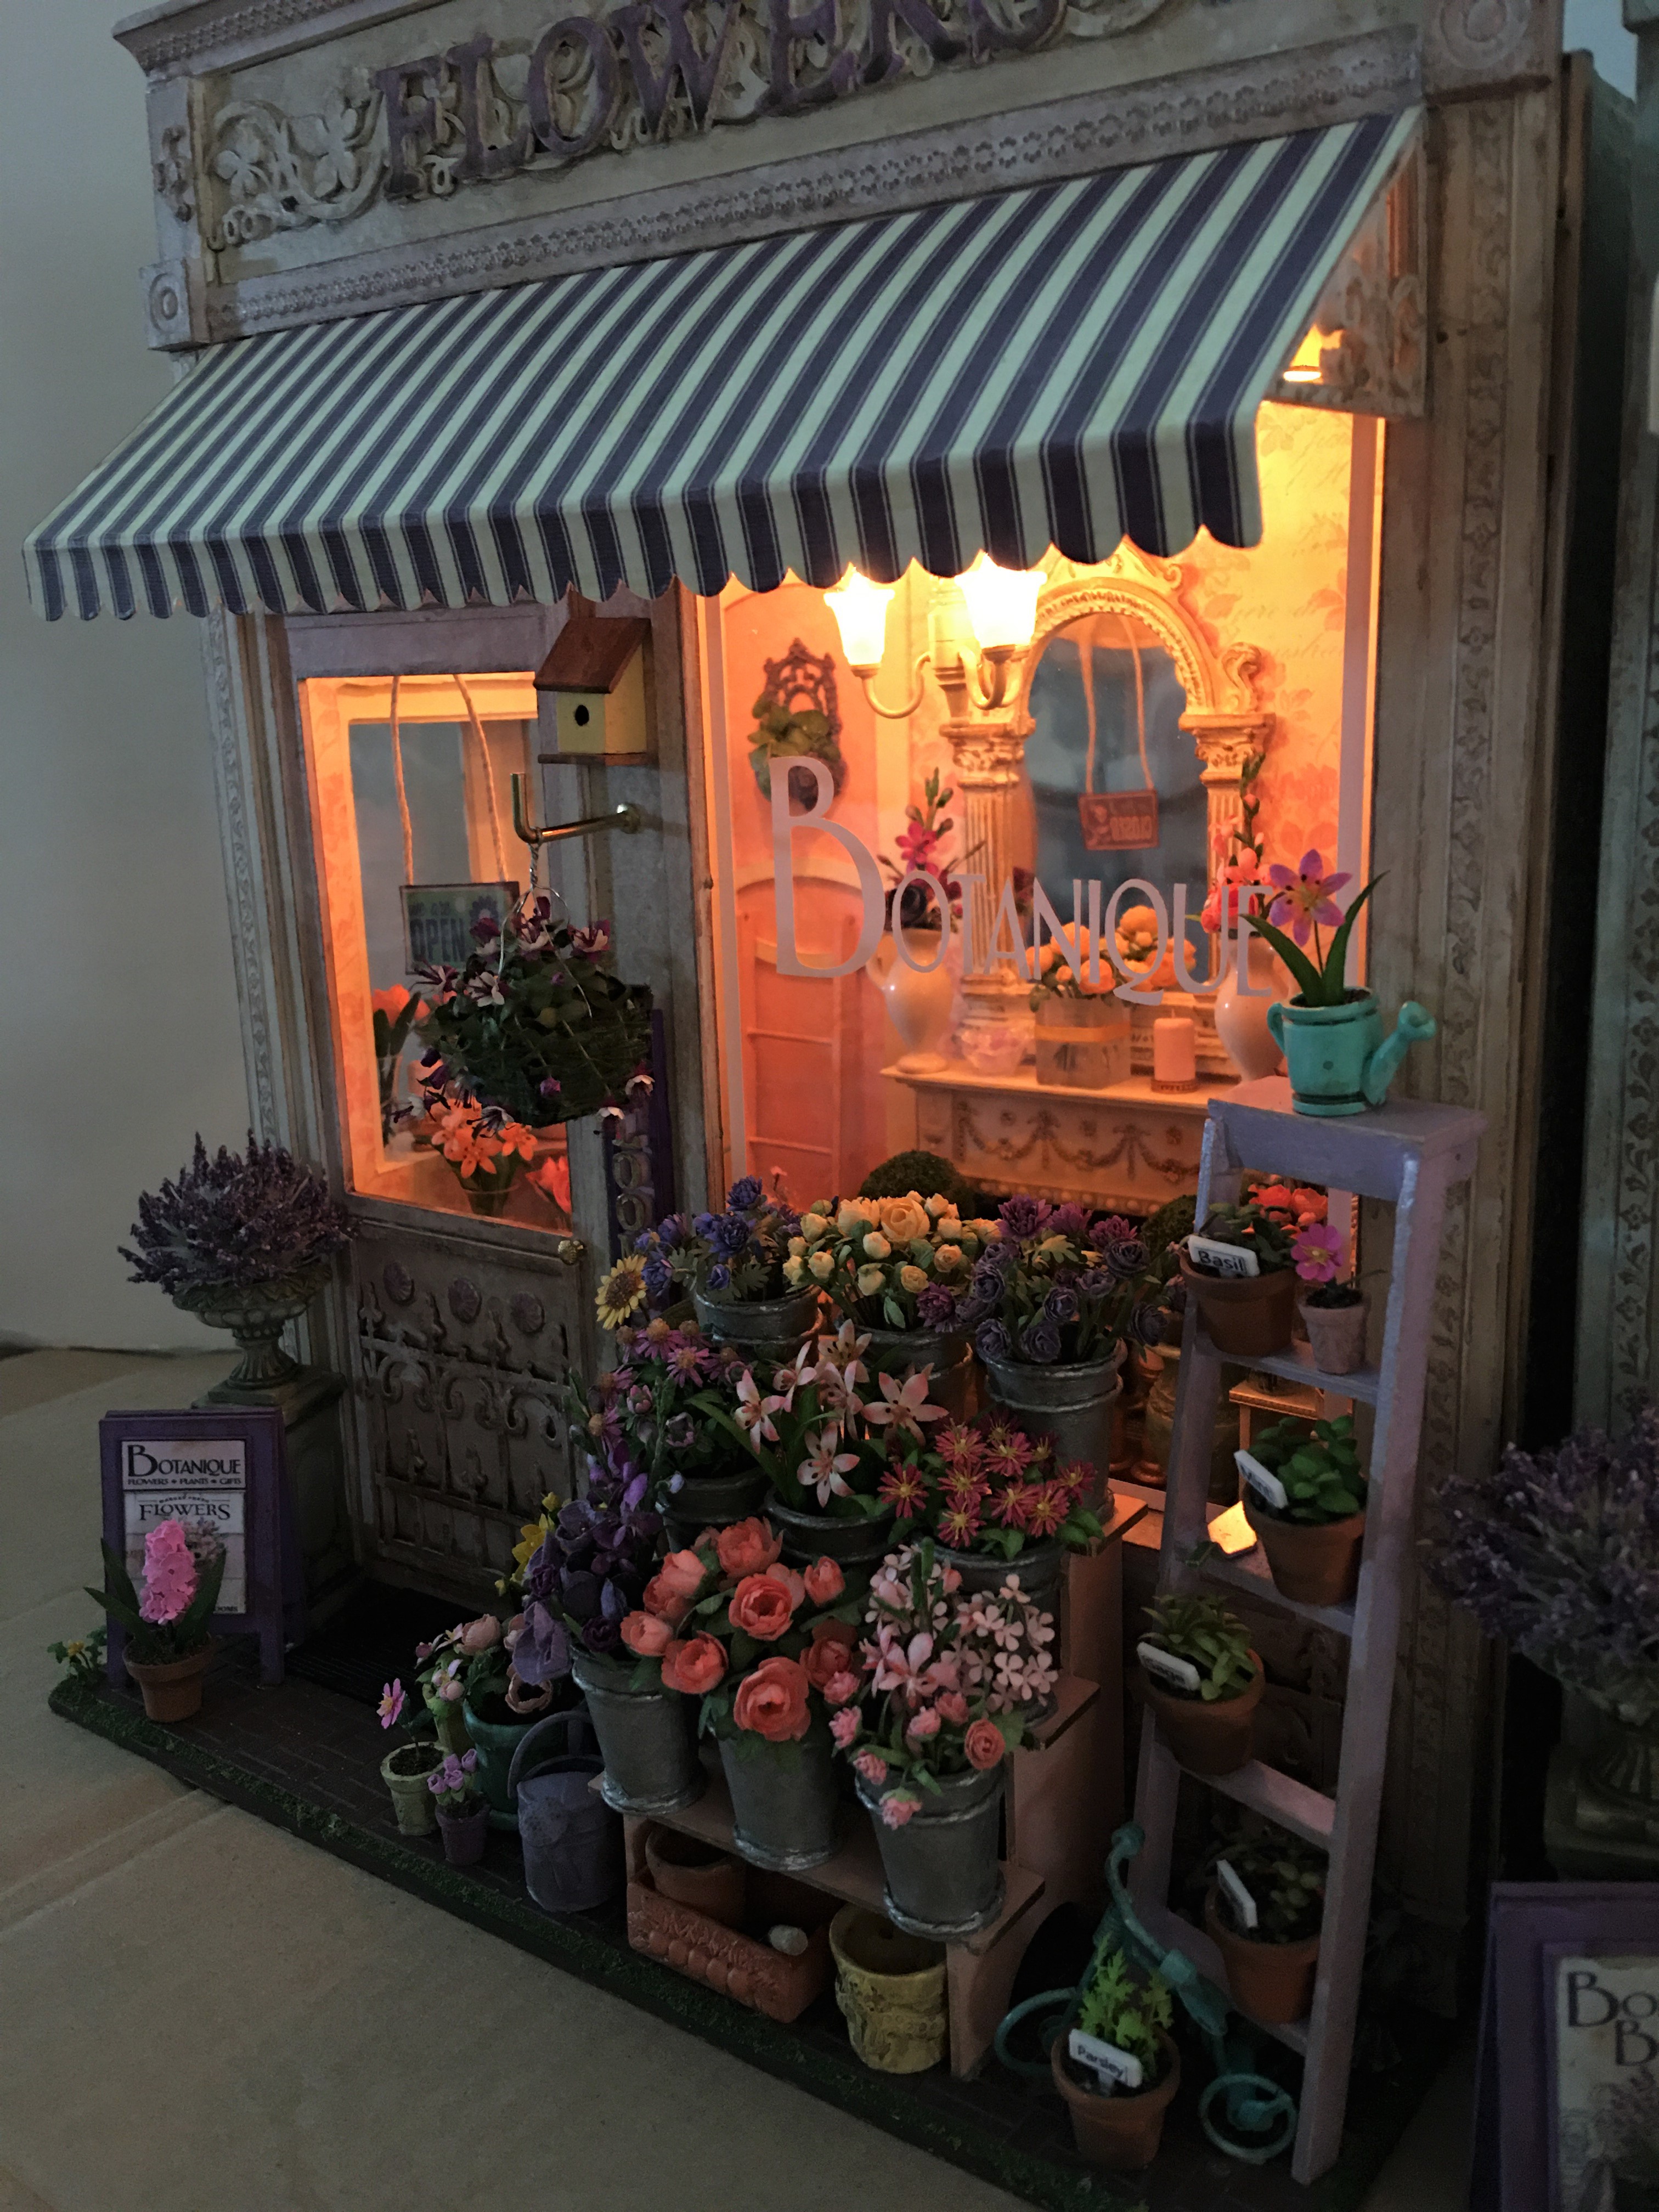

Thanks so much for your continued patience, and for coming along on another journey with me! Next post, you can help me decide what's next!
xo xo,
Jodi