
Sansevieria Laurentiis
(Striped Mother In Laws Tongue
aka Snake Plant)
 |
| Real plant left, mini plant right. |
For specific plant details, please see the page From Wikipedia.
Supplies Needed:
- Off White 1" W Masking Tape
- 26-28 Gauge Paper Covered Floral Wire
- Dark Green paint
- Medium Green Paint
- Light Green Paint
- Yellow Paint
- Satin Glazing Medium
- Mod Podge (yellow label)
- Air Dry Paper Clay
- Kitchen Sponge Piece
- Toothpicks
- Tacky Glue
- "Dirt" or Model Railroad Gravel
- Paper Towel


Tools Needed:
- Scissors
- Wire Cutters
- Paint Brushes
Cut floral wire into (10) 2-1/2" lengths and (6) 1-3/4" lengths.

Place wire onto sticky side of masking tape leaving 1" of wire exposed below the tape line. You can fit two wires on the width of the tape. Center them each in their half of the tape.

Cut the tape so that there is 1/2" of tape above the wire and then double the length. For the 2-1/2" wires your tape will be 4" total and for the 1-3/4" wires your tape length will be 3-1/2". Then fold in half enclosing the wires. Rub with your finger to seal.


Cut your tape in half length wise to create two leaves.


Using scissors, cut each leaf to shape it like a snake plant leaf. There are many varieties of snake plants, some with very thin leaves and some with broad and tapered leaves. This is nice because you can't really make a mistake. Imperfection is perfect! Here are some examples:

And here is how I cut mine:
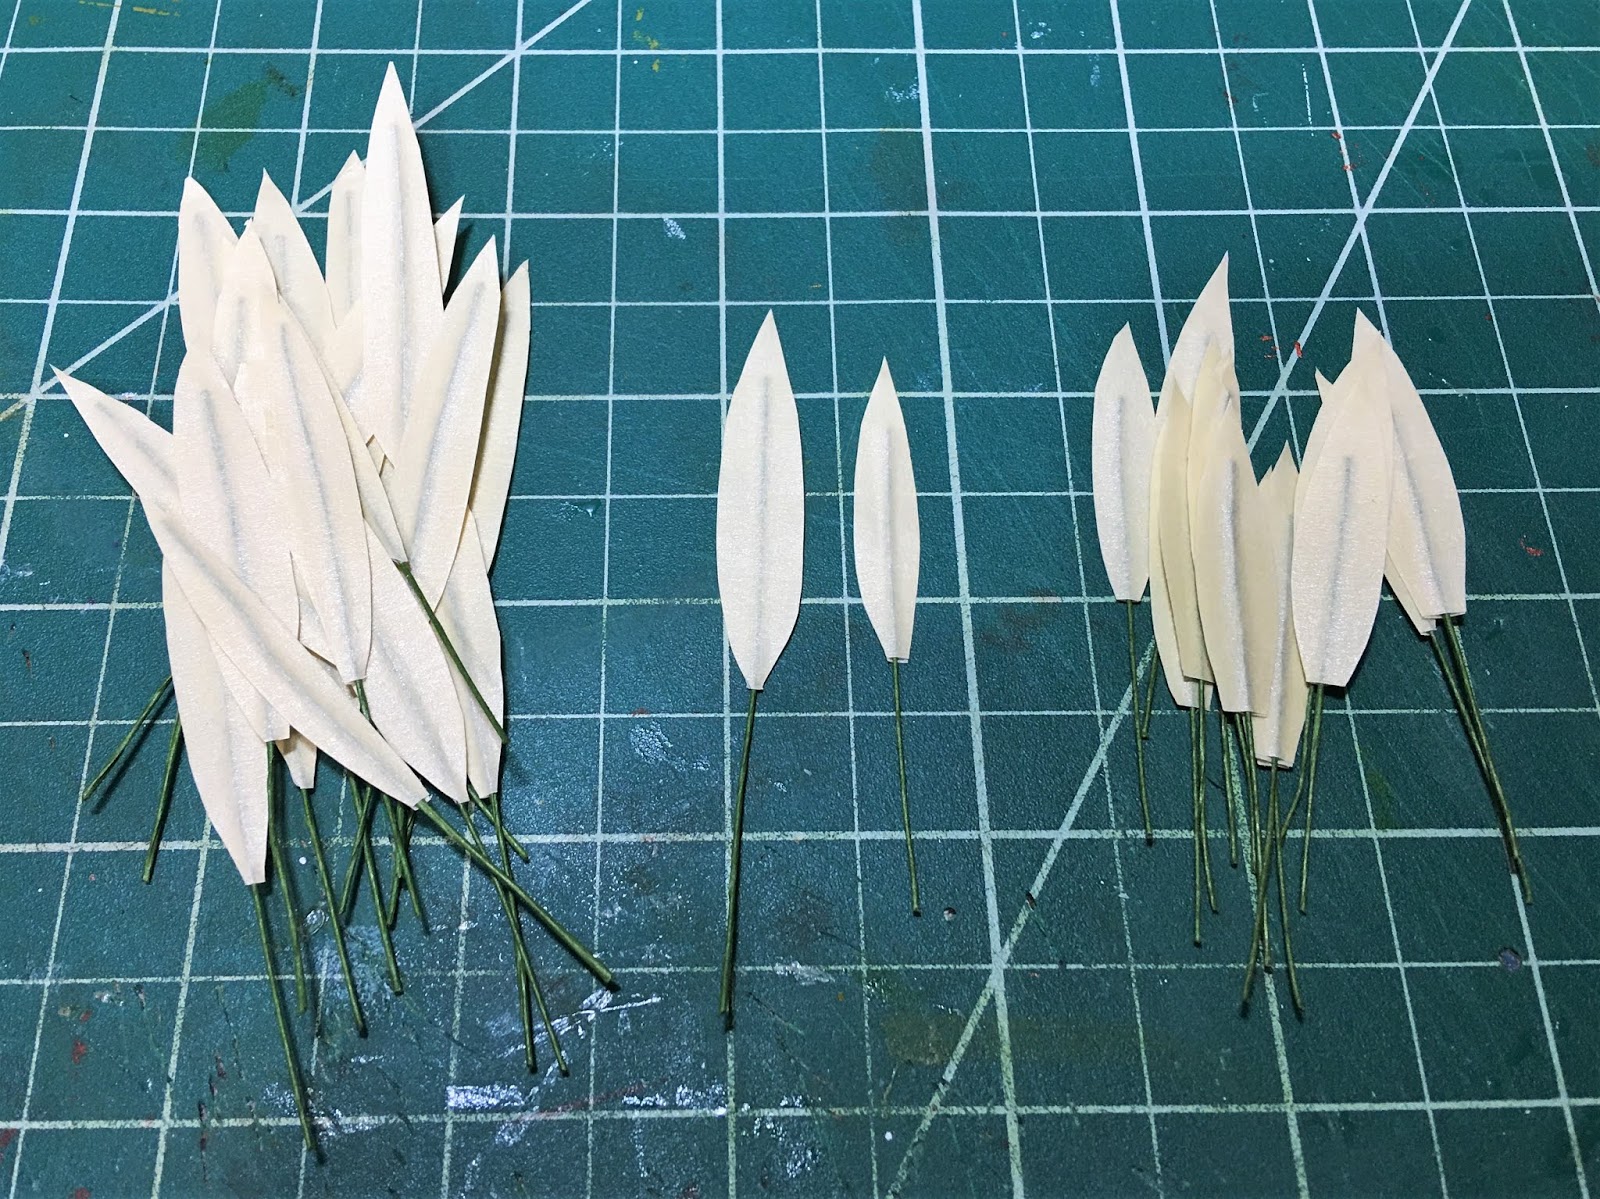
Paint the leaves, front and back, with the darkest green. Place on waxed paper and let dry.

While waiting, line up 5-7 toothpicks. Cut one end of each of them to create a slightly blunted point. Then align them perfectly and tape together in a row.

Mix the glaze and the light green paint together.

Drag your toothpick tool through the paint/glaze mixture.

Drag the toothpick tool horizontally across the leaf. You will need to make several passes to cover the entire length. Don't be concerned if it looks messy - that's okay!


Blot the line gently with a paper towel ONE Time. You don't want to smear the line, just to lift off the excess paint. Turn over and do the other side. Set on waxed paper to dry.


All your leaves should look like this:

Make a puddle of satin glaze to mix in with your medium green paint.

Your mixture should be predominantly glaze with just enough paint to color the glaze.

Dip a corner of the sponge into the colored glaze, then pounce it on the leaf. You will see a slightly opaque color layer over the stripes. This is good!
Do one side, then set on waxed paper to dry. Then do the other side.

Here's what the lot should look like at this point:

Now we add the yellow stripe on the very edges. For this, I mixed my yellow with a tiny dot of green to bring the brightness down a little. Then mix about 50/50 with glaze.

Now dip the end of a toothpick into the yellow paint/glaze mixture and run along the edge of the leaf. To make your stripe wider, just adjust your toothpick's angle. You'll get the hang of it soon enough! Let dry.

Here's what you should have so far.

There is no photo for this next step. Seal both sides of the leaf at the same time with Mod Podge. In addition to sealing the paint, the Mod Podge provides a waxy like finish on the leaves just like the real plant. Stick them as you finish applying the Mod Podge into a piece of clay or Styrofoam to let dry.

Now let's plant them! My pots are 3/4" round and 1" square. For the round pot, I used 10 large leaves and 6 small. For the square, I used 10 large leaves and 8 small.

Prepare the pots by placing a dollop of Tacky Glue into the bottom.

Now press in the paper clay filling up any voids in the pot. Leave space at the top for glue and dirt/gravel.

Smooth another layer of Tacky Glue across the paper clay about 1/8" thick and covering any exposed clay.

Sprinkle on the gravel or dirt, press, shake off the excess.

Look at a real life example of the plant you are making. Mine has wavy leaves, so I make waves in them before planting. Some varieties are perfectly straight.
Begin in the center then spiral around the pot, adding leaves one section out but in between the center leaves. Do all of the large leaves first. In each next outer circle, cut just a little off the wire end to make them a little less tall. For added stability, I like to dip the end of my wire in Tacky Glue before placing into the pot.

When you start on the small leaves, just place them wherever you see a gap that needs a leaf.

Here's what the square pot looks like.

And both of them together.

Have fun!
xo xo,
Jodi
Fantastic!
ReplyDelete💗🤗
DeletePreciosas!! Muchas gracias.
ReplyDeleteBesos.
💗💗💗
DeleteGreat tut Jodi.
ReplyDeleteThanks Carrie!
DeleteThis is fabulous, Thanks heaps!! The toothpick-brush to paint stripes is just super clever.
ReplyDeleteAnna x
Thanks Anna! I hope you'll give it a try!
DeleteGreat tutorial, thanks Jodi! I'm definitely going to make some.
ReplyDeleteThanks Megan! I'm glad! Let us know of any improvements!
DeleteWonderful tutorial! Thanks for sharing.
ReplyDeleteHugs, Drora
Thanks Drora! 💗💗💗
DeleteThis was one Terrific Tutorial Jodi and your snake plants are PERFECTION!
ReplyDeleteThanks Elizabeth! 😊💗
DeleteGracias Jodi, un tutorial fantástico.Besos:-)
ReplyDelete🥰🤗
DeleteThank you for this fantastic tutorial - very well explained and shown. I'm putting this on my some-day-I'm-going-to-list… ;O)
ReplyDeleteHugs
Birgit
Thanks Birgit! I hope you do get the chance to make some snake plants! They are so fun and easy!
Delete