
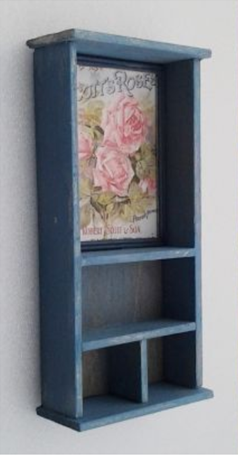
I started with the center work table. Though it's a small kitchen, I knew it would provide an essential work and storage surface (and display area) and would justify taking up the valuable real estate. A long while ago I'd purchased an auxiliary table from MenutmonShop on Etsy. I'm glad I did because they are not selling currently, and it had the perfect dimensions for the space. I kept it very neutral, as the appliances you'll see later in the post were very colorful! Plus, I thought it would be better to see the things displayed there rather than the table itself. So I just stained the butcher block top and shelf, made the structure in worn warm white, then added lace trims to give it a feminine touch. I also added a pot metal towel bar, an essential kitchen element.


I had an Art Of Mini Stepping Stool Kit in my stash. It's so cute and just the perfect size for the small space next to the kitchen sink alcove. I made the bracing aged warm white again, and decoupaged the steps.
 |
| Original Kit Photo |

 |
| Original Kit Photo |


I also had Phoenix Models 1940's Metro "Speedway" Gas Cooker and Retro Fridge kits to paint and assemble. Here's where I'll give a bit of a product review as I talk about my experience with the kits. Know in advance that I am not trying to steer you away from doing them, but I did find them complicated, and wish I'd had a review to read with some tips before I chose them for my cottage.
 |
| Original Kit Photos |
Just The Facts
- They are made of what they call White Metal, so they are Very Heavy.
- The Gas Cooker measures 4-9/16" H x 2-1/8" W (with the gas pipe) x 2" D.
- The Fridge measures 3-5/8" H x 2" W x 2-1/4" D with the handle.
- They come completely unassembled and need to be washed, primed and painted in several colors depending on the finish you choose. There are A LOT of parts, especially the range.
- They are historically accurate to the 1930's - 1940's.
- They are great for small spaces.
- They have lots of detail.
Things To Know
- I found it a little complicated to have to figure out which was the inside, outside front and back. The instructions say the parts are marked, but they are not. Do A TON of dry fitting until you intimately know every part.
- There are no assembly photos. The stove has an exploded diagram of the parts but it is difficult to see the individual pieces to discern positioning. The fridge instructions only show a finished photo. In it the freezer is installed incorrectly.
- Tabs and slots don't always match up, requiring careful cutting and carving of the metal. Do this in dry fit Prior to painting. Be careful - some parts are soft and weak and prone to breaking.
- You must prime and paint all the proper sides and then afterwords scrape away to provide a raw metal gluing surface. This may wreck your paint job if you're not careful.
- After gluing, you may have to touch up joins. This can be difficult to mask and get spray paint only where you want it.
- If you are not comfortable with several sessions of 5 minute epoxy, these are not the kits for you.
- The oven racks are just barely wide enough so you have to bend out the last spokes on each side to keep them from falling.
I had a rough go in addition to the above mentioned things because I chose a Bad Paint. I specifically researched and ordered this paint because it was supposed to be The BEST. It also came in a multitude of colors.
 |
| Montana Black Spray Paint. Not At All What I Was Hoping For |
I am not sure If I just got a bad can, but after careful prep work and priming, the paint basically ruined my parts. This was the Disaster part of this post. My choices were to scrape and sand each piece and start over or to live with a bumpy surface. I chose to live with bumpy. Let me also just say that I have a ton of experience with spray painting, both in miniature and in real life projects. I know about shaking the can ten times longer than you think you need to, temperatures, spray patterns, pooling and all kinds of techniques. This was just bad paint.
 |
| Primed Pieces Look Great! |
 |
| Bumpy Montana Black Spray Paint. |
 |
| Close Up Of Surface. |
It was really disappointing because I wanted a real enamel finish. But such is life and especially minis, so we move on and learn. Here's what they look like finished up. Notice that I replaced the plain stove back for tiles and omitted the plate rack and shelf. In the upper cabinets I built for the kitchen, I already incorporated a plate rack so it looked weird. Also, I left a lot of the parts bare metal and shined them up with steel wool. The kit instructions called for black paint, but that seemed too heavy in such a small kitchen. I may try to carefully scrape the rest of the paint off the hinge mechanisms on the fridge once I know the epoxy id fully cured.


And here's everything in the kitchen...

Now that I'd had a chance to play with different colors and fabrics for the dining room chairs, I made up a House Of Miniatures Hepplewhite Table & Chairs Kit / Chairs Only for myself. I painted mine in a color called Green Tea because I liked it in the room and the name seemed appropriate.

I went to Kisspng to find the images to create the decoupaged top. These are what I used.

And here's the finished collage.

And here's the table and chairs finished and then in the room. I added lace edging for extra detail. I like the size for the space, I might make a round rug at some point with the same elements for the tabletop.


So that was it for the week, and now I can start thinking about whether I'll finish making all of the furnishings and such or just get to decorating the kitchen. My gut is telling me to get the major pieces done in each room and then I'll have an easier time knowing where to put what in terms of decor items.
Hope you're all not experiencing the same kinds of challenges as me this week, and that everything just comes together for you!
xo xo,
Jodi
Jodi
The table, step stool and cabinet are so pretty! Love the pretty lace details on the table and chairs, too. You take the kits and make them better. I feel your pain on the stove and refrigerator. I've worked with Phoenix models, and they aren't the easiest to put together. I've also had spray paint go rogue like that. In my case, it was a smaller area and easy to remove, but it was very, very annoying. The tile you put on the back of the stove is a lovely touch!
ReplyDeleteThanks Deb! The smaller kits were fun to do and the stove and fridge I can live with for now so that I can just move forward. If they don't grow on me, I'll just keep my eyes out for the right ones and replace them someday. It always takes a while for me to have a realization about what I don't like and how I can make it better. And sometimes, bad luck just catches me!
DeleteEverything is so pretty Jodi. Thank you for the review of the Phoenix kits, I have always wondered about them.
ReplyDeleteI asked my husband about your paint issues. He does automotive paint, welding, and cabinetry. He is a smart cookie in my opinion. He said that the primer you used may have been incompatible (i.e. lacquer based for example)with the paint and that could have caused the 'orange peal' effect. He said you could wet sand the appliances with 800 grit automotive sandpaper and knock down the bumps, with out necessarily sand it completely off, just smooth. Then reapply the paint.
At this point I know you are probably fed up, but I thought it might help.
I hate when things like this happen, and I'm pretty sure most miniaturists feel your pain.
Thanks Carrie! I hope the review helps someone decide if they are really ready for such a challenge!
DeleteThe reaction theory is a good one, and is one I have learned the hard way when painting some of my 3D pieces. In this case, the lumpiness was coming directly out of the can, so I suspect that it had been exposed to temperature extremes at some point in it's life before it came to me. There were soooooo many parts, some of them very soft and delicate, that I decided against sanding and starting over. I am telling myself that the stove and fridge are such a small part of the project as a whole, and I can live with them until the perfect replacements come along. I am someone who really hates to fail, so it might even be that I order the kits again and redo them - this time with Krylon, lol!
Thank you so much for your encouragement, and for consulting the expert for answers! Your husband must be a great source of information and help in your projects, too!
I love your colors and I'm so sorry about your bad paint. The kits look great otherwise and your trim and decoupage are wonderful. The tile on the stove gives it great character.
ReplyDeleteNow I'm so curious about the rest of the house and what else you'll choose.
Thanks Sheila! There always comes a point for me when I feel like I have gone totally against my original plan, regret the way things look, and have a major setback. Ugh! I know it's part of the whole learning process, so I'll just let things go until a better idea comes along. For now I am just going to keep moving forward, keep the things I like and let the rest marinate.
DeleteI love the kitchen! So warm, bright, cheerful, inviting and cozy. I am so sorry about the bad paint - that is extremely frustrating! And thanks for all the links.
ReplyDeleteThanks Penelope! I love Most of the kitchen, too. When I look at the pics, I can live with the fridge and stove in their bumpiness and sherbet color, but the center table with it's dark wood top and shelf are not working. Back to the drawing board...
DeleteWow. Now that you say that, I think you're completely right about the center table. I think I was focusing on the other pictures.
DeleteI thought it was fine too Penelope until I looked at the photo a couple more times!!! Thank goodness for pictures, blog posts and friends who chime in!!!
DeleteMy first thought when I read about your bumpy paint finish, was the same as outlined in Deborah's comment, which is a shame after all of your determined research and hard work . Nevertheless, the colour is Really Pretty and both the stove and the fridge look lovely in situ! The centre island, shelf and the step-stool look wonderful in your cheerful little kitchen and I am so glad that you have started with this room in your cottage because the kitchen is always The Heart of any home. :D
ReplyDeleteThanks Elizabeth! When I have a bad week I never realize it until it's over. I can live with the stove and fridge until I am hit with the realization for perfect replacements, but the center island has got to assimilate better. I'm mulling it over now...
DeleteI love your kitchen. I can understand how frustrating it is when the paint is bumpy. But the colors and decoupaging make up for it and it still looks beautiful, warm and inviting. I also love the furniture pieces with your special touch.
ReplyDeleteHugs, Drora
Thanks Drora! The bumpiness and the color of the stove and fridge are just not at all what I hoped they would be. I feel like all of the other hard work I have done in the kitchen deserves better. So back to the drawing board I'll go... I do like the stool and the shelf, but the center table needs work, too.
DeleteYour kitchen is very original. I like the table.
ReplyDeleteThanks Faby! You are kind to share some encouragement!
DeleteI think the sidetable is very nice, and the dining area the green color, beautiful. Happy with your fridge and stove you have succeeded. art of mini, yeh wonderful.
ReplyDeleteThanks Gonda! I think I'll let the appliances sit with me a bit before I make a permanent decision. The rest was fun, and will likely be invited to stay!
DeleteI love the collage you made for the table.
ReplyDeleteI'm sorry about the paint, but it's a casting look.
Thanks BurSel! Glad you like the decoupage, and as for the paint - one of life's disappointments but hopefully, I'll find a way to make it into a happy accident!
DeleteUgh!! How incredibly frustrating your paint situation is! It's so annoying when we pay good money for kits and then something as simple as a bad can of spray paint ruins your vision for a hard worked on piece. I had to laugh at your reply to Penelope because sherbet really is a good description of the colour.. lol.. Don't be disheartened my friend, you are the best at making lemonade from lemons and I know you will come up with a cracking solution in time. Having said that they don't look bad in the room at all. And once you get all your decor into the room, it will be hardly noticeable. :) I agree the dark wood on the center island is a bit too dark for the room. Perhaps a lime wash or white wash?. Lime wash to me always has a bit of a pinkish tone which would be perfect in this kitchen. Or you could tile the top for a different look. The white on the legs is perfect though. As you have the white butlers sink, I would even consider repainting your appliances a buttery white. On another subject, the table top for your dining room is superb. I love this look! It looks like you painted it! You have wonderful decoupage skills my friend. And can I say I love that last shot. The dining area is sooo sweet. With the angle of the stairs and the bay window. The lead lighting on your windows looks so good from the inside and that little peek of the wreath on the door. And lets talk about the door. The attention you have given to the back of the door is lovely The hardware and hinges look fantastic and the findings added just give such a lovely feeling. I'll keep saying it forever, these little details are what makes a house special. You really have to look for them, but when you find them it's such a treat. :D
ReplyDeleteYou know it sister! With shipping these came to around $140 US dollars, so that's a bit much to swallow!!! But, you can't look at things that way unless you want to be a miserable person, so I am going to count my blessings and try to turn the situation around. It's not in my nature to settle or give up, so we'll see what we can do.
DeleteIt's funny how an idea seems like a good one until you get the thing in the room and then wonder what you were thinking! I love your tile idea - going to have to play with that!
I'm happy you like the decoupage table and how it fits into the space! Some of the detail in the cottage is very subtle because it's more texture than anything, but I really enjoy it too!
Creo que has hecho un precioso tuneo con todos los muebles que has colocado. Me gusta el colorido utilizado. Es fresco y acogedor. La pintura de la cocina y nevera no será como pretendías pero tampoco queda mal. Creo que resaltan de forma bonita. Me encanta en especial como ha dejado la mesa y el rincón donde la has colocado.
ReplyDeleteGracias isabel Los electrodomésticos aún tienen un hermoso ambiente vintage, aunque no son lo que esperaba de la cocina. Es posible que tenga otro intento, ¡y tal vez a alguien en eBay le encantarán los electrodomésticos de color sorbete! Me alegra que te guste la mesa y las sillas!
DeleteWell, Jodi, you had quite and adventure. The stove and refrigerator are so cute and I can see the challenges that you faced, but you persevered. You are right. Things will go wrong and you just have to make the best of it. Truly, no on will know unless you point your errors. Most will think that you just designed things that way. I've run into kits that have really crummy instructions, but a logical thinker can usually get them put together. I'll have my wallpaper disaster in my next post, so you are not alone.
ReplyDeleteOh no Ann! As a "wallpaper disaster" veteran myself, I already feel for you!
DeleteYes we will make the best of the appliances, and maybe even have another try at them. I am not one to give up after just one try, so maybe there is hope for a better result! I'm looking forward to hearing about your troubles and hopefully, your victorious ending!
Oh Jodi, I feel your pain! There is nothing as irritating, frustrating and downright annoying than when something completely out of your control ruins an otherwise well planned and prepared plan.
ReplyDeleteSeeing past that, the pieces are divine - the colour absolutely perfect for the pretty kitchen and I just love the tiled back on the stove. Good move leaving the brackets grey rather than the painting them.
All the other furniture is so pretty and the decoupage wonderful. Thanks for the link to Kisspng. I am pretty sure that will come in handy.
Anna x
Thank you Anna for your support and encouraging comments! The color online was more pinky cocktail than peach, so that was one strike. Not bad on it's own, but not where I hoped to be in this kitchen. The paint literally came out of the nozzle lumpy, so that was strike two. I have learned now to stick to the paint brand that is tried and true, and luckily, they are coming out with more color choices all the time.
DeleteI'm so happy you like the other elements, though the center table need more shabby pastel to compliment, I think. The great thing is that I am not on a deadline, so I can change my mind and redo as often as I need to to get it right!
Has creado unos muebles y electrodomésticos para tu cocina de ensueño,me encantan los colores,los motivos,los pequeños encajes añadidos,se ve tan linda esa cocina!!!
ReplyDeleteBesos.
Gracias pilar Quería hacer algo tan femenino y bonito, y es casi donde quiero que esté. ¡Más trabajo en electrodomésticos y la mesa central, y creo que me voy a deleitar con el resultado!
DeleteI have have the exact same stove in one of my projects but I bought it ready painted and with an opening door!!! https://chocolateriemaya.blogspot.com/search?updated-max=2013-10-11T16:06:00%2B01:00&max-results=7&start=14&by-date=false
ReplyDeleteJust perfection BECAUSE I knew they were pigs to do. On another project I had a go at their other earlier cooker and really struggled
https://bentleysdressshop.blogspot.com/2011/
That said I used a satin finish acrylic (brush) which did give a great finish so you may want to consider that if you have another go. I suspect acrylic wouldn't stand up to lots of handling but in our sort of projects that doesn't happen so its sturdy enough.
If you do go to the links you will have to scroll down on both of them to get all the info.
I could definitely cry in frustration for you as I know just how that must feel.
Thank you Marilyn! I appreciate the commiseration!
DeleteYou are so lucky to have found an already assembled model! The doors on both the stove and the fridge open too, and the detail is delightful!
I don't necessarily mind a complicated kit, but it's nice to have a little more information and instructions that are current and accurate. If I do them again, I may just have to do an in depth tutorial to help my fellow man!
Your cooker came out wonderfully and I wish it had come up in a search before I began! That's always the trouble, though, isn't it? The info is out there but can we find it?
I'm so feeling with you… you've told us so detailed about your experiences with these special and not easy to work with metal kits which turned out awesome and then just one bottle of bad paint ruined it for you. But in my opinion it's not a total loss, it still looks good as a part of this kitchen scene and will easily do until you might happen to find something else. And if not... cover the fridge with magnets and the cooker with towels! ;O) It was so much fun to look at your assembled kits, admire your lace and decoupage effects and most of all to enjoy the pictures of your work in the rooms they are dedicated for. You've made the best out of that limited kitchen space - although I too would say that the table is a bit too dark for this small room. And I really like the picture of the table group - what a lovely place to enjoy a cup of tea… and hopefully also a cup of coffee in the unlikely case I should ever find a way to come along in the miniature version of myself! *LOL* Have more fun with your next steps!
ReplyDeleteHugs
Birgit
Thanks Birgit! Covering up the faux pas is a great solution and how many of us do this in our real life homes too!?! I will let them live for now, but am almost certainly resolved to giving them another try. New kits perhaps? We'll see.
DeleteI am so glad you like the rest of the pieces that are added. It's a great way to work out ideas for the bed, dresser, nightstand, chairs and coffee table. I am just going to have to accept that my great ideas might turn out to be bad ones, and doing things over is the name of the game! 🤣
Que cocina más bonita, me encanta !!!!!
ReplyDeleteLos tuneos geniales !!!
Gracias Eloisa! Estoy feliz de escuchar que te gusta! ¡Me encantan los colores sutiles y estoy emocionada de tenerlos en existencia con mini cosas maravillosas!
DeleteThe spray paint issue looks like the next coat was sprayed too early after the first coat. A lot of times on the can it will tell you to paint within 3 hours or after 48 hours. I tend to leave primed pieces longer than that since I've had my share of wrinkled paint. :[ You might have been able to remove the paint with oven cleaner, but I get how sometimes it's easier to just start over. However, I do think the finish works for your kitchen very well. It's got a great age to it now.
ReplyDeleteHi Brae! The primer had an eight hour cure but I left the pieces for 28 hours. The Krylon that I sprayed on the interior fridge parts came out beautifully. The true tell was that the foam/lumps were actually coming out of the can and could be seen on the nozzle. I sprayed it on an empty box as well, just to be sure it really was the paint. It was. :O(
DeleteI have stored the can inside my buffet cabinet (inside the house) since it came in the mail (in May), but it's impossible to tell what the poor thing went through before it arrived. It took a full two minutes of shaking to release the balls inside, then I continued to shake it for another hour or so, changing hands, warming between my thighs, shaking up, down and sideways. It just seemed as though the paint had solidified inside the can and there was no incorporating the solids. In addition to that, the color shown was not even close to the one on the can, monitor differences or not. I thought it may still be a nice accent to the kitchen and if it had come out smooth I'd have applied multiple coats of gloss varnish and lived with it. But it's just beyond what I can live with.
I'm not going to spend any more time trying to correct it. I'll just start over with a tried and true paint and go from there.
Thanks so much for the tips and for the encouragement! We've all experienced these disasters, and it's wonderful to commiserate with fellow victims!
Hello Jodi,
ReplyDeleteFirst off, I absolutely love that kitchen worktable. What an incredible piece and the finish is just beautiful. The stool is also fantastic and I love, love, love the table and chair set. What a way to dress up a table and make it look out of this world.
Now, I predict sanding in your future.;) In all honesty, the appliances are not that bad. The orange peel effect is unusual, but I think it has a certain fairytale charm that works with your house. that being said, knowing the great artist you are, you wanted enamel and I do not think you will settle for anything less then the perfect finish.
Thank you for the tips about the Phoenix kits.
Big hug
Giac
Thanks for the encouragement, Giac! You are the perfect person to understand doing something over and over again until it comes out the way you envision it! I am going to give it one more try, new kits, using different paint, and hope I can achieve a much better result!
DeleteGrrr paint. But it doesn't look bad and you should move on. I haven't been commenting much, but I'm following along and I'm so excited that you're working on the interior of your house now.
ReplyDeletePlease email me at megbear99@gmail.com so I can get your address to deliver the little mouse teapot. My husband is leaving for Germany next week, and he's going to post it from there so you can have it early in the new year.
Thanks Megan! I'm going to give it another try and see if I can get a better result with a tried and true paint. I put way too much work in to this cottage to let disappointing appliances stay. If it were just the texture, I could live with it. What really bothers me is the color. Here's what I thought I was getting (on the left) next to what I got (on the right):
Deletehttps://3.bp.blogspot.com/-ZX4_sRNLWms/XA_t6q2vtVI/AAAAAAAAI3g/UgFO3VB6ojIKyCloU1jpcioXY0IxEA7IwCLcBGAs/s640/paintcompare.png
I sent an email with my address and I am so excited to have have your mouse teapot come to live in my cottage! Thank you so much for your generosity, and I hope in spite of all your new responsibilities that you are finding time to explore that amazing creativity of yours!
Dear Jodi, what an appalling disappointment with that paint! It is clearly not a smooth paint.... I am not even experienced with spray paint and I've never seen such bad texture! :( I have no suggestions other than sanding (carefully) and re-painting and adding "rust" and "old chipped enamel" where visible. Boy, what a disappointment especially after so much work preparing all the kit pieces! I applaud you for the other kits you put together... you know all the sources for details that can be "printed"! The step stool and table reminded me of some children's furniture (RL size) that I painted ages ago with flowers and birds nests! Mine were free-hand painting, not decoupage.... but the whimsical arrangements and cheerful colors reminded me of them! I think the "green-tea" color is so appropriate and lovely ..... you are really making an amazing project here! I Love the whole idea and am eagerly waiting for every new piece... (no pressure here LOL!) I think it is a good idea to make up the kits first.... you are on a roll and I LOVE this project!!! :):)
ReplyDeleteHi Betsy, Thank you for the encouragement and in the grand scheme of life it is only paint after all. There are much, much more important things so I vow to stop whining and be more grateful!
DeleteI bet the furniture you painted was incredible and I love to imagine it! Oh how wonderful to be so talented and be able to create lovely scenery right from your mind to your hands!!!
I am so lucky to be able to have a dollhouse to dream of and work on, and incredibly more so to have you to share it with me!
Love the island and the kitchen layout! They really are cute appliances. A bummer about the paint though :( I wonder if there is some magic melting/blurring medium you could add on top? A matte triple thick? I wish. It's so hard to spend all that time only to have it go awry. That said they do work in the space with the theme!
ReplyDeleteThanks Kristine! I seriously thought about using Chris' method of using Pour On epoxy over the exterior pieces, but thought I might just ruin them beyond use so chickened out. I have had a really harsh reminder this week that maybe my priorities are a little askew, so a bad paint job on mini appliances can be dealt with later. If I get another opportunity to try, I'll try again! :O)
DeleteSo sorry your paint went bad. Paints can do that and in a spray can it's invisible until it's too late.
ReplyDeleteThe colour is lovely though so it is ok until you decide it's not anymore.
I love your kitchen, the colours, the feel of it!
Hugs,
Véronique
Thanks Veronique! I have learned not to trust other "fancy" brands of paint, and to definitely test them before I assume their quality and spray it onto my projects. A tough and expensive lesson, but sometimes lessons are. I will try again with new kits at some point and for now, work on other things for the cottage. Life responsibilities have pulled me completely away from minis for the past week, so it gives me time to formulate a new plan in the meantime. :O)
DeleteHello, Jodi - I must offer condolences on your mishaps; I suffered along with you. But I so admire your courage in even beginning to assemble those incredibly complex-looking kits! Your efforts, in spite of the paint disaster, paid off, because even the "bumpy" paint can't affect the beauty of the finished range and fridge. They look perfect in your kitchen setting! I love the shelves, the wonderful stool, the work table, and the beautiful "Tea Time" table and chairs. You've accomplished so much, as usual, in a short time. I, on the other hand, have done ZILCH on my soddy since my last post. And at this point, I'm not sure when my next "work" session will happen, but I'm getting very antsy to get back to it. As much as I love the Christmas season and all its joy and festivities, it can certainly use up much of my time! I'm looking forward to seeing your next post, and I'm hoping that your next endeavor will happen without a hitch!
ReplyDeleteMarjorie
Thank you, Marjorie! As it turns out, the appliance disaster was only the beginning of a cluster of things "going wrong" in all scales of life and having that as a comparison has helped me gain a little perspective! I am waiting for an idea to seem like a good one on the sherbet pieces, and also waiting for replacement kits to arrive so I can "try my luck" again!
DeleteI know what you mean about the holidays derailing our miniature goals - I have barely touched minis for two weeks and I am not even hosting the parties this year!!! I hope when all the leftovers are sent along, the wrapping paper recycled (or burned) and the spare furniture has been stowed away for the next holiday, you find a nice long stretch of creative, productive mini time to make up for the lack!
Have a Very Merry Christmas!
a charming charming scene with pretty soft colors! For painting, even if it does not match your expectations the result is interesting!
ReplyDeletehugs
Thanks Claude! It is a pretty color and the appliances themselves are really very nice and detailed, I think it's just that the apricot color was not in my mind for the color palette for the kitchen. But I will keep trying!
DeleteJodi, you're kitchen is like a breath of spring air here in the middle of winter! I just love how light and fresh your kitchen is. I'm sorry about the "disaster", but they look very pretty in the room and after some time you won't even notice it. You have such awesome ideas and everything is so pretty. It's so nice to visit your cottage after indulging in my very Victorian dark heaviness (don't get me wrong I love it! But sometimes a girl needs girly girl airy freshness!). Thank you so much for sharing and inspiring!
ReplyDeleteHugs,
Teresa
Thank you, Teresa! I am happy you like the lightness of the kitchen! And it is so wonderful that unlike our real life homes, in miniature, we can own several in which we can explore all the eras, styles and finishes our hearts desire?!? Your Victorian kitchen will be drool provoking I am sure!
Delete